Introduction
Seafood sandwiches have long been a staple in coastal communities, celebrated for their satisfying flavors and textures. Among these, the crispy fried cod sandwich stands out as a beloved favorite. Whether enjoyed on a sunny boardwalk or at a cozy family dinner table, this sandwich offers a delightful combination of crunchy texture and rich flavor that keeps people coming back for more.
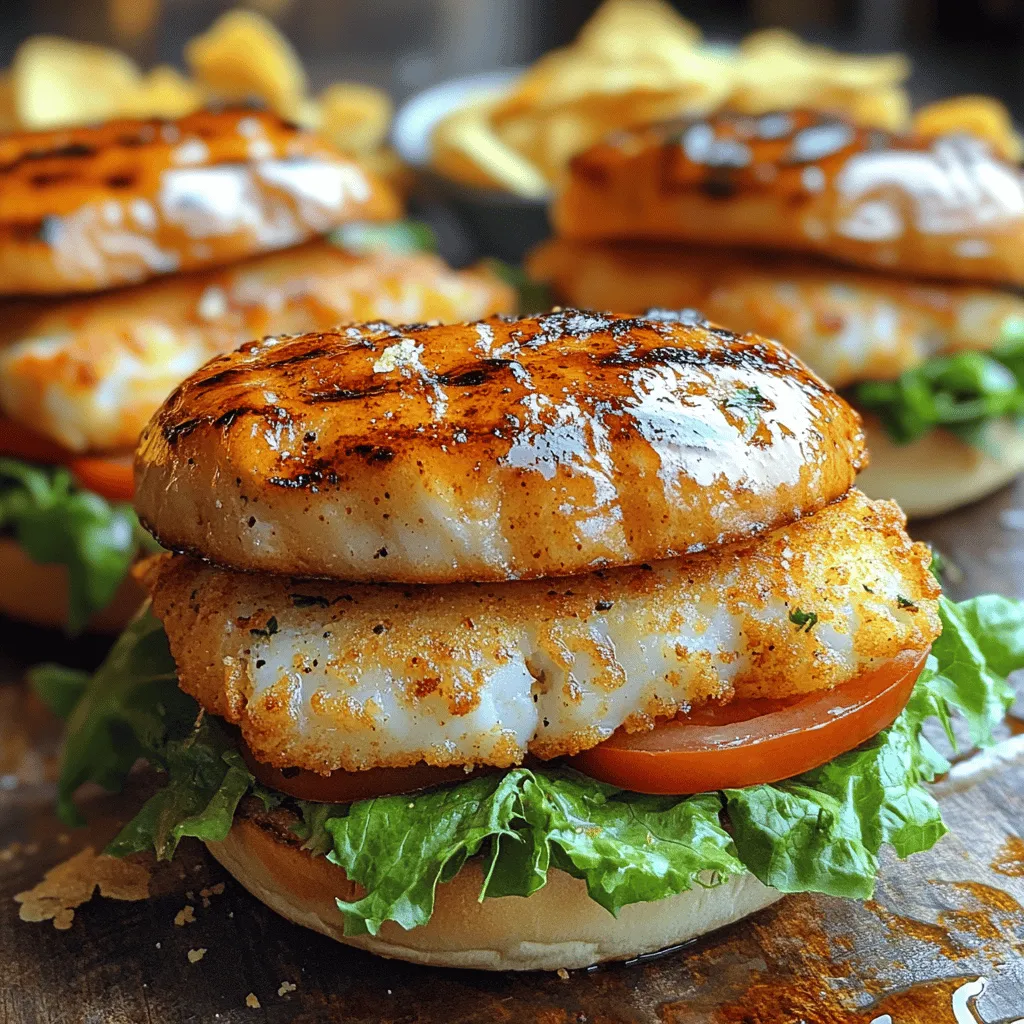
The appeal of the crispy fried cod sandwich lies not only in its comforting taste but also in the quality of its fresh ingredients. The golden, crispy coating enveloping tender cod fillets creates a mouthwatering experience, especially when paired with vibrant toppings like crisp lettuce, tangy pickles, and a dollop of zesty tartar sauce. As we delve into this recipe, we’ll explore step-by-step instructions, essential tips for achieving the perfect fry, and variations that can elevate your sandwich to new heights.
In this article, we will cover everything from the cultural significance of fish sandwiches to a detailed breakdown of ingredients and preparation methods. You will find guidance on how to prepare the cod fillets, the art of breading, and ultimately, how to assemble your delicious crispy fried cod sandwich.
The Allure of the Crispy Fried Cod Sandwich
Fish sandwiches have a rich cultural significance across the globe, from the classic New England fish fry to the famed fish tacos of Baja California. They represent not just a meal but a tradition that brings people together, often enjoyed during warm summer days or festive gatherings. The crispy fried cod sandwich, in particular, showcases the versatility of seafood, making it an appealing option for those who may not frequently indulge in fish.
Nutritionally, cod is an excellent choice for protein, low in calories and saturated fats, making it a healthier alternative to many meats. This white fish is also packed with essential nutrients such as omega-3 fatty acids, vitamin B12, and selenium, which play a crucial role in heart health, brain function, and immune support. When you choose to prepare your crispy fried cod sandwich at home, you gain control over the ingredients, ensuring a fresher and healthier option compared to fast food alternatives. Homemade versions allow you to customize the flavors and toppings to suit your preferences, making each sandwich uniquely yours.
Ingredients Breakdown
Creating the perfect crispy fried cod sandwich starts with understanding the role of each ingredient. Here’s a detailed breakdown of the essential components you’ll need:
– Cod Fillets: The foundation of your sandwich, fresh cod fillets are vital for achieving a deliciously tender and flaky texture. When selecting cod, opt for high-quality, fresh pieces. Look for fillets that are moist and have a clean, ocean-like scent. Freshness directly impacts the flavor, so if possible, purchase your cod from a reputable fishmonger.
– Buttermilk: This ingredient is crucial for marinating and tenderizing the fish. The acidity in buttermilk helps break down the proteins in the cod, resulting in a more succulent texture. It also adds a slight tanginess that enhances the overall flavor of the sandwich. Aim to marinate the fish for at least 30 minutes, but letting it sit longer—up to a few hours—can yield even better results.
– Breading Components: The breading is what gives the cod its signature crunch. A combination of all-purpose flour and cornmeal is ideal for achieving that perfect crunchy coating. The flour provides a sturdy base, while the cornmeal adds texture and a subtle sweetness. Seasoning the breading mixture with spices such as paprika, garlic powder, and cayenne pepper will elevate the flavor profile and create an irresistible crust.
– Optional Ingredients: While the basic recipe is delightful as is, consider additional toppings or flavor variations to make your sandwich truly special. Fresh herbs, like dill or parsley, can brighten the dish. You might also experiment with different spices in the breading or add toppings such as coleslaw, sliced avocado, or a spicy aioli for an extra kick.
Preparing the Cod Fillets
Now that we’ve covered the essential ingredients, let’s dive into the preparation process for the cod fillets. Preparing your fish properly is key to ensuring the best flavor and texture in your final sandwich.
Step 1: Rinse and Dry
Start by rinsing the cod fillets under cold water. This step helps remove any surface impurities and ensures a clean taste. After rinsing, gently pat the fillets dry with paper towels. Removing excess moisture is critical because it will help the breading adhere better, resulting in a beautifully crispy coating when fried.
Step 2: Seasoning
Once your fillets are clean and dry, it’s time to season them. Generously sprinkle salt and pepper on both sides of the cod. If you want to amp up the flavor, you can add a pinch of your favorite spices at this stage, such as garlic powder or smoked paprika. Allow the seasoning to sit for about 10-15 minutes. This brief rest allows the flavors to penetrate the fish, enhancing its taste.
Step 3: Marinating in Buttermilk
Next, place the seasoned cod fillets in a shallow dish and cover them with buttermilk. Ensure the fillets are fully submerged, as this will help tenderize and flavor the fish. Cover the dish with plastic wrap and refrigerate. As mentioned earlier, marinating for at least 30 minutes is recommended, but for even better results, aim for 1-2 hours if time permits. This step is crucial for achieving moist, flavorful fish that will shine in your sandwich.
The Art of Breading
The breading process is where the magic happens, transforming your marinated cod into a crispy delight. Here’s how to master the art of breading:
Step 1: Prepare the Breading Mixture
In a large mixing bowl, combine equal parts of all-purpose flour and cornmeal. A good starting point is one cup of flour and one cup of cornmeal, but adjust the quantities based on how many fillets you are preparing. To this mixture, add your chosen spices—typically, a teaspoon of paprika, a teaspoon of garlic powder, and a pinch of cayenne pepper for heat work well. Mix thoroughly to ensure even distribution of the seasonings.
Step 2: Dredging the Cod
Once your cod fillets have finished marinating, it’s time to bread them. Remove each fillet from the buttermilk, allowing any excess to drip off. Then, dredge the fillet in the breading mixture, pressing gently to ensure an even coating. Make sure to cover all sides of the fish, as this will create a lovely, crunchy crust during frying. After breading, place the coated fillets on a wire rack or a plate to set. Allowing the breading to rest for a few minutes will help it adhere better during frying.
Step 3: Frying
While this part of the process is not covered in this section, it’s worth mentioning that the frying technique is vital for achieving that perfect crispy texture. Use a heavy-bottomed skillet or deep fryer and heat oil to the right temperature for frying (around 350°F or 175°C). Frying in batches ensures the oil temperature remains consistent and prevents overcrowding, which can lead to soggy breading.
In the next part of this article, we will delve into the frying process and how to assemble your crispy fried cod sandwich, bringing all these elements together for a delightful culinary experience.
As you prepare to embark on this delicious journey, rest assured that with attention to detail and a touch of passion, your crispy fried cod sandwich will become a favorite in your household, celebrated for its flavor and crunch. Stay tuned as we explore the finishing touches that will elevate your homemade sandwich to the next level.
Insights into the Spices Used
The flavor profile of your crispy fried cod sandwich largely hinges on the spices you select. A typical blend might include paprika, garlic powder, onion powder, cayenne pepper, salt, and black pepper. Each of these spices contributes uniquely to the overall taste. Paprika adds a sweet smokiness, while garlic and onion powders deliver depth. Cayenne pepper brings a gentle heat that can be adjusted according to your personal preference; feel free to reduce the amount if you’re looking for a milder flavor or add more for a spicy kick.
Consider incorporating other spices such as dill, which pairs wonderfully with fish, or even a touch of lemon zest to brighten the flavor. Experimenting with these spices allows you to customize the sandwich to fit your taste preferences perfectly. For a more adventurous take, try a dash of curry powder or a sprinkle of Old Bay seasoning for an East Coast twist.
Visual Description of the Breading Process
Breading your cod fillets is a crucial step in achieving that coveted crispy exterior. To start, you’ll need three separate shallow bowls: one for the flour, one for the egg wash, and one for the breadcrumb mixture. The visual appeal of this process is as satisfying as the end result.
1. Flour Coating: Begin by dredging each cod fillet in the flour, ensuring it’s completely covered. The flour helps absorb moisture, allowing the egg wash to adhere better and creating a solid base for the breadcrumbs.
2. Egg Wash: Next, dip the floured fillets into the egg wash. This mixture of beaten eggs and a splash of milk or water will create a sticky layer that helps the breadcrumbs cling to the fish.
3. Breadcrumb Mixture: Finally, roll the fillets in the seasoned breadcrumbs. Use a gentle pressing motion to ensure an even coating; you want to see a thick, even layer of breadcrumbs covering the fish. Visually, each piece should appear fully encased, with no bare spots.
Techniques to Ensure an Even Coating on the Cod Fillets
Achieving an even coating on your cod fillets is essential for both texture and flavor. Here are a few techniques to keep in mind:
– Use the Three-Bowl Method: As mentioned, separating the flour, egg wash, and breadcrumbs into individual bowls allows for controlled application.
– Patience is Key: Allow each layer to set briefly before moving on to the next. A minute or two between steps can help the coating adhere better.
– Double Dipping: If you desire an extra-thick crust, consider double dipping. After the first round of breadcrumbs, return the fillet to the egg wash and then back into the breadcrumbs.
– Tap Off Excess: After coating, gently shake off any excess flour and breadcrumbs. This prevents clumping and ensures a uniform texture when fried.
Frying to Perfection
Frying fish can be intimidating but following some best practices will yield delicious results.
Temperature Control
Maintaining the oil temperature at around 350°F (175°C) is crucial. Too low, and the cod will absorb more oil, becoming greasy; too high, and the outside will burn before the inside is cooked. A candy or frying thermometer is an excellent tool to keep the oil at the right temperature. If you don’t have one, you can test the oil by dropping in a small piece of bread; if it sizzles and browns in about 60 seconds, you’re ready to fry.
Techniques for Frying in Batches
To ensure the cod fillets fry evenly, do not overcrowd the pan. Frying in batches allows for better temperature control and prevents the oil temperature from dropping too low. Aim to fry two to three fillets at a time, depending on the size of your skillet. This method not only ensures crispy fish but also preserves the integrity of each piece.
Visual Cues for Determining Doneness
The cod is perfectly fried when it reaches a golden brown hue and the flesh is opaque and flaky. Generally, cooking time will be about 4 to 5 minutes per side, depending on the thickness of the fillets. You can use a fork to gently flake the fish at the thickest part; if it flakes easily, it’s done.
Safety Tips for Frying at Home
Frying can be hazardous, so take necessary precautions. Always use a deep, heavy-bottomed pan to reduce the risk of splattering. Keep a splatter guard handy, and never leave hot oil unattended. Have a lid nearby to smother any potential flames, and ensure your workspace is clean and free of clutter.
Assembling the Perfect Sandwich
Once your cod is fried to perfection, it’s time to assemble the sandwich.
Toasting the Buns
Start by toasting your buns. This step enhances the sandwich experience by providing a crispy texture that holds up against the moisture of the fish and sauce. You can toast them in a dry skillet over medium heat for about 2 minutes on each side or place them under the broiler in your oven for a quick toast.
Importance of Tartare Sauce
Tartare sauce is the classic condiment for a fried fish sandwich. You can opt for store-bought versions for convenience; however, making your own can elevate the dish significantly. Combine mayonnaise with finely chopped pickles, capers, lemon juice, and a sprinkle of dill for a simple homemade tartare sauce that complements the fish beautifully.
Suggestions for Alternate Toppings or Additions
While the classic toppings are always a hit, you can customize your sandwich to suit your taste. Consider adding crisp lettuce, fresh tomato slices, or even a slice of avocado for creaminess. Pickles add a nice crunch and tang that contrast beautifully with the fried fish. For a kick, try adding sliced jalapeños or hot sauce.
Serving Suggestions
When it comes to serving your crispy fried cod sandwich, presentation matters!
Ideas for Side Dishes
Classic accompaniments include crispy potato chips or golden French fries. If you’re looking for a healthier option, a side salad with a light vinaigrette or creamy coleslaw pairs wonderfully with the richness of the sandwich.
Presentation Tips
To serve the sandwiches beautifully, arrange each sandwich on a plate with a side of your chosen accompaniment. Use parchment paper or a colorful plate to add visual interest. Garnish with a lemon wedge on the side for an added pop of color and a touch of acidity that complements the fish.
Conclusion
Making a crispy fried cod sandwich at home is not just about enjoying a meal; it’s about the entire experience from cooking to sharing with loved ones. The joy of getting that perfect crunch, combined with your choice of spices and toppings, creates a delightful dish that can easily become a household favorite.
As you experiment with this recipe, don’t hesitate to make it your own by adjusting flavors, trying new toppings, or even switching up the protein. Cooking at home allows you to explore your culinary creativity while enjoying the rewards of delicious food. So gather your ingredients, roll up your sleeves, and enjoy the process of making and sharing your very own crispy fried cod sandwich!