Introduction
Chicken tenders have long been a staple in homes and restaurants alike, cherished for their tender meat and versatility. These delightful strips of chicken are perfect for a quick weeknight dinner, a satisfying snack, or a crowd-pleasing appetizer for parties. Their universal appeal can be attributed to their golden-brown, crispy exterior and juicy interior, making them a favorite among both kids and adults. However, if you’re looking to elevate this classic dish, you need to try crispy dill pickle chicken tenders—a unique twist that combines the comfort of traditional chicken tenders with the zesty flavor of dill pickles.
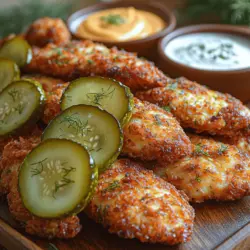
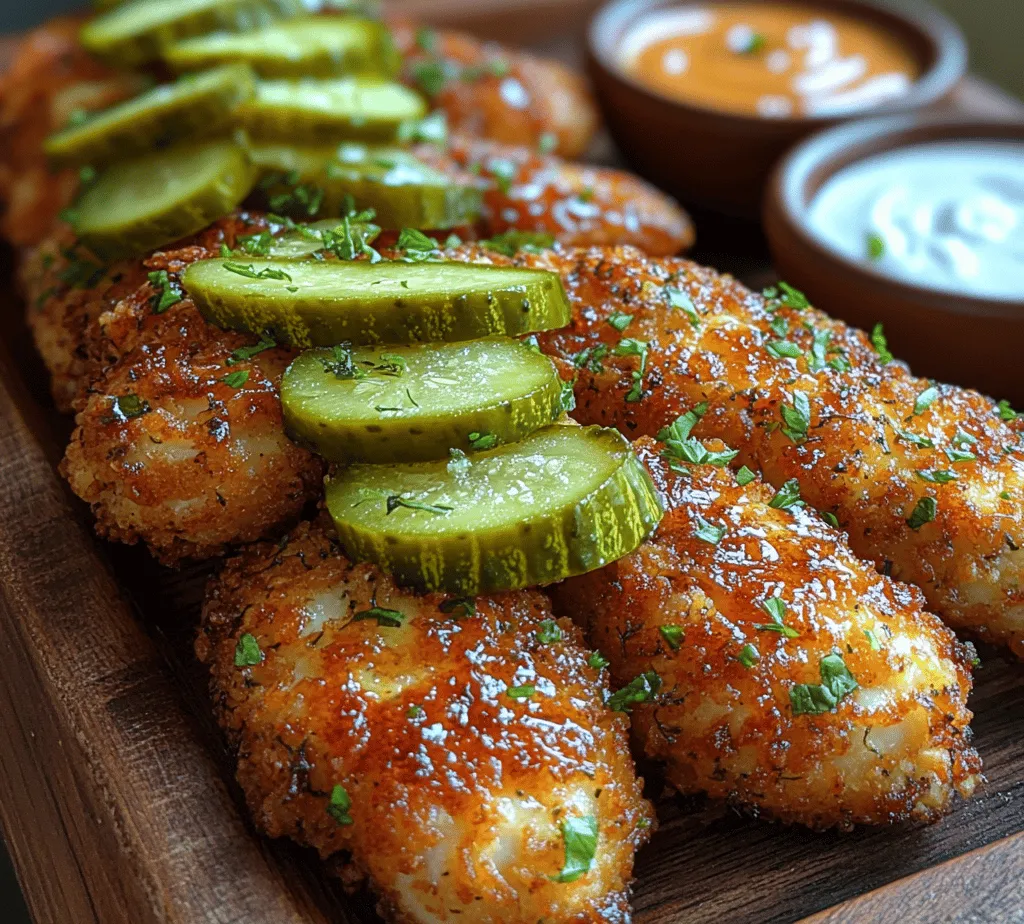
What sets dill pickle chicken tenders apart is their distinctive flavor profile. The tangy, briny notes from dill pickle juice infuse the chicken with a burst of flavor that transforms a simple dish into something extraordinary. Imagine biting into a perfectly crispy chicken tender that delivers not only crunch but also a refreshing kick of dill pickle goodness. It’s a delightful marriage of textures and tastes that makes this dish stand out.
This recipe is not only about flavor; it’s also incredibly simple to prepare, making it an ideal choice for busy weeknights or casual family gatherings. With minimal prep time and straightforward cooking steps, even novice cooks can whip up this crowd-pleaser without breaking a sweat. The combination of a crispy texture and tangy flavor ensures that these chicken tenders will quickly become a family favorite—perfect for serving with dipping sauces, alongside your favorite sides, or enjoyed all on their own.
In this article, we will guide you through the process of making crispy dill pickle chicken tenders from scratch. We will cover everything from understanding the ingredients to marinating the chicken and setting up your breading station. Let’s dive into this delicious recipe!
Understanding the Ingredients
To create the perfect crispy dill pickle chicken tenders, it’s essential to understand the role of each ingredient in this recipe. Each component contributes to the overall flavor, texture, and enjoyment of the dish.
Chicken Tenders
The star of this recipe is undoubtedly the chicken tenders themselves. Chicken tenders are cut from the chicken breast and are known for their tenderness and quick cooking time. This means that they cook evenly and quickly, making them ideal for busy cooks looking to prepare a meal in a hurry. Additionally, their smaller size means they are easy to handle and serve, making them a favorite for children and adults alike. Using chicken tenders ensures that every bite is juicy and flavorful, setting the stage for a satisfying dish.
Dill Pickle Juice
One of the key ingredients that make this recipe shine is dill pickle juice. Marinating the chicken tenders in dill pickle juice not only infuses them with a delicious tangy flavor but also helps to tenderize the meat. The acidity in the pickle juice breaks down the proteins in the chicken, resulting in a more succulent and juicy tender. Moreover, this marinating process allows the chicken to absorb the briny goodness, ensuring every bite is bursting with flavor. For the best results, aim to marinate the chicken for at least one hour, but if time allows, marinating overnight will enhance the flavor even further.
Seasonings
The seasonings in this recipe play a crucial role in building depth and complexity in flavor. A blend of garlic powder, onion powder, paprika, salt, and black pepper creates a well-rounded seasoning mix that complements the tanginess of the dill pickle juice.
– Garlic Powder: Adds a savory note that enhances the overall flavor profile.
– Onion Powder: Provides a subtle sweetness that balances the acidity of the pickle juice.
– Paprika: Introduces a mild smokiness and vibrant color to the chicken.
– Salt and Black Pepper: Essential for elevating all flavors, ensuring the chicken is well-seasoned.
Together, these seasonings create a deliciously seasoned chicken tender that packs a punch with every bite.
Cornflakes vs. Panko Breadcrumbs
When it comes to achieving that desired crunch, you have two excellent options: cornflakes or Panko breadcrumbs. Both provide a crispy coating, but they offer slightly different textures.
– Cornflakes: Crushed cornflakes give a thicker, crunchier coating that remains crisp even after frying. They are perfect for achieving that satisfying crunch that everyone loves. The sweetness of the cornflakes also adds a unique flavor dimension to the chicken tenders.
– Panko Breadcrumbs: These Japanese-style breadcrumbs are lighter and flakier than traditional breadcrumbs. Panko gives a lighter coating, allowing for a more delicate crunch. If you prefer a less robust crunch, Panko is a great choice.
Ultimately, the decision between cornflakes and Panko breadcrumbs comes down to personal preference. Both options will yield delicious results, so feel free to experiment and discover which texture you enjoy more!
Marinating the Chicken Tenders
Marinating the chicken tenders in dill pickle juice is a crucial step that significantly impacts the final flavor and tenderness of the dish. The pickle juice not only enhances the taste but also ensures that the chicken remains moist during cooking.
Importance of Marinating
The process of marinating chicken in dill pickle juice is essential for two primary reasons. First, the acidity in the pickle juice helps to break down the proteins in the chicken, resulting in a tender and juicy bite. Second, it infuses the chicken with the tangy flavor of dill pickles, making every bite burst with delightful taste.
Recommended Marination Time
For optimal flavor absorption, it is recommended to marinate the chicken tenders for a minimum of one hour. However, if you have the time, marinating them overnight will yield even better results. This extended time allows the flavors to penetrate deeper into the meat, resulting in a more flavorful dish.
Step-by-Step Guide to Marinating Chicken Tenders
1. Prepare the Marinade: In a bowl, combine enough dill pickle juice to fully submerge the chicken tenders. You can use store-bought pickle juice or make your own by mixing vinegar, water, salt, and dill.
2. Add Chicken Tenders: Place the chicken tenders in the bowl with the pickle juice. Ensure all pieces are fully submerged. If necessary, place a plate on top to keep the tenders submerged.
3. Cover and Refrigerate: Cover the bowl with plastic wrap or a lid and place it in the refrigerator. Allow the chicken to marinate for at least one hour, or up to overnight for the best flavor.
4. Remove and Drain: Once marinated, remove the chicken tenders from the pickle juice and allow them to drain briefly. Pat them dry with paper towels to remove excess liquid, which will help the breading adhere better.
By following this marinating process, you’ll ensure that your crispy dill pickle chicken tenders are not only flavorful but also juicy and tender, making for an unforgettable dish.
Setting Up Your Breading Station
Once your chicken tenders are marinated and ready to go, it’s time to set up your breading station. A well-organized breading station is key to achieving a perfectly coated and crispy chicken tender.
Detailed Explanation of Breading Station Setup
To create an efficient breading station, you will need three shallow bowls:
1. Flour Bowl: In the first bowl, add all-purpose flour mixed with a pinch of salt and pepper. This initial coating helps the egg adhere to the chicken, creating a solid base for the breading.
2. Egg Wash Bowl: In the second bowl, whisk together a couple of eggs with a splash of water or milk. This egg wash will help the breadcrumbs or crushed cornflakes stick to the chicken tenders, ensuring a flavorful and crunchy coating.
3. Breading Bowl: In the third bowl, add your choice of crushed cornflakes or Panko breadcrumbs. You may also want to mix in some additional seasonings to enhance the flavor further.
Importance of Proper Sequence in Breading
The order in which you bread the chicken tenders is crucial for achieving an even coating. Follow these steps:
1. Coat in Flour: Take a marinated chicken tender and first dredge it in the flour mixture, ensuring it is evenly coated. Shake off any excess flour.
2. Dip in Egg Wash: Next, dip the floured chicken tender into the egg wash, allowing any excess to drip off.
3. Coat with Cornflakes or Panko: Finally, press the chicken tender into the bowl of crushed cornflakes or Panko breadcrumbs, ensuring it is well coated. For extra crunch, you can gently press down on the coating to help it adhere better.
Tips for Ensuring Even Coating
– Do Not Overcrowd: Bread the chicken tenders in small batches to ensure even coating without creating a mess. Overcrowding can lead to uneven breading.
– Patience is Key: Allow the breaded chicken to sit for a few minutes before frying. This resting time helps the coating adhere better during cooking.
– Use One Hand for Wet and One for Dry: To keep your hands clean and avoid clumps, designate one hand for handling the wet ingredients (egg wash) and the other for the dry ingredients (flour and breadcrumbs).
With your breading station set up and your chicken tenders ready to go, you’ll be well on your way to creating a delicious, crispy, and flavorful dish that is sure to impress family and friends alike. Stay tuned for the next part of this article, where we’ll cover the cooking process and some expert tips for achieving the perfect crispy dill pickle chicken tenders!
Frying the Chicken Tenders
Frying chicken tenders to perfection requires careful attention to detail, particularly when it comes to oil temperature and cooking time. To achieve that signature crispy exterior while ensuring the chicken remains juicy inside, follow these best practices.
Importance of Oil Temperature
The temperature of the oil is crucial for frying chicken tenders. If the oil is too cold, the tenders will absorb excess oil, resulting in a greasy texture. Conversely, if the oil is too hot, the outside may burn before the inside cooks through. Ideally, you want the oil to be around 350°F (175°C). To test if your oil is ready, drop a small piece of bread into the oil. If it sizzles and browns in about 60 seconds, the oil is at the right temperature.
Step-by-Step Instructions for Frying Chicken Tenders
1. Prepare Your Frying Station: Set up a frying station with a large, heavy-bottomed skillet or deep fryer. Fill it with enough oil to submerge the chicken tenders halfway. This allows for even cooking and minimizes splattering.
2. Heat the Oil: Turn the heat to medium-high and allow the oil to reach the desired temperature. Use a thermometer for accuracy if you have one.
3. Fry the Tenders: Gently place the breaded chicken tenders into the hot oil, being careful not to overcrowd the pan. Fry them in batches if necessary to maintain the oil temperature.
4. Cook Until Golden Brown: Fry each side for about 4-6 minutes or until golden brown. Use tongs to carefully flip the tenders halfway through cooking for even browning.
5. Drain Excess Oil: Once cooked, remove the tenders from the oil and place them on a plate lined with paper towels to absorb any excess oil. This step is crucial to maintain that crispy texture.
Safety Tips for Frying at Home
Frying can be hazardous if not done correctly. Keep the following safety tips in mind:
– Stay Attentive: Never leave the frying oil unattended. Hot oil can ignite if it reaches its smoke point.
– Use a Splatter Guard: If you have one, use a splatter guard to contain any oil that may pop up during frying.
– Avoid Water Contact: Ensure your chicken tenders are dry before placing them in the oil to prevent dangerous oil splatters.
– Keep a Lid Nearby: In case of an oil fire, keep a lid handy to smother the flames. Never use water on an oil fire.
Serving Suggestions
Now that your crispy dill pickle chicken tenders are ready, it’s time to think about how to serve them for maximum enjoyment. These tenders can be the star of the meal, complemented by a variety of delicious sides and sauces.
Recommended Dipping Sauces
The tangy flavor of dill pickle chicken pairs wonderfully with a variety of dipping sauces. Here are some popular options:
– Ranch Dressing: A classic choice that adds creaminess and a hint of herbs.
– Honey Mustard: The sweetness of honey combined with the tang of mustard perfectly balances the flavors.
– Spicy Mayo: For those who enjoy a kick, mix mayonnaise with sriracha or your favorite hot sauce.
– Barbecue Sauce: A smoky, sweet barbecue sauce can enhance the flavor of the chicken tenders.
Pairing Options with Sides
To create a well-rounded meal, consider these side options:
– Coleslaw: The crunchiness and acidity of coleslaw complement the richness of the chicken.
– French Fries: A classic pairing, crispy fries are always a hit. For a twist, try sweet potato fries.
– Fresh Salad: A light green salad with a vinaigrette can provide a refreshing contrast to the crispy tenders.
Presentation Tips
Make your dish visually appealing by arranging the chicken tenders on a large platter. Garnish with fresh dill or parsley for a pop of color. Serve the dipping sauces in small bowls alongside the tenders for an inviting display.
Storage and Reheating
If you happen to have leftovers (which is rare with such a delicious dish), proper storage and reheating are essential to keep the chicken tenders crispy and flavorful.
How to Store Leftover Chicken Tenders
1. Cool Down: Allow the chicken tenders to cool completely before storing them. This prevents condensation that can lead to sogginess.
2. Airtight Container: Place the cooled tenders in an airtight container. To maintain crispiness, you can layer them between paper towels, which will absorb excess moisture.
3. Refrigerate: Store in the refrigerator for up to 2-3 days. For longer storage, consider freezing them.
Best Methods for Reheating
1. Oven Reheating: Preheat your oven to 375°F (190°C). Place the chicken tenders on a baking sheet lined with parchment paper. Bake for about 10-15 minutes or until heated through and crispy.
2. Air Fryer Option: For a quick reheating method, place the tenders in an air fryer basket and heat at 375°F (190°C) for about 5-7 minutes. This method can help restore their original crispiness.
3. Avoid the Microwave: While it may be tempting to use a microwave for convenience, this method can lead to chewy, soggy chicken tenders. Stick to oven or air fryer methods for the best results.
Nutritional Information
Crispy dill pickle chicken tenders can be a satisfying addition to your meal plan, but it’s essential to be mindful of their nutritional content. Each serving provides a good source of protein, making them a filling option. However, they are also fried, which adds extra calories and fat.
Overview of Nutritional Aspects
– Calories: The calorie count will vary based on the breading and frying method, but a typical serving of chicken tenders can range from 300 to 400 calories.
– Protein: Chicken is a great source of lean protein, making these tenders a fulfilling option for any meal.
– Fat Content: The frying process adds extra fat, so consider using healthier oil options or baking for a lighter version.
Making the Recipe Healthier
To make this recipe healthier without sacrificing flavor, consider these adjustments:
– Baking Instead of Frying: For a lighter version, bake the chicken tenders. Simply coat them in the breading and bake on a lined baking sheet at 400°F (200°C) for about 20-25 minutes, flipping halfway through.
– Whole Wheat Bread Crumbs: Substitute regular bread crumbs with whole wheat or panko for added fiber.
– Serve with Healthier Sides: Pair the tenders with steamed vegetables or a quinoa salad to boost the nutritional value of your meal.
Conclusion
Crispy dill pickle chicken tenders bring together the crunchiness of fried chicken and the delightful tang of dill pickles, creating a dish that is sure to please both kids and adults alike. With their easy preparation and vibrant flavors, they are an excellent choice for family dinners, game day snacks, or even casual gatherings with friends.
Encouraging you to try this recipe, you will find it not only satisfies cravings but also provides a comforting and satisfying meal option that can be enjoyed any time of the year. The combination of crispy texture and zesty flavor makes these tenders a standout dish that you can easily prepare in your kitchen. Dive into this deliciousness and relish every bite of your homemade crispy dill pickle chicken tenders!