Introduction
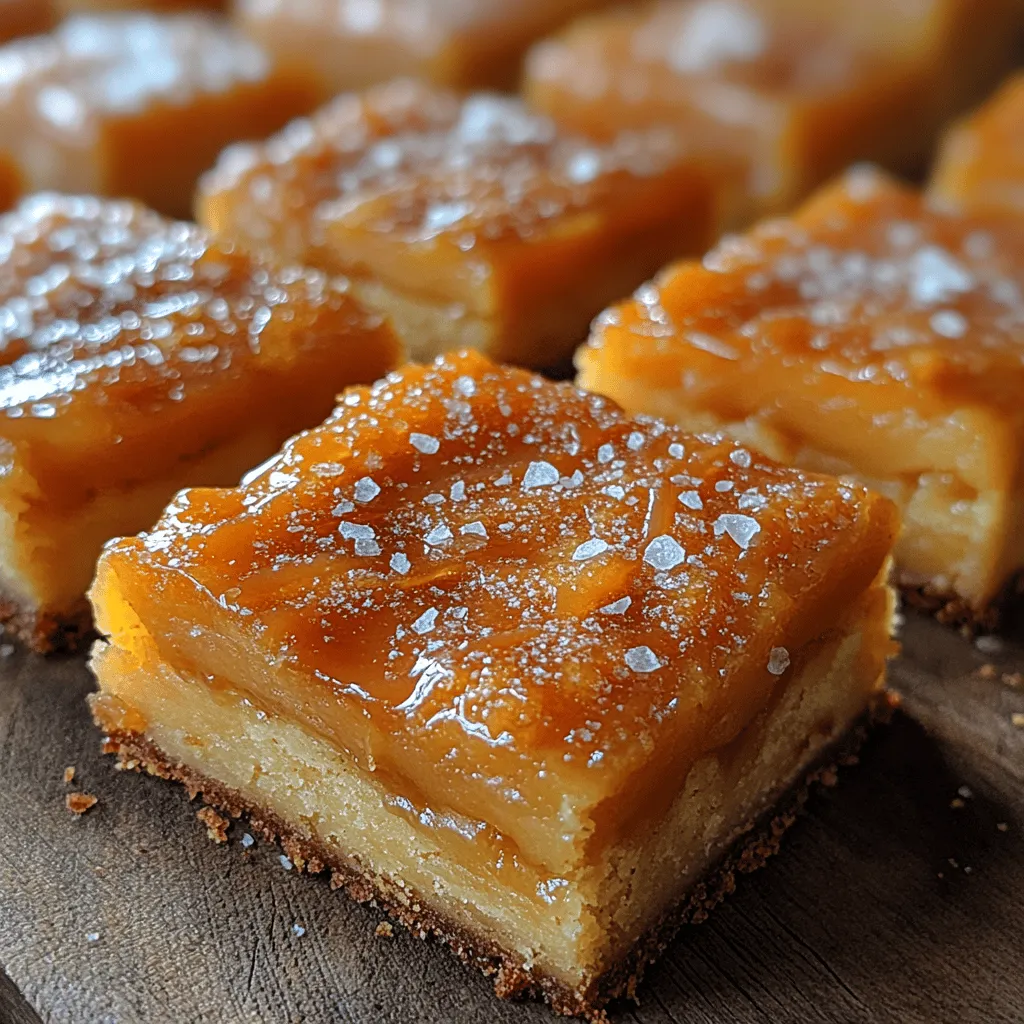
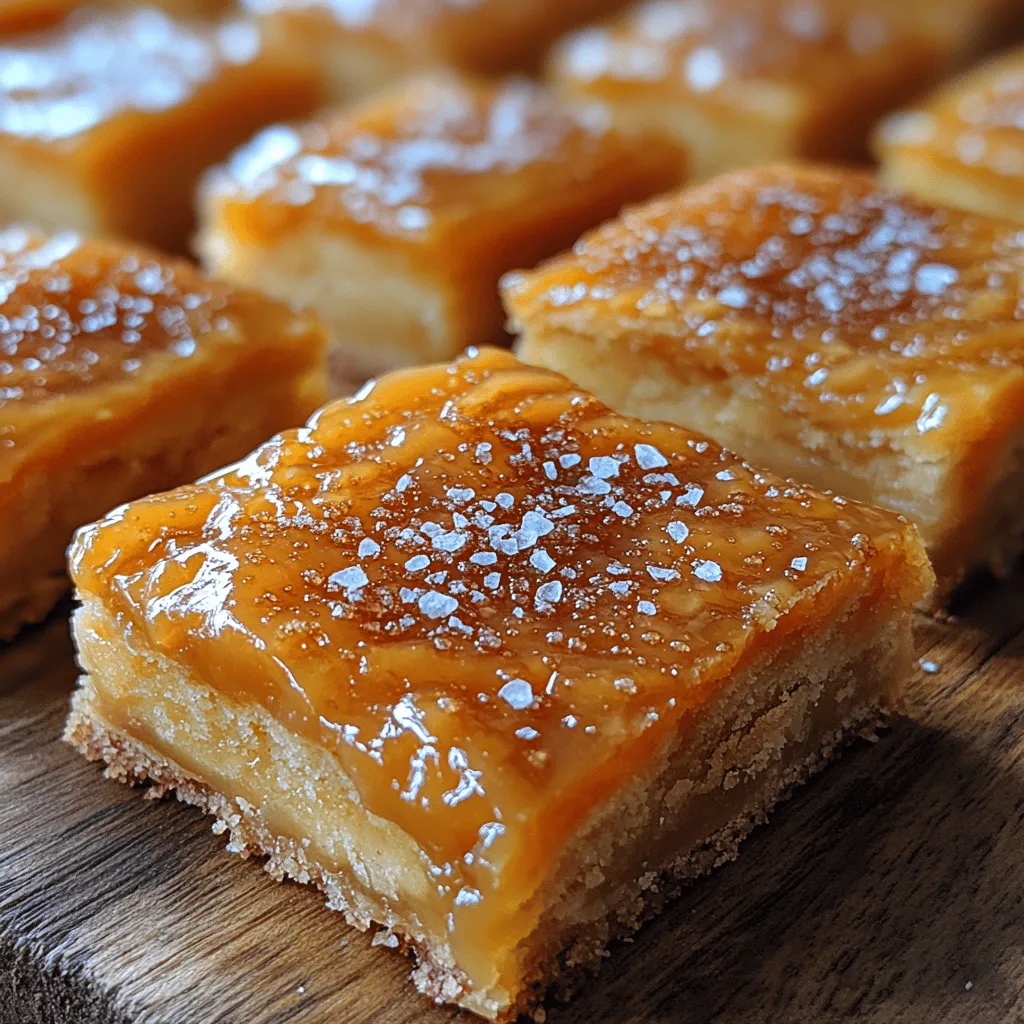
In recent years, salted caramel has emerged as one of the most beloved flavors in the dessert world. Its unique combination of sweetness and savory saltiness appeals to a wide range of palates, making it a favorite in everything from candies to cakes. Among the plethora of salted caramel desserts, Salted Caramel Butter Bars stand out as a particularly indulgent treat. These buttery, chewy bars are layered with rich salted caramel, creating a dessert that is both satisfying and utterly delicious.
Homemade treats like Salted Caramel Butter Bars are perfect for a variety of occasions—from birthday celebrations and holiday gatherings to quiet evenings at home when you simply want to indulge in something sweet. These bars not only impress with their flavor but also with their ease of preparation, making them an ideal choice for both novice bakers and seasoned chefs. The allure of homemade desserts lies not just in their taste but also in the love and effort that goes into making them, elevating any moment into a special occasion.
The Allure of Salted Caramel
The flavor profile of salted caramel is what sets it apart from conventional caramel. This delightful treat achieves a perfect balance between sweetness and saltiness, creating a complex taste experience that tantalizes the taste buds. When the rich, buttery sweetness of caramel is accentuated by a hint of sea salt, it transforms into something truly extraordinary. The salt enhances the sweetness, making it more pronounced while simultaneously adding depth and a savory counterpoint.
Salted caramel’s rise in modern desserts can be attributed to its versatility. It can be used in a myriad of applications, from drizzling over ice cream and filling cakes to serving as a dip for fruits and pretzels. This adaptability has made salted caramel a staple in gourmet dessert offerings and home kitchens alike. Whether used as a topping or incorporated into the recipe itself, its unique flavor elevates any dish, inviting dessert lovers to explore new culinary possibilities.
Ingredients Breakdown
To create these irresistible Salted Caramel Butter Bars, it’s essential to understand the role of each ingredient in the recipe. Here’s a detailed breakdown of the components that contribute to the rich, luxurious taste and texture of these bars:
1. Unsalted Butter: The foundation of the bars, unsalted butter provides richness and contributes to the soft, chewy texture. Using unsalted butter allows you to control the salt content in your recipe, ensuring that the salted caramel can shine without being overpowering.
2. Brown Sugar vs. Granulated Sugar: This recipe employs both brown sugar and granulated sugar, each playing a distinct role. Brown sugar adds moisture and a deep, molasses-like flavor, while granulated sugar helps achieve the desired sweetness and structure. The combination creates a well-rounded flavor profile that enhances the overall taste of the butter bars.
3. Eggs: Eggs act as a binding agent, helping to hold the ingredients together while also adding moisture. They contribute to the bars’ chewy texture and richness, making them more satisfying.
4. Vanilla Extract: A dash of vanilla extract enhances the flavor of the bars, adding a warm and aromatic note that complements the salted caramel beautifully. It elevates the overall taste experience, making each bite more enjoyable.
5. All-Purpose Flour, Baking Powder, and Salt: These ingredients form the structural backbone of the butter bars. All-purpose flour provides the necessary bulk and texture, while baking powder ensures a light, fluffy consistency. A pinch of salt brings out the flavors of the other ingredients, creating a well-balanced treat.
6. Salted Caramel Ingredients: The salted caramel itself is the star of the show. Made by caramelizing sugar until it reaches a deep amber color and then adding cream and salt, the chemistry of caramelization is crucial for developing that rich flavor. The resulting sauce is a perfect blend of sweet and salty, making it a delightful addition to the bars.
Preparing for Success: Tools and Equipment
Before diving into the recipe, it’s essential to gather the necessary tools and equipment to ensure a smooth baking process. Here’s a list of what you’ll need:
– Mixing Bowls: For combining and mixing ingredients. Having multiple sizes can be helpful for separating the butter, sugars, and dry ingredients.
– Electric Mixer or Whisk: An electric mixer makes it easy to cream the butter and sugars together, but a whisk can also do the job with a bit more elbow grease.
– Measuring Cups and Spoons: Accurate measurement of ingredients is crucial for baking success. Using proper measuring tools ensures that your ratios are correct.
– Parchment Paper and Baking Pan: Lining your baking pan with parchment paper not only prevents sticking but also makes it easier to remove the bars once they are baked.
– Medium Saucepan for Caramel Preparation: A heavy-bottomed saucepan is ideal for making caramel, as it distributes heat evenly and helps to prevent burning.
Step-by-Step Instructions for Salted Caramel Butter Bars
Preheat the Oven and Prepare the Baking Pan
To get started on your Salted Caramel Butter Bars, preheat your oven to 350°F (175°C). This ensures that your bars will bake evenly and achieve that perfect golden brown color. While the oven is heating up, prepare your baking pan by lining it with parchment paper. Allow some overhang on the sides, as this will make it easier to lift the bars out of the pan once they are baked. If you’re using a non-stick pan, lightly greasing it with butter or cooking spray can further ensure that the bars come out smoothly.
With the oven preheating and the baking pan prepared, you’re all set to begin the delightful process of making these irresistible salted caramel butter bars. In the next steps, you will combine the ingredients, create the salted caramel, and assemble the layers for baking. Each stage is designed to build upon the previous one, culminating in a decadent dessert that you—and everyone who tries it—will love.

Importance of Oven Temperature for Even Baking
When baking irresistible salted caramel butter bars, the temperature of your oven plays a crucial role in ensuring even baking. A preheated oven, typically set to 350°F (175°C), ensures that the batter cooks uniformly, preventing uneven textures that can result in a chewy or undercooked center. Using an oven thermometer can help you verify that your oven is at the correct temperature, as many ovens can be off by several degrees.
Greasing and Lining the Pan for Easy Removal
Before you start preparing the batter, it is important to prepare your baking pan properly. Greasing your pan with butter or cooking spray is essential to prevent the bars from sticking. However, for the easiest removal, line the bottom and sides of the pan with parchment paper, leaving an overhang on the sides. This will allow you to lift the bars out of the pan once they have cooled, making cutting and serving a breeze.
Preparing the Butter Bar Batter
Creaming Technique: Achieving the Right Texture
To prepare the butter bar batter, begin by creaming together the softened butter and sugar. This step is vital; it incorporates air into the mixture, resulting in a lighter texture. Beat the butter and sugar on medium speed until the mixture is light and fluffy, which usually takes about 3-5 minutes. This fluffy consistency is what contributes to the melt-in-your-mouth quality of the finished bars.
Importance of Adding Eggs One at a Time
Once the butter and sugar are creamed, it’s time to add the eggs. It is critical to add them one at a time, mixing well after each addition. This technique ensures that the eggs are fully incorporated into the batter, which helps maintain the structure and moisture of the bars. The emulsification of the eggs with the butter mixture adds richness and contributes to the final texture.
Baking the First Layer of Butter Bars
After preparing the batter, spread half of it evenly into the prepared pan. This layer will serve as the base for your salted caramel butter bars.
Timing and Visual Cues for Doneness
Bake the first layer for about 15-20 minutes, until the edges are lightly golden and a toothpick inserted into the center comes out clean. Keep a close eye on the bars as they bake; they can quickly go from perfectly baked to overdone. The visual cue of a lightly browned edge and a set center is an excellent indicator that this layer is done.
Making the Salted Caramel
Now, let’s move on to the star of the show: the salted caramel.
Detailed Steps for Caramelization: Tips to Avoid Burning
Begin by placing granulated sugar in a medium saucepan over medium heat. Stir continuously with a wooden spoon or heat-resistant spatula to promote even melting. As the sugar starts to melt, it will clump together before eventually dissolving into a liquid. Be patient during this process; constant stirring helps to prevent the sugar from burning. If you notice any dark spots, quickly remove the pan from heat to avoid a burnt taste.
The Science Behind Adding Butter and Cream to Melted Sugar
Once the sugar has completely melted and is a beautiful amber color, it’s time to add the butter. Remove the pan from heat and carefully whisk in the butter. The mixture will bubble vigorously, so be cautious to avoid steam burns. After the butter has melted and is fully incorporated, gradually pour in the heavy cream, continuing to whisk until the mixture is smooth. This combination of butter and cream enriches the caramel, making it creamy and decadent.
Importance of Sea Salt in Enhancing Flavor
Finally, stir in a generous pinch of sea salt. This is not just for decoration but enhances the flavor of the caramel, balancing the sweetness and adding depth to your salted caramel butter bars.
Assembling the Bars
With both the first layer baked and the caramel prepared, it’s time to assemble your bars.
Layering Technique: Spreading Caramel Evenly and Placing the Remaining Batter
Pour the warm salted caramel over the baked layer, spreading it evenly with a spatula. Ensure that the caramel reaches all corners of the pan for an even distribution of flavor. Once the caramel layer is smooth, take the remaining batter and dollop it over the caramel. Use a spatula to gently spread it to cover the caramel as evenly as possible, being careful not to disturb the caramel layer underneath.
Final Baking Process
Now, return the assembled bars to the oven for the final bake.
Monitoring the Baking Time: Achieving a Golden Top and Checking Doneness with a Toothpick
Bake the bars for another 25-30 minutes. As they bake, keep an eye on the top; it should turn a golden brown. To check for doneness, insert a toothpick into the center; it should come out clean or with a few moist crumbs attached. If the toothpick has wet batter on it, give the bars a few more minutes in the oven.
Cooling and Serving
After baking, remove the pan from the oven and allow the bars to cool in the pan for at least 15-20 minutes.
Importance of Cooling Time for Texture
Letting the bars cool completely before cutting is essential for achieving the perfect texture. If you cut them too soon, the caramel may ooze out, resulting in a messy presentation. Once cooled, use the parchment overhang to lift the bars out of the pan and place them on a cutting board. Cut into squares or rectangles as desired.
Suggestions for Garnishing with Flaky Sea Salt
For an extra touch of flavor and presentation, sprinkle a few flakes of sea salt over the top of the bars just before serving. This not only enhances the visual appeal but also amplifies the salted caramel flavor, making every bite irresistible.
The Perfect Pairing: Enjoying Your Salted Caramel Butter Bars
These salted caramel butter bars are delicious on their own, but pairing them with the right beverages can elevate your experience.
Suggestions for Beverages that Complement the Bars, Such as Coffee or Tea
For a cozy treat, enjoy your butter bars with a rich cup of coffee or a comforting mug of tea. The bitterness of coffee perfectly complements the sweetness of the caramel, while a creamy chai or a spiced tea adds warmth and depth to your dessert experience.
Ideas for Serving at Gatherings or as a Cozy Home Treat
These bars are perfect for sharing at gatherings or as a cozy treat at home. Consider serving them at parties, potlucks, or even as a delightful after-dinner dessert. They also make a thoughtful homemade gift for friends and family, beautifully packaged in a box or tied with a ribbon.
Conclusion
Creating your own salted caramel butter bars at home is not just about the end product; it’s about the joy of baking and the satisfaction that comes from mastering a delicious recipe. Each layer, from the buttery base to the silky salted caramel and the final topping, comes together to create a dessert that is truly irresistible.
Sharing these bars with loved ones will undoubtedly bring smiles and compliments, as they savor each rich, buttery bite. Don’t hesitate to experiment with variations, such as adding nuts or chocolate chips to the batter, or even swapping out the sea salt for flavored salts to create unique twists on this classic treat. Dive into the world of baking and let your creativity shine!

