Crunchy Honey Glazed Chicken Wings: A Culinary Delight
Indulging in a plate of crispy chicken wings coated in a sweet and savory honey glaze is a culinary experience that many cherish. These Crunchy Honey Glazed Chicken Wings are not only finger-licking good but also easy to prepare, making them a perfect dish for game days, parties, or family gatherings. Whether you’re hosting friends for a big match or simply looking to treat your family to a delicious meal, this recipe is sure to impress. In this article, we will delve into the ingredients, step-by-step preparation, and the delightful flavor profile of these wings. Whether you’re a seasoned cook or a beginner in the kitchen, this recipe will guide you through creating a dish that will leave everyone reaching for seconds.
Understanding the Ingredients
Exploring the Chicken Wings
Chicken wings have become a staple in many kitchens around the world due to their versatility and robust flavor. Originating from the United States, chicken wings have transcended borders, finding their way into various cuisines and cooking methods. From spicy buffalo wings to tangy Asian-style wings, their adaptability makes them a favorite for many. The wings themselves consist of three main parts: the drumette, the flat, and the tip. Each part offers a unique texture and flavor profile, but they all benefit from the same cooking techniques that ensure a crispy exterior and juicy interior.
One of the reasons chicken wings are so beloved is their ability to absorb flavors. Whether marinated, coated, or glazed, they serve as a perfect canvas for a variety of tastes—making them an ideal choice for this crunchy honey glaze. The combination of the crispy texture and the rich, complex flavors of the glaze creates an irresistible dish that can be enjoyed by all.
Highlighting the Coating Ingredients
The secret to achieving that perfect crunch lies in the coating ingredients. For our Crunchy Honey Glazed Chicken Wings, we will use a mixture of all-purpose flour and baking powder. The all-purpose flour provides the base for the coating, while the baking powder plays a crucial role in achieving a light and crispy texture. This combination helps to create a barrier that keeps the juices locked inside the wings as they cook.
In addition to the flour and baking powder, we will enhance the flavor with a blend of garlic powder, onion powder, smoked paprika, salt, and black pepper. Each of these ingredients contributes to the overall taste profile of the wings. Garlic and onion powders introduce aromatic notes, while smoked paprika adds a subtle smokiness that elevates the dish. Salt and black pepper are essential for seasoning, ensuring that every bite is bursting with flavor.
Delving into the Honey Glaze
The honey glaze is the star of this recipe, providing a perfect balance of sweetness and umami. Honey, with its rich, natural sweetness, pairs wonderfully with soy sauce, which brings depth and savoriness to the dish. The combination of these two ingredients creates a glaze that is not only sticky but also deeply flavorful.
To add a touch of acidity and brightness, we incorporate apple cider vinegar into the glaze. This ingredient not only enhances the flavor but also helps to cut through the sweetness, creating a well-rounded sauce that complements the crispy wings perfectly. For those who enjoy a bit of heat, an optional addition of Sriracha can be mixed into the glaze, providing a delightful kick that balances the sweetness of the honey.
Preparation Steps for Perfect Crunchy Wings
Preheating the Oven: Setting the Stage for Success
Before diving into the preparation of our Crunchy Honey Glazed Chicken Wings, it’s crucial to set the stage for optimal cooking. Preheating the oven to the right temperature is essential for achieving that coveted crispiness. A hot oven ensures that the wings cook evenly and develop a golden-brown exterior while remaining juicy on the inside. Additionally, preparing a baking sheet lined with parchment paper or a wire rack will help facilitate air circulation around the wings, contributing to their crunchiness.
Preparing the Chicken Wings: Ensuring Crispiness
The first step in preparing the wings is to rinse them thoroughly under cold water. This helps remove any residual blood or impurities. Once rinsed, it’s important to dry the wings completely using paper towels. This step is key to achieving a crispy exterior; moisture on the surface can lead to steaming rather than crisping during the cooking process. Patting the wings dry ensures that they will fry up beautifully in the oven.
Mixing the Dry Ingredients: Creating a Flavorful Coating
While the oven is preheating, it’s time to prepare the coating. In a large mixing bowl, combine the all-purpose flour, baking powder, garlic powder, onion powder, smoked paprika, salt, and black pepper. Whisk the ingredients together until well combined. This mixture serves as the flavorful coating that will adhere to the wings, ensuring a crunchy texture with every bite. The baking powder in this mixture will react with the heat of the oven, creating a light and airy crust that elevates the overall eating experience.
Now that we have the initial steps laid out, let’s move forward to the next part of this recipe, where we will dive into the coating process and the creation of the delightful honey glaze that will take these wings to the next level. Stay tuned for the continuation of our journey into the world of Crunchy Honey Glazed Chicken Wings.
Coating the Wings: Techniques for Even Coverage
Achieving the perfect crunch in your honey glazed chicken wings begins with a well-executed coating process. Proper application of the flour mixture ensures consistent crispiness and enhances the overall texture. Here’s how to get it right:
1. Dry the Wings: Before coating, it’s essential to pat the chicken wings dry with paper towels. This step removes excess moisture, allowing the flour to adhere better and resulting in a crunchier finish.
2. Prepare the Flour Mixture: In a large bowl, combine all-purpose flour with seasonings such as salt, pepper, garlic powder, and onion powder. For extra flavor, consider adding smoked paprika or cayenne pepper to the mixture. A well-seasoned flour mix is crucial for enhancing the wings’ taste.
3. Coat Evenly: Toss the wings in the flour mixture until they are fully coated. It’s helpful to do this in batches; add a few wings at a time to the flour mixture and shake off any excess. This technique prevents clumping and ensures that each wing has an even layer of flour.
4. Let Them Rest: After coating, allow the wings to rest for about 10-15 minutes on a wire rack. This resting period helps the flour adhere to the chicken, ensuring a more substantial crunch once cooked.
By following these steps, you’ll set the stage for deliciously crispy chicken wings that serve as the perfect base for your honey glaze.
Baking the Wings: Achieving the Perfect Texture
Baking is a preferred method for cooking chicken wings, as it allows for a healthier preparation while achieving a perfectly crispy exterior. Here’s how to bake them to perfection:
The Importance of Spacing Wings on the Baking Sheet
When arranging the wings on a baking sheet, spacing is key. Follow these guidelines to ensure even cooking:
– Use a Rimmed Baking Sheet: This will catch any drippings and prevent a mess in your oven.
– Line with Parchment Paper: This step makes for easier cleanup and helps prevent sticking.
– Leave Space Between Wings: Arrange the wings in a single layer, ensuring there’s space between each piece. This allows hot air to circulate, promoting even cooking and crispiness.
Tips on the Baking Process
To achieve optimal texture, follow these baking tips:
1. Preheat Your Oven: Make sure your oven is preheated to 425°F (220°C) before placing the wings inside. A hot oven is crucial for achieving that crispy exterior.
2. Flip for Uniform Crispness: Halfway through the baking process (about 20-25 minutes), carefully flip the wings using tongs. This ensures that both sides receive equal exposure to the heat, resulting in an evenly crispy texture.
3. Check for Doneness: Bake the wings for a total of 40-50 minutes, turning them at the halfway mark. They should reach an internal temperature of 165°F (75°C) and have a golden-brown color.
By following these baking techniques, your wings will be crispy on the outside while remaining juicy on the inside.
Crafting the Honey Glaze
The honey glaze is what elevates these chicken wings from ordinary to extraordinary. Here’s how to create a delicious glaze that enhances the flavors of your wings.
Combining Ingredients: Creating the Glaze
To prepare the honey glaze, follow these steps:
1. Gather Ingredients: You will need honey, soy sauce, minced garlic, apple cider vinegar, and a pinch of red pepper flakes for a kick. Optionally, you may add a splash of sesame oil for an extra depth of flavor.
2. Mix the Ingredients: In a small saucepan over medium heat, combine the honey, soy sauce, minced garlic, apple cider vinegar, and red pepper flakes. Stir well to combine.
3. Heat and Reduce: Bring the mixture to a gentle simmer, stirring frequently. Allow it to simmer for about 5-7 minutes until it thickens slightly. The ideal consistency is syrupy but not too thick, allowing for easy brushing on the wings.
4. Taste and Adjust: Before finishing, taste the glaze and adjust the flavors according to your preference. Add more honey for sweetness or more vinegar for tanginess.
Brushing the Glaze: Techniques for Best Results
To ensure every wing is generously coated in glaze, follow these brushing techniques:
1. Use a Pastry Brush: Dip a pastry brush into the glaze and liberally brush it over each wing. Make sure you cover all surfaces for maximum flavor.
2. Apply in Layers: For an extra sticky and flavorful coating, consider applying a couple of layers of glaze. Brush the wings with glaze about 10 minutes before they finish baking, then again right before serving.
3. Drizzle Leftover Glaze: If there’s any glaze left after coating, drizzle it over the wings when serving for an added burst of flavor.
Final Bake: Caramelizing the Glaze
The final baking step is crucial for achieving the perfect caramelized finish on your honey glazed chicken wings. Here’s how to do it:
1. Return to the Oven: After glazing, return the wings to the oven for an additional 10-15 minutes. This allows the glaze to caramelize and form a sticky coating that enhances both flavor and appearance.
2. Watch Closely: Keep an eye on the wings during this final bake. The sugars in the honey can burn quickly, so you want to ensure they turn a beautiful golden brown without becoming overly charred.
3. Remove and Cool: Once the wings are caramelized, remove them from the oven and let them cool slightly before serving. This cooling period allows the glaze to set, creating that coveted sticky texture.
Serving and Presentation
Now that your Crunchy Honey Glazed Chicken Wings are beautifully cooked and glazed, it’s time to present them in an irresistible way.
Plating the Wings: Making Them Irresistible
Presentation can enhance the dining experience, and with these wings, you want to make them as appealing as possible:
1. Use a Large Serving Platter: Arrange the wings neatly on a large platter. Overlapping them slightly can create an inviting look.
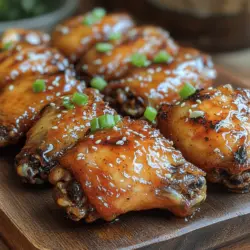
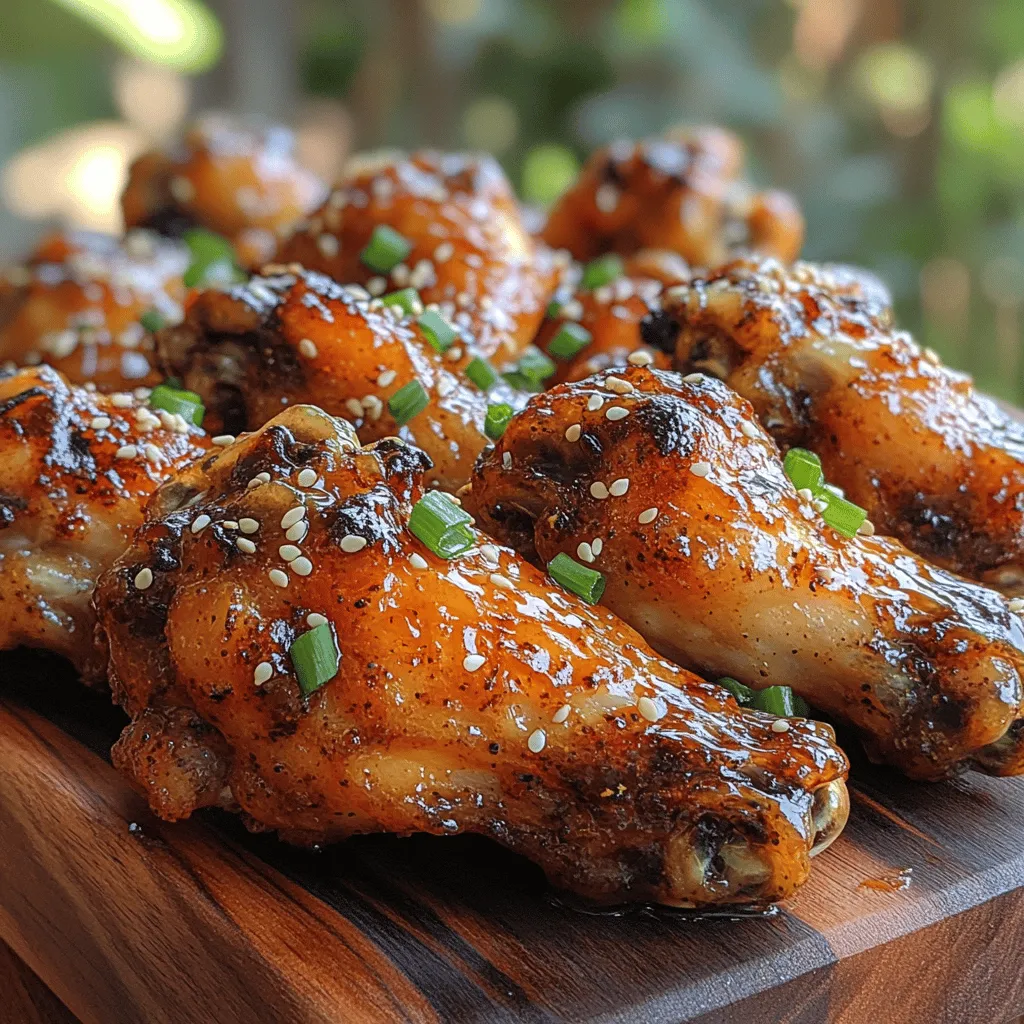
2. Garnish Thoughtfully: Consider garnishing with sesame seeds and chopped green onions. Not only do these additions enhance visual appeal, but they also add flavor and texture.
3. Serve with Dipping Sauces: Provide a selection of dipping sauces such as ranch, blue cheese, or a spicy sriracha mayo to complement the wings.
Best Pairings for Crunchy Honey Glazed Chicken Wings
To create a well-rounded meal, pair your wings with complementary sides and beverages:
– Side Dishes: Serve the wings alongside crispy coleslaw, baked potato wedges, or a fresh garden salad. These sides balance the richness of the wings and add freshness to the meal.
– Beverages: Pair your wings with a refreshing beverage, such as a cold beer, lemonade, or iced tea. These drinks will cleanse the palate and enhance your overall dining experience.
Conclusion: Enjoying Your Crunchy Honey Glazed Chicken Wings
In conclusion, these Crunchy Honey Glazed Chicken Wings are a delightful addition to any meal or gathering. With their perfectly crispy texture and a glaze that balances sweetness with a hint of spice, they are sure to become a favorite in your recipe repertoire. By following the steps outlined in this article, you can create a dish that not only satisfies your cravings but also impresses your family and friends. Enjoy the process of cooking and savor every delicious bite! Whether served as an appetizer, main dish, or party snack, these wings will surely be a hit. Happy cooking!