Introduction
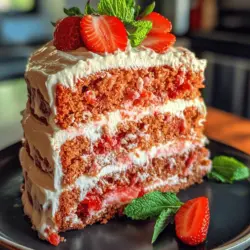
Layered cakes have become a staple in both bakeries and home kitchens, celebrated for their stunning appearance and delightful flavors. The appeal lies not only in their visual impact—stacks of fluffy cake layered with decadent frosting—but also in the myriad of flavor combinations that can be created. Among the various types of layered cakes, the strawberry layered cake stands out as a seasonal favorite, especially during the warmer months when fresh strawberries are at their peak. This cake is not just a treat for the taste buds; it’s a celebration of summer’s bounty.
When it comes to baking, the quality of ingredients plays a crucial role in the final outcome. This is particularly true for a strawberry layered cake, where fresh strawberries can elevate the flavor profile and contribute to the cake’s moistness. Using ripe, juicy strawberries ensures that each bite bursts with flavor, making it an irresistible dessert for gatherings and celebrations alike. Whether you’re celebrating a birthday, hosting a summer barbecue, or simply indulging in a sweet treat, this strawberry layered cake is sure to impress.
In this article, we will delve into the steps needed to create the best strawberry layered cake with cream cheese frosting, ensuring that your baking experience is as enjoyable as the result. From understanding the essential ingredients to preparing the perfect batter, we will guide you through the process of crafting this delightful dessert.
Understanding the Ingredients
To make the best strawberry layered cake, it’s essential to understand the role of each ingredient in the recipe. Let’s break down the key components that will come together to create this delicious cake.
All-Purpose Flour
All-purpose flour is the backbone of most cake recipes, including our strawberry layered cake. It provides the structure and stability needed for the cake layers to rise and hold their shape. The protein content in all-purpose flour helps create a delicate crumb while ensuring that the cake is neither too dense nor too light. For this recipe, you will want to measure your flour accurately—spooning it into the measuring cup and leveling it off to avoid compacting.
Baking Powder and Baking Soda: Leavening Agents
Baking powder and baking soda are crucial leavening agents that help the cake rise. Baking powder contains both an acid and a base, which react when mixed with wet ingredients, producing carbon dioxide bubbles that create lift. Baking soda, on the other hand, requires an acid (such as buttermilk) to activate. Together, these leavening agents contribute to the light and airy texture of the cake, ensuring that each layer is fluffy and tender.
Butter and Sugar
Butter and sugar are the dynamic duo that play a significant role in achieving a cake’s fluffiness and flavor. The creaming process—where softened butter is beaten together with sugar—introduces air into the mixture, helping to create a light and airy batter. This step is crucial as it not only affects the cake’s texture but also enhances its taste. For the best results, use unsalted butter to control the salt content and ensure a balanced flavor profile.
Eggs and Buttermilk
Eggs are essential in cake recipes for their binding properties and contribution to moisture. They help create a rich texture while also adding flavor. In this recipe, we will use large eggs, which are standard in most baking recipes.
Buttermilk is another key ingredient that adds moisture and richness to the cake. Its acidity helps to tenderize the cake, resulting in a soft crumb. If you don’t have buttermilk on hand, you can easily make a substitute by mixing regular milk with a splash of vinegar or lemon juice and letting it sit for a few minutes.
Fresh Strawberries
The star of this cake is undoubtedly the fresh strawberries. Not only do they bring a burst of color, but they also add a sweet, fruity flavor that complements the creamy frosting. When selecting strawberries, look for firm, plump berries that are deep red in color. Using fresh strawberries instead of frozen will ensure that your cake has the best flavor and texture. You’ll be pureeing some of the strawberries to fold into the cake batter, while others will be sliced for layering and decoration.
Preparing the Cake Batter
Once you have gathered all your ingredients, it’s time to prepare the cake batter. Here’s a step-by-step guide to ensure that your batter is well-mixed and ready for baking.
Step 1: Sift the Dry Ingredients
Start by sifting the all-purpose flour, baking powder, and baking soda together in a bowl. Sifting helps to aerate the flour, breaking up any clumps, and ensures even distribution of the leavening agents. This step is crucial to achieving a light and fluffy cake.
Step 2: Creaming Butter and Sugar
In a separate mixing bowl, add the softened unsalted butter and granulated sugar. Using an electric mixer, cream them together on medium speed until the mixture is light and fluffy, usually about 3-5 minutes. This process incorporates air into the mixture, which is vital for achieving a good rise in your cake.
Step 3: Incorporating Eggs and Vanilla Extract
Once the butter and sugar are well-creamed, add the eggs one at a time, mixing well after each addition. This gradual incorporation allows the eggs to emulsify properly into the batter. Next, add the vanilla extract, which enhances the overall flavor of the cake. Mix until everything is well-combined.
Step 4: Alternating Dry and Wet Ingredients
With the mixer on low speed, begin adding the dry ingredients to the creamed mixture. To maintain a smooth batter, alternate between the dry mixture and the buttermilk. Start with a third of the dry ingredients, followed by half of the buttermilk, and continue this pattern until everything is incorporated. This technique helps prevent overmixing, which can lead to a dense cake.
Step 5: Folding in the Strawberry Puree
To infuse your cake with the delightful flavor of strawberries, prepare a strawberry puree by blending fresh strawberries until smooth. Gently fold the puree into the batter using a spatula, being careful not to overmix. This will ensure that the batter maintains its light texture while evenly distributing the strawberry flavor.
Baking the Cake
Now that your cake batter is ready, it’s time to bake. Follow these detailed instructions to achieve the perfect layers for your strawberry cake.
Step 1: Preheat the Oven
Preheat your oven to 350°F (175°C). An accurate oven temperature is crucial for even baking, so be sure to allow your oven to fully preheat before placing the cake inside.
Step 2: Prepare Your Cake Pans
Prepare two 9-inch round cake pans by greasing them with butter or cooking spray. For added insurance against sticking, you can also dust the pans with a light coating of flour. This step will make it easier to remove the cakes once they are baked.
Step 3: Pour the Batter and Bake
Divide the batter evenly between the two prepared cake pans. Use a spatula to smooth the tops, ensuring an even layer. Place the pans in the preheated oven and bake for 25-30 minutes or until a toothpick inserted into the center comes out clean. Avoid opening the oven door during the first 20 minutes of baking to prevent the cakes from collapsing.
Step 4: Cooling the Cakes
Once baked, remove the cake pans from the oven and let them cool in the pans for about 10 minutes. After that, carefully run a knife around the edges to loosen the cakes, then invert them onto wire racks to cool completely. Allowing the cakes to cool completely is important before frosting, as it prevents the frosting from melting.
With these foundational steps, you are well on your way to creating the best strawberry layered cake with cream cheese frosting. Stay tuned for the next part, where we will dive into the delicious cream cheese frosting and the assembly of this stunning dessert.
Signs of Doneness: Using the Toothpick Method
To ensure your strawberry layered cake is perfectly baked, it’s crucial to recognize the signs of doneness. One of the most reliable methods is the toothpick test. About 5-10 minutes before the recommended baking time, insert a toothpick into the center of the cake. If it comes out clean or with a few moist crumbs attached, your cake is ready. If the toothpick has wet batter on it, continue baking for a few more minutes, checking periodically. This method allows for precise timing, so your layers emerge light and fluffy, avoiding the risk of overbaking which can lead to a dry texture.
Cooling Techniques for Optimal Cake Texture
Once your cake layers are baked to perfection, the next step is cooling them properly. Cooling is crucial as it allows the steam to escape, which helps in achieving a tender crumb. After removing the cakes from the oven, let them sit in the pans for about 10-15 minutes. This resting period allows the edges to pull away from the sides of the pan slightly. Then, carefully invert the cakes onto a wire rack to cool completely.
Avoid placing warm cakes directly into the refrigerator, as the rapid temperature change can lead to a gummy texture. Instead, allow them to cool at room temperature for at least an hour. When cool, wrap each layer in plastic wrap if you’re not assembling right away, which will help maintain moisture and prevent the cakes from drying out.
Making the Cream Cheese Frosting
Importance of Cream Cheese Frosting in Complementing the Cake
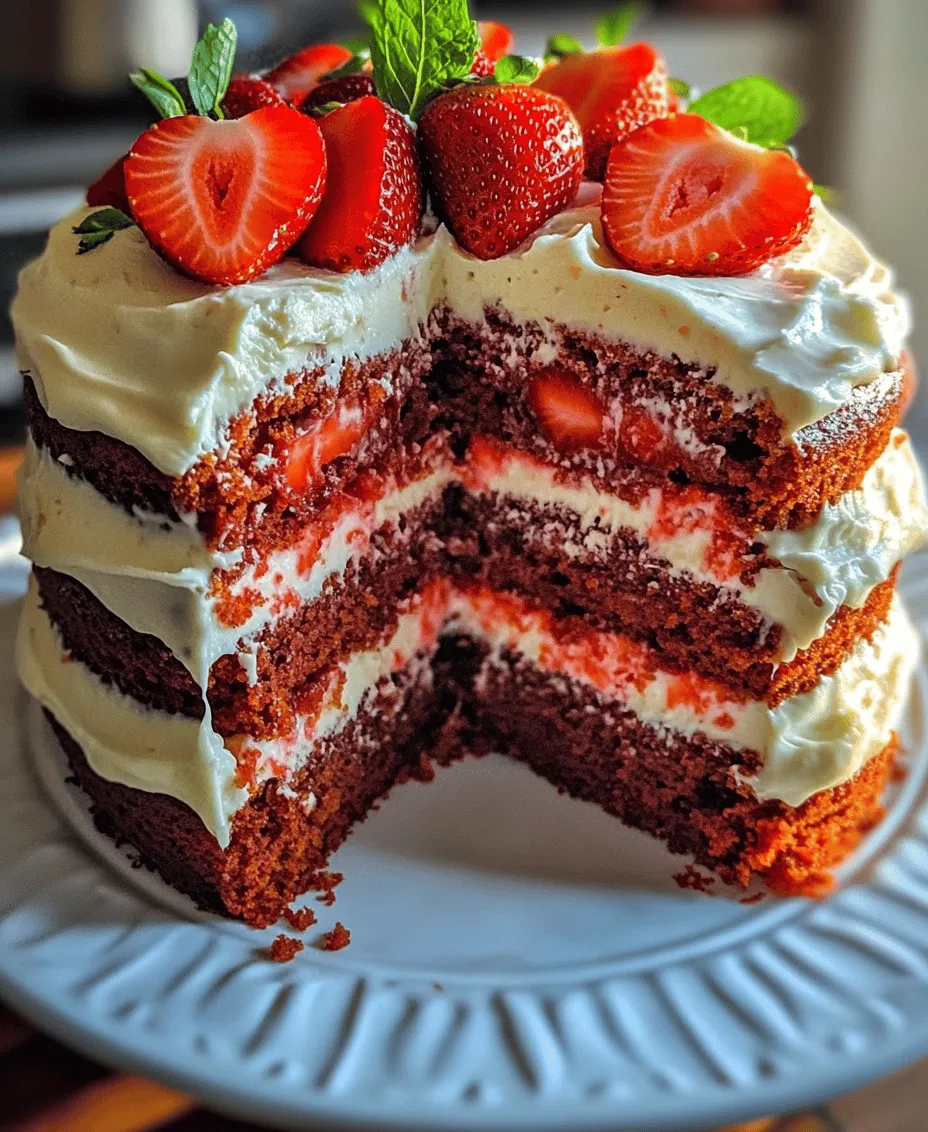
The luscious cream cheese frosting is a critical element of this strawberry layered cake. Its creamy, tangy flavor perfectly complements the sweetness of the strawberries and the cake itself, creating a harmonious balance that enhances each bite. The frosting not only adds flavor but also provides a beautiful contrast against the vibrant pink of the strawberries, making your cake visually appealing.
Step-by-Step Guide to Creating the Frosting
To prepare the cream cheese frosting, you will need the following ingredients:
– 8 oz cream cheese, softened
– 1/2 cup unsalted butter, softened
– 4 cups powdered sugar
– 1 teaspoon vanilla extract
– 2-4 tablespoons heavy cream (as needed for consistency)
Instructions:
1. In a large mixing bowl, beat the softened cream cheese and butter together until smooth and creamy, around 2-3 minutes.
2. Gradually add the powdered sugar, one cup at a time, mixing on low speed to prevent a sugar cloud.
3. Once all the sugar is incorporated, add the vanilla extract and beat until combined.
4. To achieve the desired frosting consistency, slowly add heavy cream, one tablespoon at a time, until you reach a spreadable texture. Aim for a smooth, creamy frosting that can hold its shape yet is easy to spread.
Achieving the Right Consistency: When to Add Heavy Cream
The key to perfect cream cheese frosting lies in its consistency. If your frosting seems too thick, adding heavy cream will help smooth it out. Conversely, if it’s too thin, you can incorporate more powdered sugar to thicken it. Aim for a consistency that is thick enough to hold up between the layers but soft enough to spread easily.
Flavor Enhancements with Vanilla Extract
Vanilla extract plays a significant role in elevating the flavor profile of your cream cheese frosting. Be sure to use pure vanilla extract for the best taste. If you’re feeling adventurous, consider adding a hint of lemon zest or almond extract for an extra layer of flavor that can beautifully complement the strawberries.
Assembling the Strawberry Layered Cake
Techniques for Layering the Cake
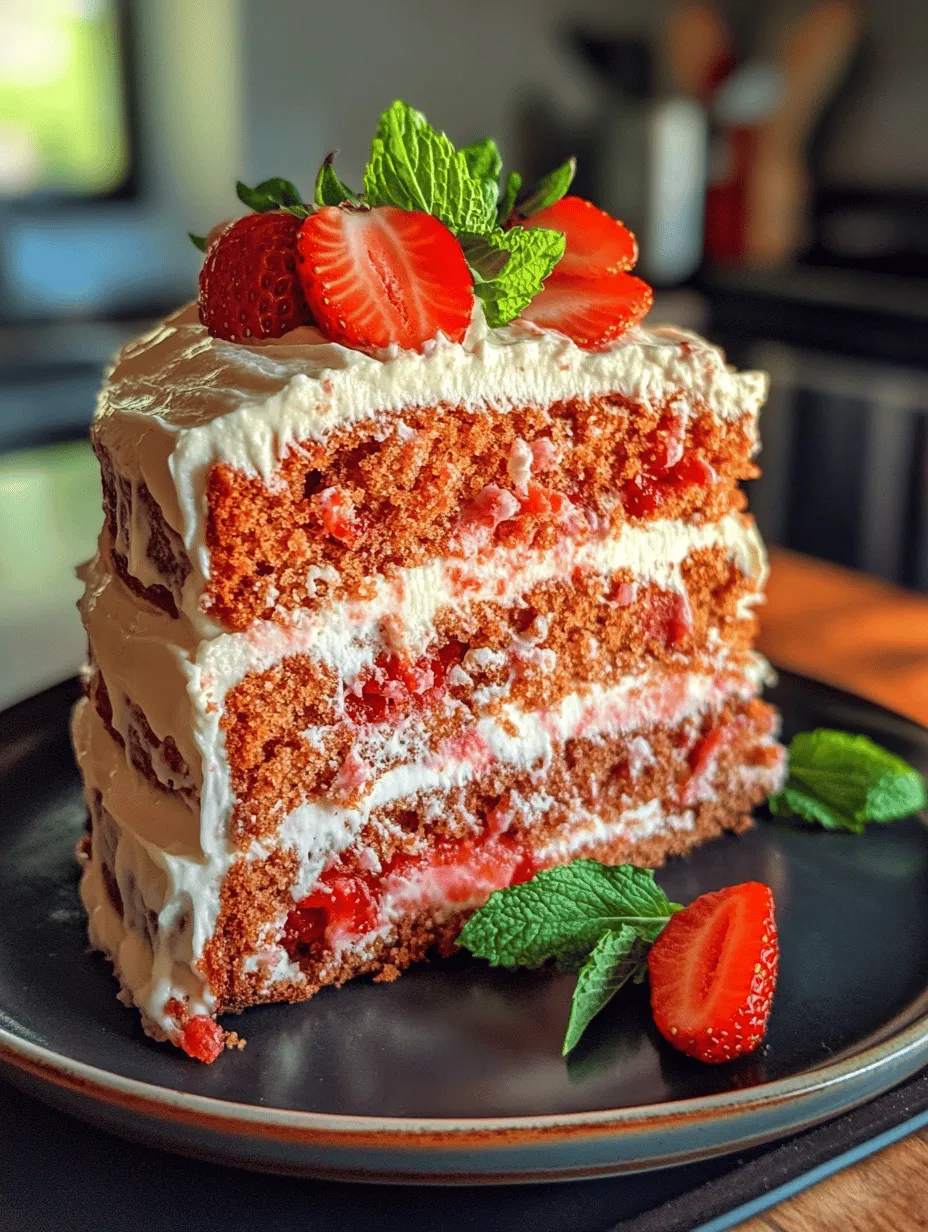
Once your cake layers are completely cooled and your cream cheese frosting is ready, it’s time to assemble your masterpiece. Start by placing one cake layer on a serving plate or cake stand. It’s essential to ensure that the first layer is flat; if it has domed, consider leveling it with a serrated knife.
Best Practices for Spreading Frosting
Using an offset spatula or a butter knife, spread a generous amount of cream cheese frosting over the first layer. Aim for an even layer, allowing the frosting to slightly hang over the edges. This will create a beautiful layered effect once the second layer is added on top. Repeat this process for the next layer, adding frosting between each.
Ensuring Even Layers for Aesthetic Appeal
To achieve an aesthetically pleasing cake, it’s important to keep your layers even. After stacking each layer, gently press down to ensure they adhere well and remain stable. If you find any unevenness, take a moment to adjust using your spatula or knife.
Tips for Frosting the Outside of the Cake
After stacking and frosting the layers, it’s time to frost the outside of the cake. Apply a thin layer of frosting around the sides and top, known as a crumb coat. This layer helps to seal in any crumbs and creates a smooth base for the final layer of frosting. Chill the cake for about 30 minutes to set the crumb coat before applying a thicker layer of frosting. For the final layer, use the spatula to create swirls or smooth finishes as desired.
Decorating the Cake
Creative Decoration Ideas Using Fresh Strawberries and Mint
Decorating your strawberry layered cake can be as simple or as elaborate as you like. Fresh strawberries are a natural choice, as they not only enhance the flavor but also add a pop of color. Arrange halved strawberries on the top of the cake in a circular pattern, or create a cascading effect down the sides for a dramatic touch. Adding fresh mint leaves can provide a beautiful contrast and a hint of freshness.
Importance of Presentation in Dessert Appeal
Presentation is key in dessert appeal. A well-decorated cake not only looks enticing but also elevates the overall dining experience. Consider dusting the top of your cake with powdered sugar or drizzling a strawberry glaze for added flair.
Suggestions for Additional Decorative Elements (e.g., Edible Flowers)
For those looking to take their cake to the next level, consider incorporating edible flowers like pansies or nasturtiums. They add a beautiful touch and are a fantastic way to elevate the visual appeal without overwhelming the flavor. You can also use chocolate shavings or sprinkles for added texture.
Serving Suggestions
Ideal Occasions for Serving the Strawberry Layered Cake
This strawberry layered cake is perfect for a variety of occasions. Whether it’s a birthday celebration, a summer picnic, or a delightful dessert for a holiday gathering, it’s sure to impress your guests. The vibrant colors and delicious flavors make it a standout dessert for any festive table.
Pairing Suggestions (e.g., Beverages That Complement the Cake)
When serving your cake, consider pairing it with beverages that will complement its flavors. A chilled glass of sparkling lemonade or iced tea would be refreshing choices. For a more indulgent option, serve with a scoop of vanilla ice cream for an irresistible treat.
Storage Tips to Maintain Freshness
To keep your strawberry layered cake fresh, store it in an airtight container in the refrigerator for up to 5 days. If you need to prepare in advance, consider assembling the cake and frosting it the day before your event, allowing the flavors to meld beautifully overnight. If you have leftover cake, you can freeze individual slices wrapped tightly in plastic wrap and foil for up to three months.
Conclusion
Baking a homemade strawberry layered cake is not only a delightful culinary experience but also a wonderful way to share joy with family and friends. The satisfaction derived from using fresh, quality ingredients to create a beautiful and delicious dessert is unparalleled. Whether you savor it at a special occasion or simply as a treat for yourself, this cake is sure to be a hit.
Don’t hesitate to experiment with flavors, decorations, and presentation styles as you embark on your cake-making journey. Enjoy the process, and remember that the heart of baking lies in the joy of creating something truly delicious to share with others.