Introduction
Lemon bars are a timeless dessert that holds a special place in the hearts of many. Their bright, zesty flavor and refreshing taste make them a perfect treat for any occasion, whether you’re hosting a summer barbecue, celebrating a birthday, or simply indulging in a sweet afternoon snack. The appeal of lemon bars lies not only in their vibrant citrus flavor but also in their unique melt-in-your-mouth texture. This delightful combination of creamy filling and buttery crust creates an experience that is both indulgent and satisfying.
At the heart of every exceptional lemon bar is the use of fresh ingredients, particularly when it comes to the lemons. Freshly squeezed lemon juice and zest elevate the flavor profile, making the bars taste vibrant and lively, as opposed to using bottled lemon juice, which can lack the depth and brightness of fresh. By prioritizing quality ingredients, you ensure that every bite of your lemon bars bursts with the refreshing essence of lemons, leaving your taste buds longing for more.
In this article, we will guide you through the steps to create melt-in-your-mouth lemon bars that are sure to impress. From understanding the essential ingredients to preparing the crust and making the luscious lemon filling, you’ll discover the secrets to achieving that perfect balance of sweetness and tartness.
Understanding the Ingredients
To create the best lemon bars, it’s essential to understand the role of each ingredient in the recipe. The basic ingredients needed for melt-in-your-mouth lemon bars include:
1. All-Purpose Flour: This forms the base of both the crust and the filling, providing structure while keeping the bars light and tender.
2. Granulated Sugar: Sweetening the filling and the crust, granulated sugar helps balance the tartness of the lemons, making each bite enjoyable.
3. Unsalted Butter: Essential for the crust, cold unsalted butter contributes to a rich flavor and flaky texture. It also helps create that melt-in-your-mouth experience.
4. Eggs: The binding agent in the filling, eggs provide structure and help achieve the creamy, custard-like consistency that characterizes a great lemon bar.
5. Fresh Lemons: Both the juice and zest of fresh lemons are crucial for delivering that signature tart flavor. The zest adds aromatic oils that enhance the lemony taste, while the juice provides the necessary acidity.
6. Powdered Sugar: Used for dusting on top of the finished lemon bars, powdered sugar adds a touch of sweetness and visual appeal.
Using fresh lemons is not just a recommendation; it’s a necessity for creating lemon bars that are truly delightful. Fresh lemons have a more complex flavor profile and are packed with essential oils that contribute to the overall taste. When zesting the lemons, make sure to handle them carefully to avoid the bitter white pith beneath the peel, which can detract from the sweetness of the final product.
Preparing the Crust
The crust is the foundation of your lemon bars and plays a critical role in the overall texture and taste. A perfectly made crust should be buttery, flaky, and provide a slight crunch that complements the smoothness of the lemon filling. Here’s how to prepare the crust step-by-step:
1. Gather Your Ingredients: You will need all-purpose flour, granulated sugar, unsalted butter, and a pinch of salt. Having everything pre-measured and ready to go makes the process smoother.
2. Chill the Butter: Start with cold, unsalted butter cut into small cubes. The temperature of the butter is crucial; using cold butter ensures that the crust remains flaky. When butter is added to the flour mixture, it should remain in small chunks, which will create pockets of steam during baking, resulting in a light and airy crust.
3. Mix the Dry Ingredients: In a mixing bowl, combine the all-purpose flour, granulated sugar, and salt. Whisk the ingredients together to ensure they are evenly mixed.
4. Cut in the Butter: Using a pastry cutter or your fingertips, cut the cold butter into the flour mixture until it resembles coarse crumbs. This step is vital; you want to ensure that the butter is well incorporated without melting it.
5. Form the Dough: Once the mixture resembles coarse breadcrumbs, add a tablespoon of cold water at a time until the dough starts to come together. Be careful not to overwork the dough; it should be just combined enough to hold its shape.
6. Press into the Pan: Transfer the crust mixture to a greased 9×9-inch baking pan. Use your fingers or a spatula to press the dough evenly across the bottom of the pan. Press firmly to ensure the crust holds its shape during baking.
7. Pre-Bake the Crust: Preheat your oven to 350°F (175°C). Bake the crust for about 15-20 minutes, or until it turns golden brown. This step helps to set the crust, preventing it from becoming soggy once the lemon filling is added.
8. Cool the Crust: Once baked, remove the crust from the oven and allow it to cool slightly before adding the lemon filling. This cooling step is essential to ensure that the filling doesn’t melt the crust, preserving that delightful texture.
By carefully preparing your crust with these steps, you’ll set the stage for the luscious lemon filling to shine brightly. The right crust not only complements the creamy lemon filling but also enhances the overall experience of the lemon bars.
Making the Lemon Filling
Now that your crust is prepped and ready, it’s time to move on to the star of the show: the lemon filling. This step requires precision and attention to detail to ensure that the filling achieves a smooth texture and a perfect balance of flavors. Here’s how to make the lemon filling step-by-step:
1. Gather Your Ingredients: For the lemon filling, you will need granulated sugar, eggs, fresh lemon juice, lemon zest, and a touch of all-purpose flour. Having everything ready makes the process seamless.
2. Whisk the Eggs: In a medium mixing bowl, crack the eggs and whisk them vigorously until they are well combined. This step is crucial as it helps to incorporate air into the eggs, resulting in a light and airy filling.
3. Add the Sugar: Gradually add granulated sugar to the whisked eggs, continuing to whisk until the mixture is smooth and the sugar is dissolved. This process not only sweetens the filling but also aids in achieving the desired consistency.
4. Incorporate Lemon Juice and Zest: Squeeze fresh lemons to extract the juice, ensuring you remove any seeds. Add the lemon juice and lemon zest to the egg and sugar mixture, whisking until it is fully incorporated. The fresh juice brings acidity and brightness, while the zest adds aromatic depth.
5. Add Flour: Sift in a small amount of all-purpose flour, which helps to stabilize the filling. Gently fold the flour into the mixture until just combined. Be careful not to overmix, as this can lead to a dense filling.
6. Taste and Adjust: This is your chance to taste the filling. If you prefer a sweeter filling, you can adjust the sugar slightly, but keep in mind that the tartness of the lemons is essential for that classic lemon bar flavor.
7. Pour Over the Crust: Pour the lemon filling over the pre-baked crust, spreading it evenly with a spatula. This ensures that every bite has an even distribution of that delicious lemony goodness.
8. Bake: Return the pan to the oven and bake at 350°F (175°C) for an additional 20-25 minutes, or until the filling is set and the top is lightly golden. The filling should have a slight jiggle in the center when you take it out; it will firm up as it cools.
9. Cool and Chill: Once baked, remove the lemon bars from the oven and allow them to cool in the pan on a wire rack. After they have cooled to room temperature, transfer them to the refrigerator to chill for at least two hours before slicing. Chilling helps the filling to set properly, making it easier to cut into clean squares.
By following these detailed steps, you will create a lemon filling that is perfectly balanced, creamy, and bursting with flavor. The combination of tartness and sweetness will leave you and your guests savoring every bite of these melt-in-your-mouth lemon bars.
Combining the Layers
Once your crust is perfectly baked and cooled, it’s time to layer on the luscious lemon filling. This is a crucial step, as the layering technique can significantly impact the texture and flavor of your melt-in-your-mouth lemon bars.
How to Properly Layer the Filling Over the Crust
1. Prepare the Filling: Before you pour the filling onto the crust, give it a good whisk to ensure that all the ingredients are well combined. This will help achieve a smooth, creamy texture.
2. Pouring Technique: Gently pour the lemon filling onto the center of the crust. This method helps minimize the risk of the filling mixing with the crust. Allow the filling to flow outward naturally—do not spread it with a spatula, as this can disturb the crust.
3. Avoiding Mixing: To further prevent the filling from integrating with the crust, you can place a layer of parchment paper on the crust before pouring the filling. This barrier will help separate the two layers until they bake together.
Baking the Lemon Bars
Now that the filling is in place, it’s time to bake those beautiful lemon bars to perfection. The baking process is crucial for setting the filling and achieving that ideal melt-in-your-mouth texture.
Optimal Baking Conditions and Time for Perfect Results
– Preheat Your Oven: Make sure your oven is preheated to 350°F (175°C) before you put your lemon bars in. A well-heated oven ensures even baking.
– Baking Time: Bake the lemon bars for approximately 20-25 minutes. Keep an eye on them after the 20-minute mark to avoid overbaking, which can lead to a tough texture.
Signs That Indicate the Lemon Bars Are Ready to Be Removed from the Oven
– Center Jiggle: The filling should be set but still have a slight jiggle in the center when you gently shake the pan. This indicates that the lemon filling is cooked but not overdone.
– Edges Firming Up: The edges of your lemon bars should appear slightly puffed and firm, while the center remains soft.
Importance of Cooling the Bars Before Cutting
After removing the bars from the oven, allow them to cool in the pan at room temperature for about 30 minutes. Once they have cooled, transfer them to the refrigerator for at least 2 hours. This chilling step is essential, as it allows the filling to set properly, making it easier to cut clean squares without the filling oozing out.
Serving Suggestions
Now that your lemon bars are perfectly baked and cooled, it’s time to enjoy them! Here are some creative serving suggestions to enhance your dessert experience.
Ideas for Garnishing and Serving the Lemon Bars
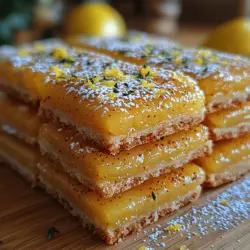
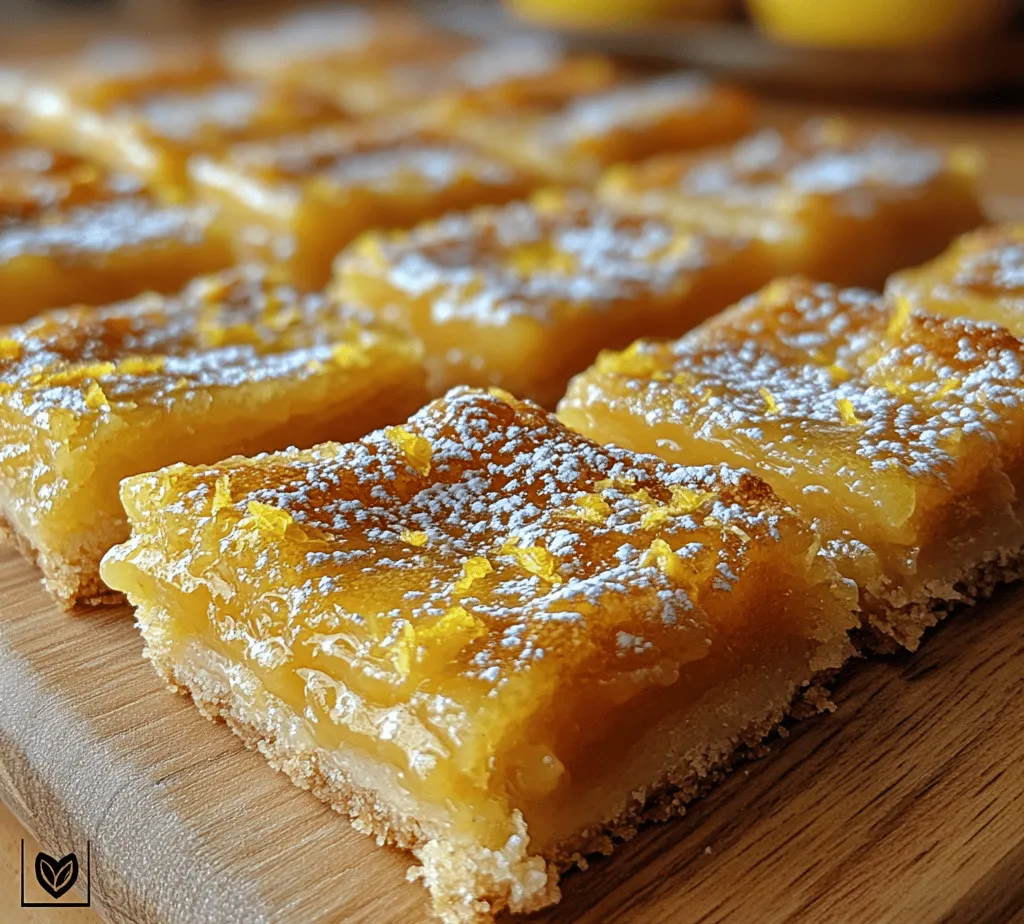
– Dusting with Powdered Sugar: A light dusting of powdered sugar adds a beautiful finish and a touch of sweetness that balances the tartness of the lemon.
– Lemon Zest: For an extra burst of citrus flavor, sprinkle some finely grated lemon zest on top before serving. This not only enhances the presentation but also intensifies the lemon aroma.
– Whipped Cream: Serve alongside a dollop of freshly whipped cream for a creamy contrast to the tangy filling. You could also try flavored whipped cream, like vanilla or lemon.
Best Practices for Storing Leftovers
If you find yourself with leftover lemon bars, store them in an airtight container in the refrigerator. They will stay fresh for up to one week. To prevent them from sticking together, consider placing parchment paper between layers.
Suggestions for Pairing Lemon Bars with Beverages or Other Desserts
Lemon bars are versatile and can be paired with a variety of beverages and desserts. Here are a few ideas:
– Tea: A cup of herbal tea, such as chamomile or mint, complements the citrus flavor beautifully.
– Coffee: For coffee lovers, a shot of espresso or a creamy latte pairs perfectly with the tartness of lemon bars.
– Other Desserts: Serve lemon bars with a side of fresh fruit like berries or a scoop of lemon sorbet for a refreshing twist.
Nutritional Information
Understanding the nutritional profile of your lemon bars can help you enjoy them in moderation. Here’s a quick overview.
– Serving Size: A typical serving size is one square (about 2 inches x 2 inches).
– Calories: Each lemon bar contains roughly 150-200 calories, depending on the specific ingredients used and portion size.
– Nutritional Aspects: Lemon bars are a good source of vitamin C from the lemons, but they are also high in sugar and fat due to the crust and filling ingredients. For a healthier version, consider substituting some of the sugar with a natural sweetener or using whole grain flour in the crust.
Conclusion
Creating melt-in-your-mouth lemon bars is a delightful experience that combines the bright, zesty flavors of lemons with a buttery, crumbly crust. From the moment you prepare the crust to the final touches of garnishing, each step contributes to the overall joy of enjoying this classic dessert.
Encouragement to try the recipe and share the experience with others is essential. Whether you’re hosting a gathering or simply indulging in a sweet treat, these lemon bars are sure to impress. So grab your ingredients, head to the kitchen, and make your own batch of these irresistible lemon bars. Once you taste that perfect balance of tart and sweet, you’ll want to share the recipe with friends and family, embracing the joy of homemade desserts together.