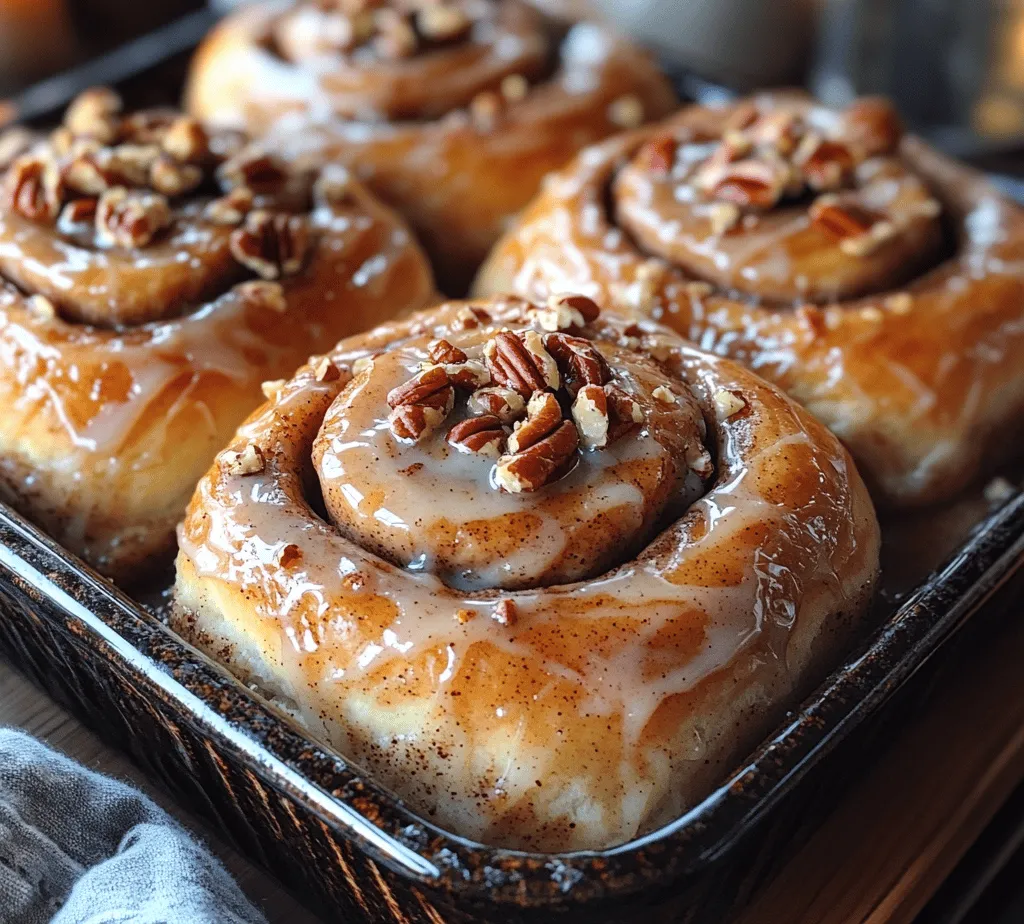
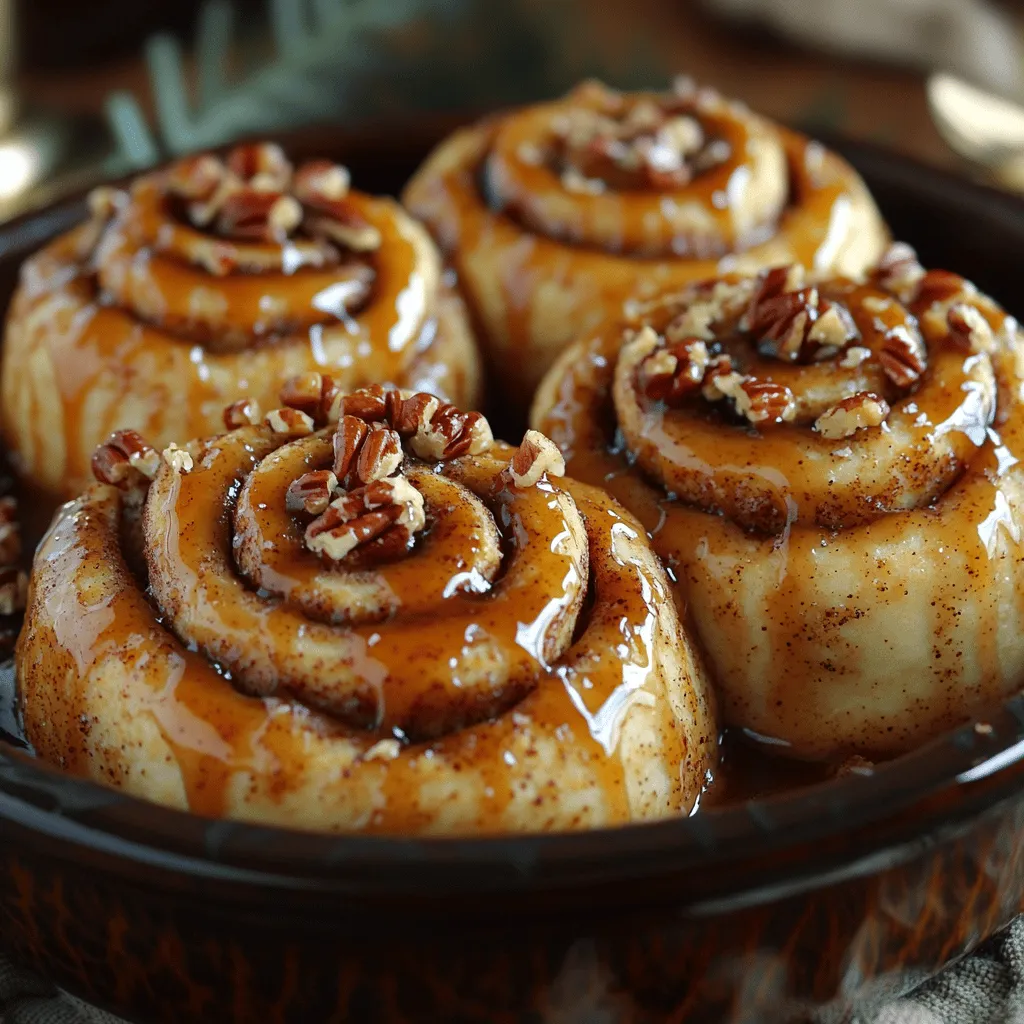
When it comes to comfort food, few things can rival the warm, gooey goodness of freshly baked cinnamon rolls. Among the myriad of variations, Buttered Maple Cinnamon Rolls stand out as an irresistible treat, perfect for breakfast, brunch, or even dessert. The delightful combination of sweet maple syrup, rich butter, and aromatic cinnamon creates a flavor profile that warms the heart and tantalizes the taste buds. Imagine serving a tray of these golden, sticky rolls to family or friends, each bite melting in their mouth, surrounded by the sweet scent of freshly baked pastry. There’s a certain joy that comes from homemade baking, and Buttered Maple Cinnamon Rolls encapsulate that joy perfectly.
The Allure of Homemade Cinnamon Rolls
Homemade cinnamon rolls are more than just a delicious pastry; they are a cherished tradition in many households. The act of baking itself becomes a sensory experience that envelops the kitchen in a warm embrace of sweet aromas. As the dough rises and the cinnamon filling melds with the buttery goodness, anticipation builds, leading to a delightful moment when the rolls emerge from the oven, golden and fragrant.
What makes homemade cinnamon rolls so special is their versatility. You can customize them with various fillings and toppings to suit any occasion. Whether you prefer a classic cinnamon-sugar filling or wish to elevate your rolls with add-ins like chocolate chips, nuts, or dried fruit, the possibilities are endless. Each batch can be uniquely tailored to reflect personal tastes or seasonal flavors, making them a perfect choice for holiday gatherings, brunch parties, or cozy family breakfasts.
Ingredients Breakdown for Buttered Maple Cinnamon Rolls
Creating the perfect Buttered Maple Cinnamon Rolls begins with understanding the essential ingredients that contribute to their delightful texture and flavor. Each component plays a critical role in crafting the ultimate roll, ensuring that every bite is a heavenly experience.
Essential Ingredients Overview
At the heart of any great cinnamon roll recipe is all-purpose flour, which provides the structure and foundation for the dough. The choice of flour significantly influences the final outcome, as the right protein content is essential for achieving the desired texture. Active dry yeast is another key ingredient, responsible for leavening the dough. Activating the yeast properly ensures that the rolls rise beautifully, resulting in a light and fluffy texture.
Whole milk adds richness to the dough, contributing to its softness and flavor. The warmth of the milk also helps to activate the yeast, which is crucial in the initial dough preparation. Combining these ingredients in the right proportions will set the stage for the perfect Buttered Maple Cinnamon Rolls.
The Sweetness Factor
Sweetness is a vital element in any cinnamon roll, and this recipe utilizes both granulated sugar and brown sugar to achieve depth of flavor. Granulated sugar is incorporated into the dough, providing a subtle sweetness that complements the overall taste. Meanwhile, brown sugar plays a crucial role in the filling, enhancing the caramel notes that pair beautifully with the cinnamon and maple syrup. The combination of these sugars creates a delightful sweetness that balances the richness of the dough and the warmth of the spices.
The Role of Fats
Fats are essential for creating a rich and flavorful dough, and unsalted butter takes center stage in this recipe. Used in both the dough and the filling, butter adds moisture and flavor, resulting in a tender roll with a decadent taste. The use of unsalted butter allows for better control of the overall saltiness of the rolls, ensuring that the sweet and savory elements harmonize perfectly. Additionally, a drizzle of melted butter over the finished rolls enhances the glossy appearance and adds an extra layer of richness.
Flavor Enhancements
To elevate the flavor profile of Buttered Maple Cinnamon Rolls, vanilla extract and ground cinnamon are indispensable. Vanilla extract contributes a warm, aromatic note that enhances the overall sweetness of the rolls. Ground cinnamon, of course, is the star of the show; its warm, spicy notes are what make cinnamon rolls so beloved. Together, these flavor enhancers create a delightful symphony that dances on the palate, making each bite a memorable experience.
Optional Add-Ins
While Buttered Maple Cinnamon Rolls are delicious on their own, consider incorporating optional toppings for added texture and flavor. Chopped pecans or walnuts provide a satisfying crunch and a nutty richness that complements the sweetness of the rolls. You can also experiment with different toppings such as cream cheese frosting, maple glaze, or even a sprinkle of sea salt for a finishing touch that elevates your rolls to gourmet status.
Step-by-Step Instructions for Making Buttered Maple Cinnamon Rolls
Now that we have a thorough understanding of the ingredients, let’s dive into the process of making these delightful rolls. The journey begins with preparing the dough, a crucial first step that sets the foundation for your Buttered Maple Cinnamon Rolls.
Preparing the Dough
Start by gathering all your ingredients and ensuring that your kitchen is warm and welcoming, as a cozy environment is ideal for dough rising. In a large mixing bowl, combine the warm whole milk with the active dry yeast. Allow the mixture to sit for about 5-10 minutes until it becomes frothy, indicating that the yeast is properly activated. This step is vital, as it ensures that your dough will rise beautifully.
Once the yeast is activated, add the granulated sugar, melted unsalted butter, and vanilla extract to the mixture. Stir until combined. Next, gradually add the all-purpose flour, mixing until a soft dough begins to form. The dough should be slightly sticky but manageable. Be cautious not to add too much flour at this stage, as you want to maintain the moisture that contributes to a tender roll.
Mixing the Ingredients
As you mix the ingredients, it’s helpful to switch to a wooden spoon or a dough hook if you’re using a stand mixer. Continue to mix until the dough begins to pull away from the sides of the bowl. At this point, you can add a pinch of salt, which enhances the flavor of the dough and balances the sweetness.
Kneading Techniques
After mixing, it’s time to knead the dough. Kneading is crucial for developing gluten, which gives the rolls their structure. You can knead by hand on a floured surface for about 8-10 minutes, or you can use a stand mixer fitted with a dough hook on low speed for about 5 minutes. The dough should become smooth and elastic, and you can test its readiness by performing the “windowpane test” — stretch a small piece of dough; if it forms a thin, translucent membrane without tearing, it’s ready.
The First Rise: Importance of Time and Temperature
Once kneaded, shape the dough into a ball and place it in a lightly greased bowl, covering it with a clean kitchen towel. This initial rise is crucial for achieving the perfect texture. Allow the dough to rise in a warm, draft-free area for about 1 to 2 hours, or until it has doubled in size. The time it takes to rise can vary based on the temperature of your kitchen, so be patient and give it the time it needs. This step is essential for developing the light and fluffy texture characteristic of homemade cinnamon rolls.
The Next Steps
As the dough rises, you can prepare your filling and glaze, ensuring that everything is ready for the assembly of your Buttered Maple Cinnamon Rolls. Stay tuned for the next part, where we will dive into creating the delectable filling, shaping the rolls, and baking them to perfection. The journey to homemade bliss continues, and you won’t want to miss it!

Crafting the Perfect Filling
Combining Ingredients for the Filling
To create a luscious filling for your Buttered Maple Cinnamon Rolls, begin by gathering the essential ingredients: brown sugar, ground cinnamon, and softened butter. The right consistency for the filling is crucial; it should be thick yet spreadable, allowing for easy application across the dough without tearing it.
In a medium bowl, combine 1 cup of packed brown sugar with 2 tablespoons of ground cinnamon. Stir these two ingredients until they are well mixed. Next, take 1/2 cup of softened unsalted butter and blend it into the sugar mixture. You can use a fork or a spatula for this task, ensuring that the butter integrates smoothly into the sugar and cinnamon. The end result should be a thick paste that is easy to spread but not overly runny. If your mixture is too thick, consider adding a touch of maple syrup to achieve the desired consistency.
Rolling Out the Dough
Once your filling is ready, it’s time to roll out the dough. Start by lightly flouring your work surface and placing the dough on it. Using a rolling pin, gently roll the dough into a rectangle, approximately 12 inches by 18 inches and about 1/4-inch thick. Flour the surface of the dough as needed to prevent sticking, but be cautious not to incorporate too much flour, which can make the rolls dense.
For an even distribution of filling, ensure that the dough is rolled out evenly. As you roll, apply gentle but firm pressure to maintain a consistent thickness. Once you have achieved the right size, you’re ready to spread the filling. Use a spatula to apply the cinnamon filling evenly across the surface of the dough, leaving a small border around the edges. This will help prevent the filling from spilling out when you roll it up.
Assembling the Rolls
With the filling spread out, it’s time to assemble the rolls. Starting from one of the long edges of the rectangle, carefully roll the dough away from you, keeping the roll tight but not so tight that it forces the filling out. When you reach the end, pinch the seam to seal it.
Next, use a sharp knife or a bench scraper to slice the rolled dough into approximately 12 equal pieces, each about 1.5 inches wide. A serrated knife works exceptionally well, as it can cut through the dough without squishing it. If you want perfectly uniform rolls, consider using dental floss or a piece of string to slice them; simply slide it under the roll, cross the ends over the top of the roll, and pull to cut.
The Second Rise: Building Fluffiness
Preparing for the Second Rise
After slicing the rolls, arrange them in a greased baking dish, ensuring they are close but not touching. Cover the dish with a clean kitchen towel or plastic wrap, and let them rise in a warm, draft-free area for about 30 to 45 minutes. This second rise is vital as it allows the rolls to expand, resulting in a soft and fluffy texture. The yeast will work its magic during this time, creating air pockets that make the rolls light and airy.
Baking the Rolls
Preheat your oven to 350°F (175°C) while the rolls are rising. A properly preheated oven is essential to ensure even baking. Once the rolls have risen and appear puffy, place them in the oven. Bake for 25 to 30 minutes or until they are golden brown on top. Keep an eye on them towards the end of the baking time; the rolls are done when they’ve puffed up significantly and the tops are lightly browned. If you notice they are browning too quickly, cover them loosely with aluminum foil to prevent burning.
Crafting the Maple Glaze
Ingredients for the Glaze
While the rolls are baking, you can prepare the maple glaze. For this delightful topping, you will need 1 cup of powdered sugar, 2 to 3 tablespoons of maple syrup, and a splash of vanilla extract. The balance of maple syrup and powdered sugar is critical for achieving that perfect drizzle consistency – thick enough to stay on the rolls but thin enough to spread easily.
In a small bowl, combine the powdered sugar and maple syrup. Start with 2 tablespoons of syrup and whisk until smooth. If the glaze is too thick, you can add an additional tablespoon of syrup until you reach your desired consistency. For an added depth of flavor, mix in a few drops of vanilla extract.
Drizzling Techniques
Once the rolls are out of the oven and have cooled slightly, it’s time to apply the glaze. For maximum coverage, use a spoon or a whisk to drizzle the glaze over the warm rolls. You can create beautiful patterns by drizzling in a back-and-forth motion across the rolls. If you want to go the extra mile, consider using a piping bag for a more refined look. Simply fill the piping bag with the glaze and gently squeeze it over the rolls to create artistic designs.
Serving Suggestions and Presentation Ideas
Ideal Serving Temperature
Buttered Maple Cinnamon Rolls are best served warm, just slightly cooled from the oven. The warmth enhances the buttery flavor and allows the glaze to melt slightly, creating an irresistible treat. If you’re serving them for breakfast or brunch, consider passing them around on a beautiful platter, garnished with a sprinkle of powdered sugar or a few pecan halves for an added touch of elegance.
Pairing Options
To complement the rich flavors of your cinnamon rolls, consider pairing them with a hot beverage. A freshly brewed cup of coffee or a warm cup of tea enhances the experience and balances the sweetness of the rolls. Alternatively, a glass of freshly squeezed orange juice or a fruit-infused iced tea can provide a refreshing contrast. For those who prefer, a dollop of whipped cream or a scoop of vanilla ice cream can elevate the rolls into a decadent dessert.
Conclusion: The Joy of Buttered Maple Cinnamon Rolls
Making Buttered Maple Cinnamon Rolls is not just about following a recipe; it is an experience that brings warmth and joy into your kitchen and your home. The delightful aroma that fills the air while they bake is enough to make anyone’s mouth water. These rolls are perfect for special occasions, weekend breakfasts, or simply as a comforting treat any day of the week.
As you savor each fluffy bite, you’ll understand that the effort put into creating these rolls is well worth it. There’s something incredibly rewarding about sharing homemade baked goods with family and friends. So, embrace the joy of baking, and let the simple pleasure of Buttered Maple Cinnamon Rolls become a cherished tradition in your household. Gather loved ones around the table, share stories, and enjoy the delightful experience of homemade treats together.

