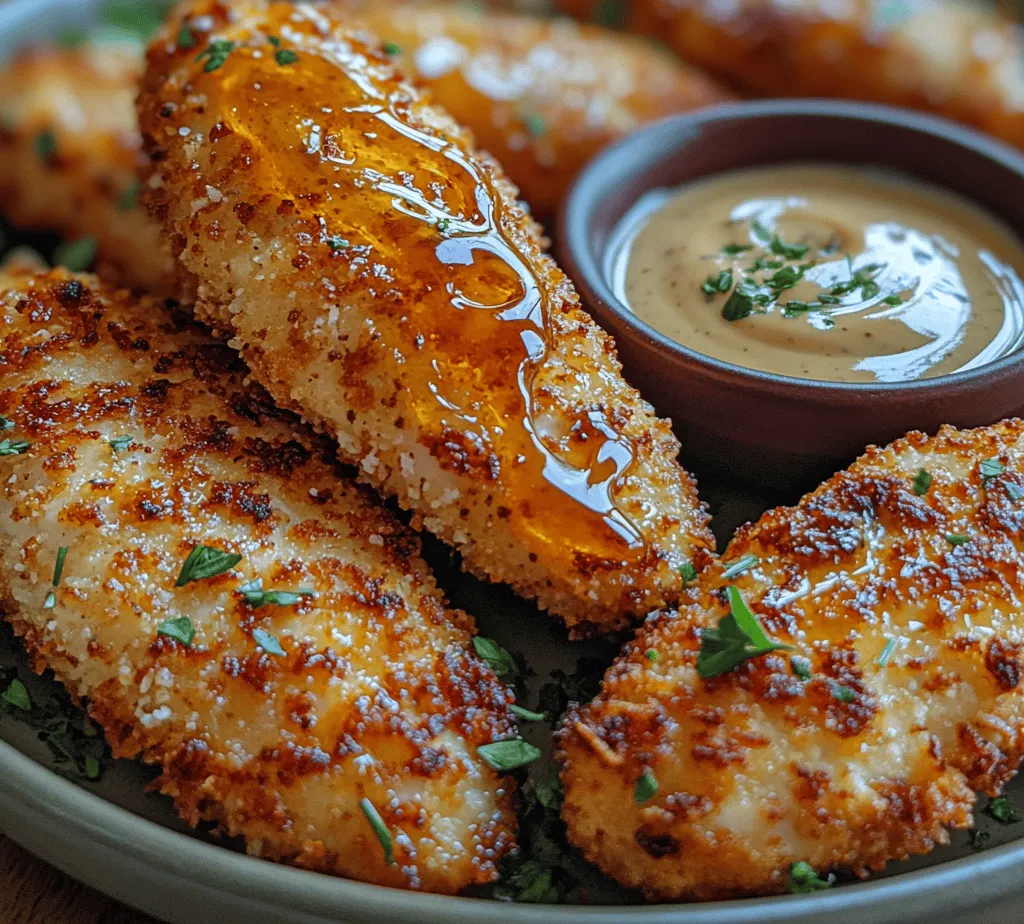
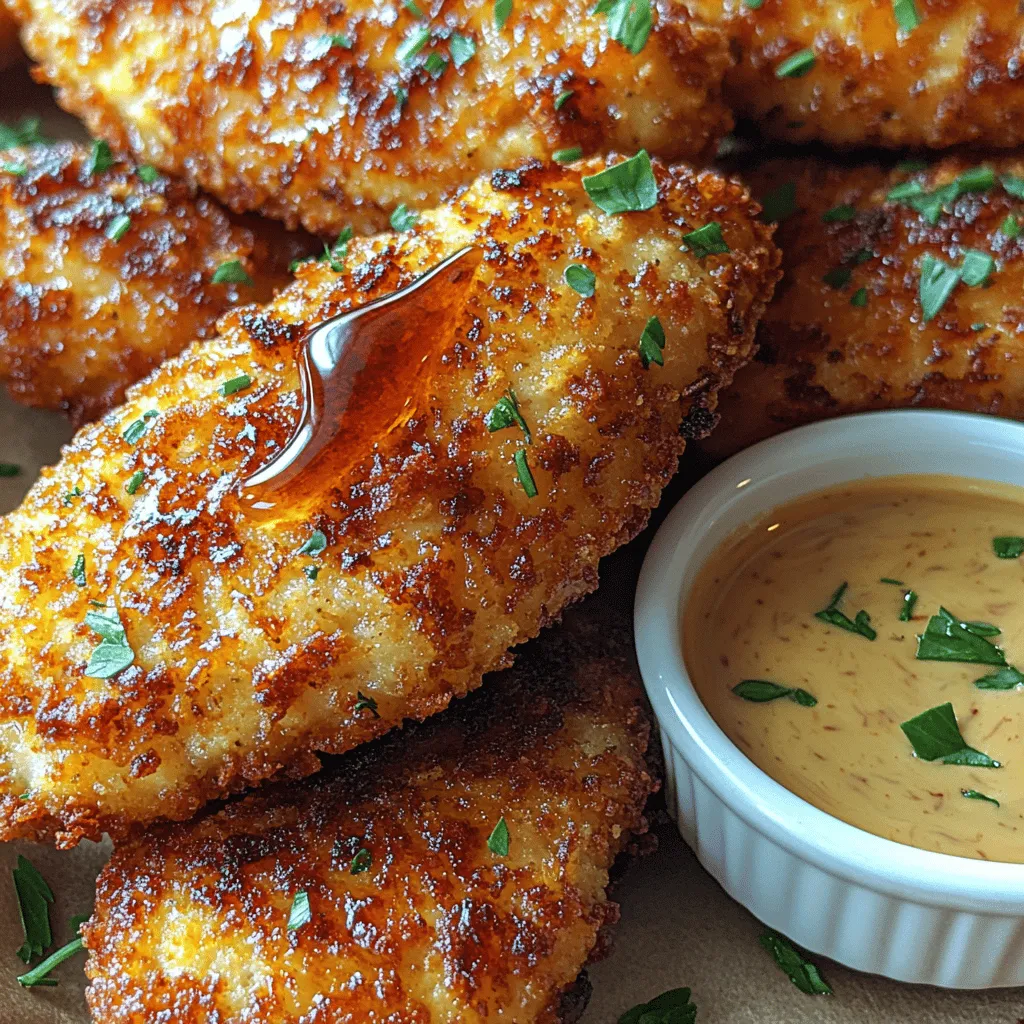
When it comes to comfort food, few dishes are as universally beloved as chicken tenders. Their tender, juicy texture and crispy coating make them a favorite among both children and adults alike. Whether served as a main dish, appetizer, or snack, chicken tenders have a special place in the hearts (and stomachs) of many. In this article, we will be exploring a delightful twist on this classic dish: Crispy Honey Mustard Chicken Tenders. This recipe blends the delicious flavors of sweet honey and tangy mustard, creating an irresistible combination that elevates traditional chicken tenders to a new level of flavor.
The appeal of honey mustard lies in its perfect balance of sweetness and tanginess, making it a versatile condiment that can enhance a variety of dishes. In our Crispy Honey Mustard Chicken Tenders, this unique flavor profile is infused into both the marinade and the dipping sauce, ensuring that every bite is bursting with taste. Not only are these tenders incredibly flavorful, but they are also easy to prepare, making them an ideal choice for busy weeknight dinners or casual gatherings with friends and family.
In this guide, we will walk you through the entire process of making these delectable chicken tenders, from understanding the ingredients to executing each step with precision. Whether you’re a seasoned cook or a kitchen novice, you’ll find the instructions clear and straightforward. So, let’s dive in and discover how to create these crispy, golden-brown delights that will surely impress anyone who tries them.
Understanding the Ingredients for Perfect Chicken Tenders
To create the ultimate Crispy Honey Mustard Chicken Tenders, it’s crucial to understand the role of each ingredient in the recipe. By selecting high-quality components and combining them thoughtfully, you ensure a dish that not only tastes fantastic but also has the right texture.
Chicken Tenders: The Foundation of the Recipe
The star of our recipe is, of course, the chicken tenders. When selecting chicken tenders, freshness is key. Look for high-quality, fresh chicken that is free from added hormones and antibiotics. Fresh chicken tenders are naturally tender and juicy, providing the perfect base for this dish. Using chicken tenders rather than regular chicken breasts ensures that the meat remains moist during cooking, leading to a satisfying bite that is both tender and flavorful.
The Marinade: A Flavorful Soak
Next, we move on to the marinade, which is essential for infusing flavor and ensuring that the chicken remains tender. The base of our marinade is buttermilk, a classic choice in fried chicken recipes. Buttermilk helps to tenderize the meat, allowing it to soak up the flavors of the other ingredients while ensuring a juicy interior. In addition to buttermilk, we include Dijon mustard for its sharp, tangy flavor, which complements the sweetness of honey beautifully. Honey not only adds sweetness but also contributes to the caramelization process during frying, resulting in a beautifully golden-brown crust.
To elevate the marinade further, we incorporate an array of spices, such as garlic powder, onion powder, and a pinch of paprika. These spices add depth and complexity to the flavor profile, ensuring that every bite of chicken is infused with a delightful taste. The combination of these ingredients creates a marinade that not only enhances the chicken’s flavor but also helps it to retain moisture during cooking.
Breading Essentials: Flour, Panko, and Parmesan
The breading process is where the magic happens, transforming our marinated chicken tenders into crispy, golden perfection. For the breading, we use a combination of all-purpose flour, panko breadcrumbs, and grated Parmesan cheese.
The all-purpose flour serves as the first layer of coating, helping the wet marinade adhere to the chicken. Panko breadcrumbs, which are coarser than regular breadcrumbs, play a vital role in achieving that coveted crunch. They absorb less oil and create a lighter, crispier texture that is hard to resist. Finally, Parmesan cheese adds a savory element to the breading, enhancing the overall flavor and contributing to the browning process during frying. Together, these components ensure a satisfyingly crunchy outer layer that contrasts beautifully with the tender chicken inside.
Frying Technique: Achieving the Perfect Crunch
Frying is the final step in our preparation, and it’s essential to get it right for the crispiest results. One of the key factors in frying chicken tenders is maintaining the correct oil temperature. If the oil is too hot, the tenders will brown too quickly on the outside while remaining undercooked on the inside. Conversely, if the oil is not hot enough, the tenders will absorb too much oil and become greasy rather than crispy.
We recommend using a deep-frying thermometer to monitor the oil temperature, aiming for around 350°F (175°C). This temperature is ideal for frying chicken tenders, allowing them to cook through while developing a beautifully crisp exterior. Additionally, frying in small batches prevents the oil temperature from dropping too much, ensuring that each tender receives the attention it deserves.
Step-by-Step Guide to Making Crispy Honey Mustard Chicken Tenders
Now that we’ve covered the essential components of our recipe, it’s time to dive into the step-by-step process of making these Crispy Honey Mustard Chicken Tenders. Follow along closely, and you’ll be on your way to creating a dish that is sure to become a family favorite.
Marinating the Chicken for Maximum Flavor
1. Prepare the Marinade: In a large mixing bowl, combine 1 cup of buttermilk, 2 tablespoons of Dijon mustard, 2 tablespoons of honey, and your choice of spices (garlic powder, onion powder, and paprika). Whisk until well combined.
2. Add the Chicken: Place the fresh chicken tenders into the marinade, ensuring that they are fully submerged. Cover the bowl with plastic wrap or transfer the mixture to a resealable plastic bag. Allow the chicken to marinate in the refrigerator for at least 30 minutes, but ideally for 2 to 4 hours. This extended marination time will enhance the flavor and tenderness of the chicken.
Preparing the Breading Station
While the chicken is marinating, it’s important to set up your breading station for efficiency. Here’s how to do it:
1. Gather Your Ingredients: In a shallow dish, add 1 cup of all-purpose flour. In a second shallow dish, place 2 cups of panko breadcrumbs mixed with 1/2 cup of grated Parmesan cheese.
2. Prepare for Breading: Set up your station with the marinated chicken tenders on one side, the flour, the egg wash (a beaten egg mixed with a splash of water), and the panko mixture lined up in order. This assembly line setup will make the breading process smooth and organized.
3. Breading Process: Remove each chicken tender from the marinade, allowing any excess to drip off before dipping it first into the flour, then the egg wash, and finally coating it thoroughly with the panko mixture. Press gently to ensure the breadcrumbs adhere well to the chicken. Place the breaded tenders on a wire rack or a plate while you finish breading the rest.
By following these steps, you’ll be well on your way to creating Crispy Honey Mustard Chicken Tenders that are sure to impress everyone at your table. In the next part of our article, we’ll delve deeper into frying techniques and tips for serving these delicious tenders. Stay tuned for more delicious insights and instructions!

Breading the Chicken: The Key to Crunchiness
Creating the perfect crispy chicken tenders hinges on the breading process. To set up your breading station efficiently, gather all your ingredients and tools before you begin. You’ll need three shallow dishes: one for the flour mixture, one for the egg wash, and one for the breadcrumbs.
1. Flour Mixture: In the first dish, combine all-purpose flour with your choice of seasonings. A mix of salt, pepper, garlic powder, and onion powder works wonders. The flour will help the egg wash adhere to the chicken.
2. Egg Wash: In the second dish, beat a few eggs with a splash of water or milk. This mixture acts as an adhesive for the breadcrumbs.
3. Breadcrumbs: In the third dish, use plain or seasoned breadcrumbs, or a combination of panko and regular breadcrumbs for extra crunch.
To keep your workspace organized, line up the dishes in the following order: flour, egg wash, and breadcrumbs. This assembly line approach will streamline the process and minimize mess. As you bread the chicken, it helps to use one hand for the dry ingredients (flour and breadcrumbs) and the other for the wet (egg wash). This technique not only keeps your hands cleaner but also ensures that the chicken is coated thoroughly.
Frying the Chicken: Ensuring Golden Perfection
Once your chicken tenders are breaded, it’s time to fry them to achieve that golden-brown, crispy exterior. The key to frying is maintaining the right oil temperature and ensuring even cooking.
1. Heating the Oil: In a large, heavy-bottomed skillet or deep fryer, heat enough oil to submerge the tenders about halfway. A temperature of 350°F (175°C) is ideal. Use a thermometer to monitor the oil temperature, as frying at too low a temperature can make the tenders greasy, while frying at too high can burn them.
2. Frying Process: Carefully place the breaded chicken tenders in the hot oil, ensuring not to overcrowd the pan. Fry in batches if necessary. This prevents a drop in oil temperature, which can lead to uneven cooking. Fry the tenders for about 4-5 minutes on each side, or until they are golden brown and cooked through (the internal temperature should reach 165°F or 74°C).
3. Avoiding Oil Splatter: To minimize mess, gently lower the chicken into the oil instead of dropping it in. You can also use a splatter guard to keep your cooking area clean. Turn the tenders only once during frying to ensure a uniform crust and to avoid breaking the breading.
4. Draining the Oil: Once cooked, transfer the tenders to a plate lined with paper towels to absorb excess oil. This step is crucial for maintaining that crispy texture.
Keeping the Tenders Warm and Crispy
After frying, you may need to keep your chicken tenders warm until serving. To do this without sacrificing crispiness, consider the following:
– Oven Method: Preheat your oven to a low temperature (around 200°F or 93°C). Place a wire rack on a baking sheet and arrange the fried tenders in a single layer on the rack. This allows air to circulate around the chicken, keeping it warm and crisp.
– Avoid Steam: Do not cover the tenders with foil or a lid, as this will trap steam and make them soggy. Instead, keep them uncovered in the oven until ready to serve.
Serving Suggestions and Pairing Ideas
Crispy honey mustard chicken tenders are incredibly versatile and can be enjoyed in a variety of ways. Here are some serving suggestions and pairing ideas to elevate your meal:
– Plating: Serve the tenders on a large platter, garnished with fresh herbs or lemon wedges for a pop of color and flavor. You can also create a fun platter for kids by arranging the tenders with colorful vegetables or fruits.
– Wraps: Consider using the chicken tenders in wraps. Layer them with lettuce, tomatoes, and your favorite sauces in a tortilla for a delicious and filling meal.
– Salads: Add sliced tenders to a fresh salad for a hearty lunch or dinner option. They pair nicely with mixed greens, avocado, and a light vinaigrette.
– Sandwiches: For a satisfying sandwich, place the tenders between slices of your favorite bread, add some lettuce, tomato, and a drizzle of honey mustard or ranch dressing.
Dipping Sauce Options
A key component to enjoying chicken tenders is the dipping sauce. Here are some popular options that complement the flavors of crispy honey mustard chicken tenders:
– Honey Mustard Sauce: Enhance the flavor of the chicken with a homemade honey mustard sauce. Mix equal parts honey and Dijon mustard, adjusting to taste.
– Ranch Dressing: A classic choice, ranch dressing pairs perfectly with crispy chicken. You can even make your own ranch dressing by combining sour cream, mayonnaise, buttermilk, garlic powder, and herbs.
– Barbecue Sauce: For a smoky flavor, serve the tenders with a side of barbecue sauce. This tangy option adds a different dimension to the dish.
– Buffalo Sauce: If you enjoy a bit of heat, buffalo sauce is an excellent option. You can drizzle it over the tenders or serve it on the side for dipping.
Meal Pairings
To create a complete meal around your crispy honey mustard chicken tenders, consider these side dish pairings:
– Coleslaw: A crunchy coleslaw adds a refreshing contrast to the savory chicken. Its creamy texture and tangy flavor complement the tenders well.
– French Fries: You can never go wrong with classic fries. Serve with a sprinkle of sea salt or even a dusting of garlic powder for an extra kick.
– Fresh Salad: A light salad with mixed greens, cherry tomatoes, cucumber, and a simple vinaigrette balances the richness of the chicken tenders nicely.
– Vegetable Medley: Roasted or steamed vegetables, such as broccoli, carrots, or green beans, provide a nutritious and colorful addition to your plate.
Storing and Reheating Leftovers
If you find yourself with leftover crispy honey mustard chicken tenders, proper storage and reheating are essential to maintain their quality:
1. Storing: Allow the tenders to cool completely before transferring them to an airtight container. For optimal freshness, store them in the refrigerator for up to 3 days.
2. Freezing: If you want to store them longer, consider freezing the tenders. Place them in a single layer on a baking sheet to freeze solid, then transfer them to a freezer-safe bag. They can last up to 3 months in the freezer.
3. Reheating: To reheat, avoid using the microwave, as it can make the chicken soggy. Instead, preheat your oven to 375°F (190°C) and place the tenders on a wire rack over a baking sheet. Heat them for about 10-15 minutes, or until heated through and crispy again.
Conclusion: Enjoying Your Crispy Honey Mustard Chicken Tenders
Making crispy honey mustard chicken tenders is a rewarding culinary adventure that results in a dish bursting with flavor and texture. From the careful selection of ingredients to the frying process that achieves that coveted crunch, each step contributes to a satisfying meal perfect for any occasion.
Whether you’re serving them as a fun appetizer, a main course for family dinner, or as part of a festive gathering, these chicken tenders are sure to impress. They are versatile enough to pair with an array of sauces and sides, allowing you to customize your dining experience.
Encouraging you to experiment with this recipe, consider adding your own twist—perhaps a different spice mix in the flour, or using a flavored breadcrumb. The joy of cooking is in the creativity, and homemade comfort food like this can bring everyone together around the table. Enjoy your crispy honey mustard chicken tenders, and relish the delicious flavors that come from your own kitchen!

