Introduction
If you have a sweet tooth and a penchant for chocolate, the lava cake is a dessert that likely holds a special place in your heart. Known for its molten center that flows like a river of chocolate when cut open, lava cakes have become a staple on dessert menus and a favorite among home bakers. Their rich, indulgent nature invites anyone with a craving for something decadent to indulge without hesitation.
Now, imagine taking that classic dessert experience and giving it a delightful twist. Enter the peanut butter cup lava cake—a harmonious fusion of two beloved flavors: chocolate and peanut butter. This irresistible combination is not just for peanut butter enthusiasts; it appeals to a wide audience, bringing together those who love the creaminess of peanut butter and the richness of chocolate in one fantastic dessert. The allure of these lava cakes lies not only in their taste but also in their simplicity. With just a few ingredients and minimal preparation, you can create a show-stopping dessert that is sure to impress.
Understanding Lava Cakes
Lava cakes, also known as molten chocolate cakes, are a dessert that combines the elegance of a soufflé with the indulgence of a chocolate cake. The concept of a lava cake traces back to the culinary scene of the 1980s. Chef Jean-Georges Vongerichten is often credited with bringing this delightful dessert to the forefront, creating a sensation that would sweep across fine dining establishments worldwide.
At its core, a lava cake is a rich, chocolate cake that is baked just long enough for the outer layer to firm up while leaving the inside delightfully gooey. The magic of the lava cake lies in the precise baking time and temperature. When baked properly, the outer layer solidifies while the inner core remains molten, creating a luxurious texture that flows out when the cake is sliced open. This unique characteristic is achieved through a delicate balance of ingredients—primarily eggs and butter—which create a light structure while allowing the center to remain runny.
In recent years, there has been a growing trend in the culinary world to incorporate various flavors and fillings into the traditional lava cake. From fruity variations to nutty twists, bakers are experimenting with new ingredients, with peanut butter being one of the most popular choices. The creamy richness of peanut butter pairs beautifully with chocolate, making it the perfect addition to the classic lava cake, which transforms it into a comforting, indulgent treat.
Ingredients Breakdown
To create the perfect peanut butter cup lava cakes, it’s essential to understand the key ingredients that contribute to their rich flavor and signature texture. Each component plays a crucial role in the overall result, ensuring that every bite is a delightful experience.
Unsalted Butter
The foundation of any good cake starts with butter. Unsalted butter is preferred in this recipe as it allows for precise control over the salt content, ensuring a balanced flavor. The butter not only adds richness to the cake but also helps create a tender texture. When melted, it combines seamlessly with the chocolate, creating a luscious batter that is both smooth and decadent.
Semi-Sweet Chocolate Chips
Using high-quality semi-sweet chocolate chips is a must for achieving a rich, chocolatey flavor in your lava cakes. The chocolate serves as the primary flavor base, and its melting point is ideal for creating that gooey center we all crave. Whether you opt for a brand you love or choose gourmet chocolate, the quality of the chocolate will directly impact the final outcome of your dessert.
Creamy Peanut Butter
No peanut butter cup lava cake would be complete without creamy peanut butter. This ingredient adds a luscious, nutty flavor that beautifully complements the rich chocolate. When combined with the other ingredients, peanut butter contributes to the cake’s overall moisture and helps to create that coveted molten center. For the best results, choose a high-quality peanut butter that is smooth and free from added sugars or oils.
Powdered Sugar
Powdered sugar, or confectioners’ sugar, is used in this recipe to sweeten the batter without adding graininess. Its fine texture allows for easy incorporation into the mixture, providing the right level of sweetness to balance the rich flavors of chocolate and peanut butter. Additionally, powdered sugar is often used for dusting the finished lava cakes, adding a touch of elegance to the presentation.
Eggs and Egg Yolks
Eggs are a crucial ingredient in any cake recipe, and in the case of lava cakes, they serve multiple functions. Whole eggs provide structure and stability to the cake, while egg yolks contribute richness and moisture. The combination creates a dense yet tender crumb that bakes beautifully, forming the outer layer while leaving the center molten.
Vanilla Extract
Vanilla extract is the secret ingredient that can elevate the flavor profile of your peanut butter cup lava cakes. A splash of pure vanilla enhances the overall taste, adding depth and a warm aroma that complements the chocolate and peanut butter. It’s a small addition that makes a significant impact on the final product.
All-Purpose Flour
All-purpose flour serves as the backbone of the cake, providing structure and stability. In moderation, it helps bind the ingredients together while allowing the cake to rise slightly during baking. Care should be taken not to overmix the batter, as this can result in a denser texture rather than the desired light and airy consistency.
Salt
Salt is a key component in baking that enhances the sweetness of the cake and balances the flavors. A small pinch of salt can make a world of difference, ensuring that the chocolate and peanut butter flavors shine through without being overly sweet.
Frozen Mini Peanut Butter Cups
For the ultimate indulgence, frozen mini peanut butter cups are added to the center of each lava cake. These delightful morsels not only add an extra layer of flavor but also contribute to the molten effect when baked. As they melt in the oven, they create a rich, gooey center that oozes out when you take your first bite, making each dessert an unforgettable experience.
With these carefully selected ingredients, you are well on your way to creating decadent peanut butter cup lava cakes that will delight any chocolate lover. The combination of flavors and textures in this dessert is sure to impress your family and friends, making it a perfect indulgence for special occasions or a simple weeknight treat.
Initial Steps for Preparation
Now that we understand the importance of each ingredient, let’s delve into the initial steps of preparing these mouthwatering peanut butter cup lava cakes. The process is straightforward and requires minimal equipment, making it accessible for both novice and experienced bakers.
1. Preheat Your Oven: Start by preheating your oven to 425°F (220°C). This high temperature is essential for achieving that perfect molten center while ensuring the outer layer is cooked just enough to hold its shape.
2. Prepare the Ramekins: Grease four ramekins with unsalted butter, ensuring that every nook and cranny is coated. This step is crucial for easy removal of the lava cakes once they are baked. To further prevent sticking, you can dust the greased ramekins with a light sprinkle of cocoa powder, tapping out any excess.
3. Melt the Chocolate and Butter: In a microwave-safe bowl, combine the semi-sweet chocolate chips and unsalted butter. Heat them in the microwave in 30-second intervals, stirring after each interval until the mixture is smooth and fully melted. This method ensures that the chocolate doesn’t scorch and maintains its glossy appearance.
4. Mix in the Peanut Butter: Once the chocolate and butter are melted and combined, stir in the creamy peanut butter until smooth. This step infuses the chocolate mixture with the rich, nutty flavor that will define your lava cakes.
5. Combine the Dry Ingredients: In a separate bowl, whisk together the powdered sugar, eggs, egg yolks, and vanilla extract until well combined. Gradually add this mixture to the chocolate and peanut butter blend, stirring gently to combine. Be careful not to overmix, as this can lead to a denser cake.
6. Add the Flour and Salt: Sift in the all-purpose flour and salt, folding them into the batter with a spatula until just combined. The goal is to create a smooth batter without overworking it, which can negatively affect the texture of the final cake.
7. Fill the Ramekins: Divide the batter evenly among the prepared ramekins, filling each about halfway. Then, place a frozen mini peanut butter cup in the center of each ramekin, pressing it down gently. Top off with additional batter until each ramekin is about three-quarters full, leaving space for the cakes to rise.
With these initial steps completed, you are now ready to bake your peanut butter cup lava cakes. The anticipation builds as the aroma of chocolate fills your kitchen, promising a delicious reward for your efforts.
Stay tuned for the next section, where we’ll discuss the baking process, how to achieve that perfect molten center, and some expert tips for serving these delectable treats!

Preparation Steps for Peanut Butter Cup Lava Cakes
Preheating the Oven
To achieve the perfect texture for your peanut butter cup lava cakes, start by preheating your oven to 425°F (220°C). This high temperature is crucial as it ensures that the outer edges of the cakes cook quickly while leaving the center gooey and molten. Additionally, properly greasing your ramekins is equally important. Use butter or non-stick cooking spray to coat the insides generously; this will help the cakes release easily once baked. Dusting the greased ramekins with a little cocoa powder can also prevent sticking and add a subtle chocolate flavor.
Melting the Chocolate and Butter
Next, you’ll want to melt your chocolate and butter together to create a smooth and luscious mixture. You can use a double boiler method, which involves placing a heat-safe bowl over a pot of simmering water, ensuring that the bowl doesn’t touch the water. Stir the chocolate and butter together until fully melted. Alternatively, you can melt them in the microwave by placing them in a microwave-safe bowl and heating in 30-second increments, stirring in between to prevent burning. Achieving a smooth consistency is essential, as any lumps can affect the final texture of your lava cakes.
Mixing Peanut Butter
Once your chocolate and butter mixture has cooled slightly, it’s time to incorporate the star ingredient: peanut butter. Choose a creamy variety for the best results, as it blends seamlessly into the chocolate. Add the peanut butter to the melted chocolate and stir until fully combined. For an extra layer of flavor, consider using a flavored peanut butter, such as dark chocolate or honey-roasted. This step is crucial as it creates the rich, peanut buttery center that will ooze out when you cut into the lava cake.
Combining Dry and Wet Ingredients
In a separate bowl, combine your dry ingredients, which typically include flour, sugar, and a pinch of salt. Whisk these together to ensure they are evenly distributed. When you’re ready to combine the dry and wet mixtures, be careful not to overmix. Gently fold the dry ingredients into the chocolate-peanut butter mixture until just combined. This will help maintain the light and airy texture of the cakes. Overmixing can lead to dense lava cakes, which is not the desired outcome.
Assembling the Lava Cakes
Now comes the fun part: assembling the lava cakes. Start by spooning a small amount of the batter into the bottom of each greased ramekin, filling them about one-third full. Then, place a peanut butter cup or a spoonful of peanut butter in the center. Top with more batter until each ramekin is filled to about three-quarters full. This layering technique ensures that the peanut butter cup is nestled within the batter, creating that irresistible molten center.
Baking Instructions
Carefully place your assembled ramekins in the preheated oven. Bake for 12-14 minutes, keeping a close eye on them to avoid overbaking. The tops should look set, but the centers should still jiggle slightly when you gently shake the ramekins. This is your indicator that the lava cakes will have that coveted gooey center. Once done, remove them from the oven and allow them to cool for 1-2 minutes before inverting.
Resting and Serving
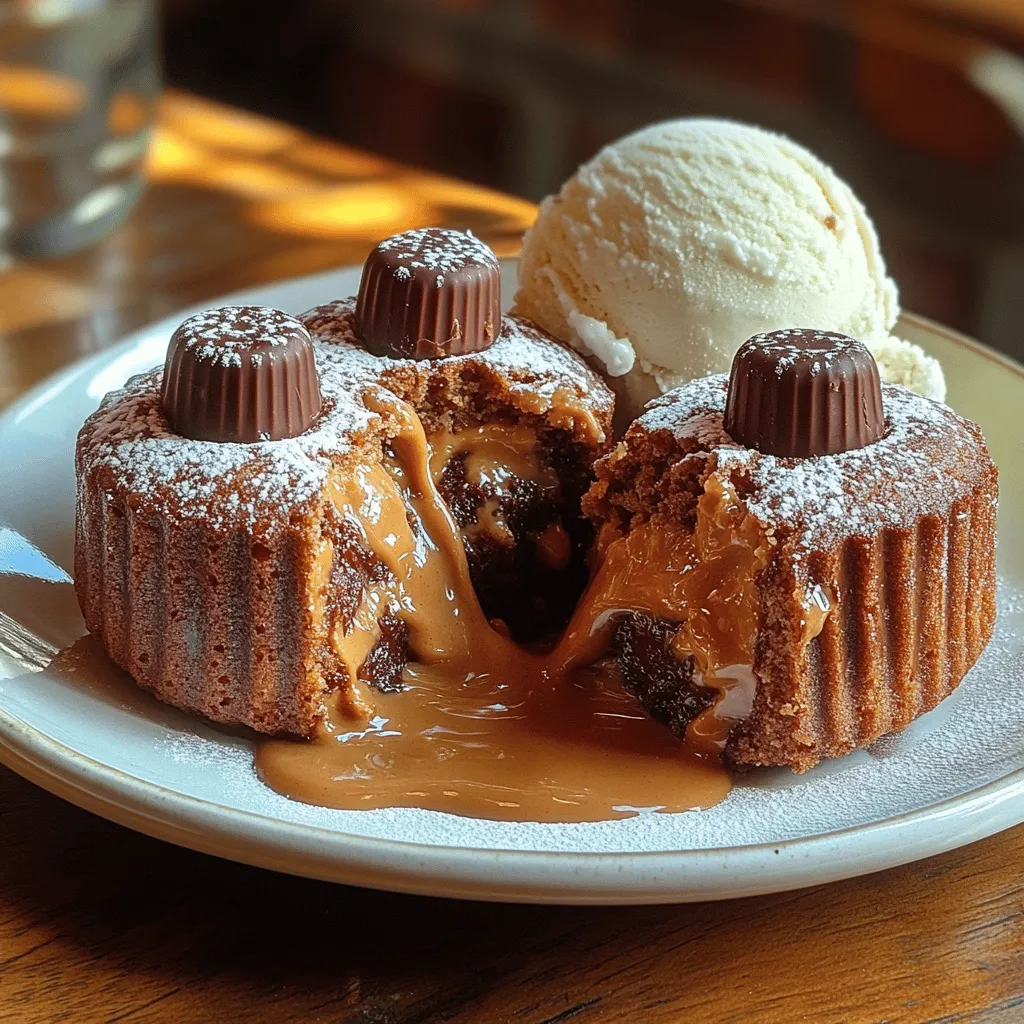
Letting the lava cakes rest for a minute before inverting them is essential. This resting period allows the edges to firm up slightly, making the cakes easier to remove from the ramekins. To serve, run a knife around the edges of each ramekin, then carefully invert them onto individual plates. Gently lift the ramekin off, allowing the warm lava cake to slide out. The moment you cut into the cake, the warm, gooey center will flow out, creating a delightful presentation.
Serving Suggestions and Pairings
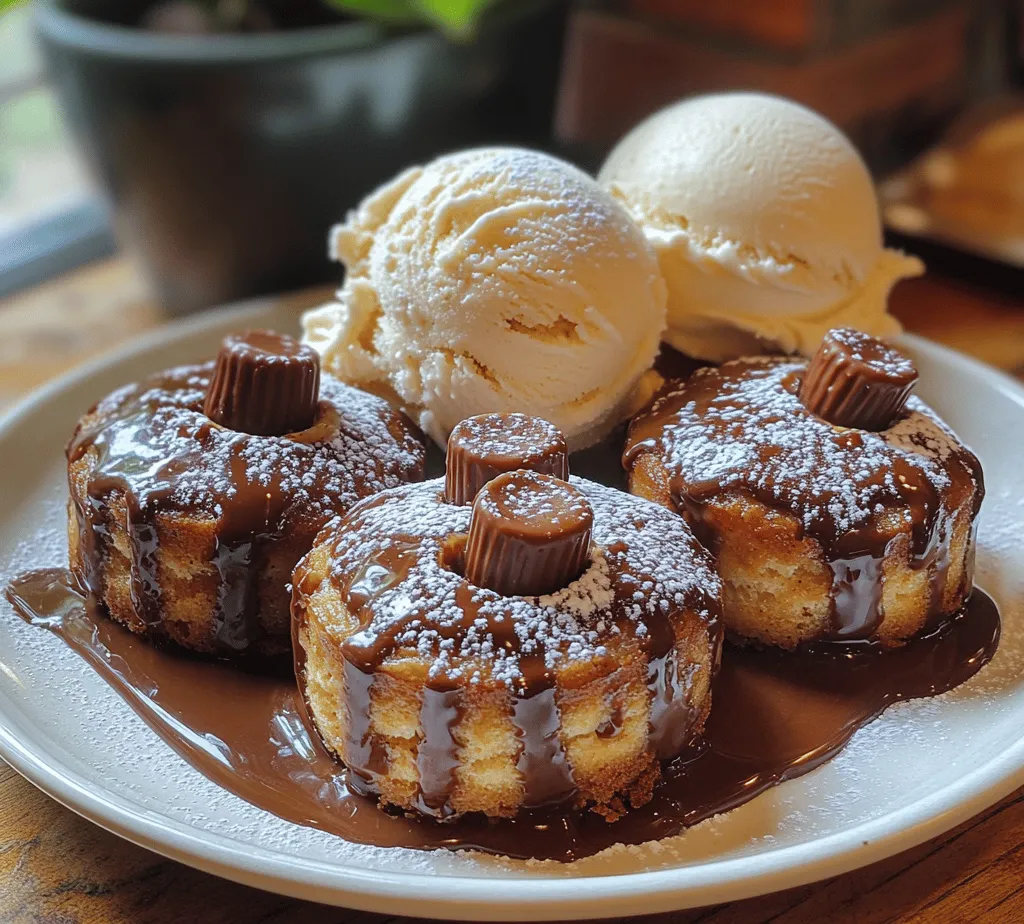
To elevate your peanut butter cup lava cakes, consider garnishing them with a light dusting of powdered sugar for an elegant touch. A scoop of vanilla ice cream pairs beautifully with the warm chocolate and peanut butter, providing a creamy contrast that enhances the overall experience. You can also add fresh berries, such as strawberries or raspberries, for a burst of freshness and color. Drizzling chocolate sauce over the top adds extra indulgence, making each bite even more heavenly.
Nutritional Information
When it comes to indulging in desserts like peanut butter cup lava cakes, it’s important to consider the nutritional content. Each serving typically contains approximately 350-400 calories, depending on the specific ingredients and portion sizes. While these cakes are a treat, they do contain fat and sugar, so moderation is key. For those following specific dietary guidelines, be aware of the caloric content and consider enjoying this dessert on special occasions.
Variations and Customizations
If you’re looking to cater to different dietary preferences or simply want to experiment, there are several variations you can try with this recipe. For a gluten-free version, substitute all-purpose flour with a gluten-free flour blend. If you want to make it vegan, use dairy-free chocolate and replace the eggs with flax eggs or a commercial egg replacer. Additionally, consider incorporating different types of nut butters such as almond or cashew butter for a unique twist. If you’re feeling adventurous, experiment with different candies or flavorings by adding crushed cookies or flavored extracts to the batter.
Conclusion
In conclusion, making peanut butter cup lava cakes is a delightful experience that results in a decadent dessert perfect for any occasion. The combination of rich chocolate, creamy peanut butter, and the thrill of the molten center makes these cakes irresistible. They’re not only easy to prepare but also allow for personalization, ensuring that each batch can be tailored to your taste preferences. Whether you’re celebrating a special event or enjoying a cozy night in, these lava cakes are sure to impress. Don’t hesitate to experiment with the recipe, and indulge in the rich flavors and textures that define this extraordinary dessert.

