Introduction
There’s something undeniably comforting about homemade biscuits, isn’t there? The aroma of freshly baked goods wafting through the kitchen can evoke feelings of nostalgia, warmth, and satisfaction. Biscuits are a quintessential comfort food, cherished for their flaky texture and rich flavor. Among the myriad of biscuit recipes, the Sticky Honey Butter Biscuits stand out as a delightful fusion of sweet and savory that can elevate any meal, be it breakfast, brunch, or a cozy evening snack.
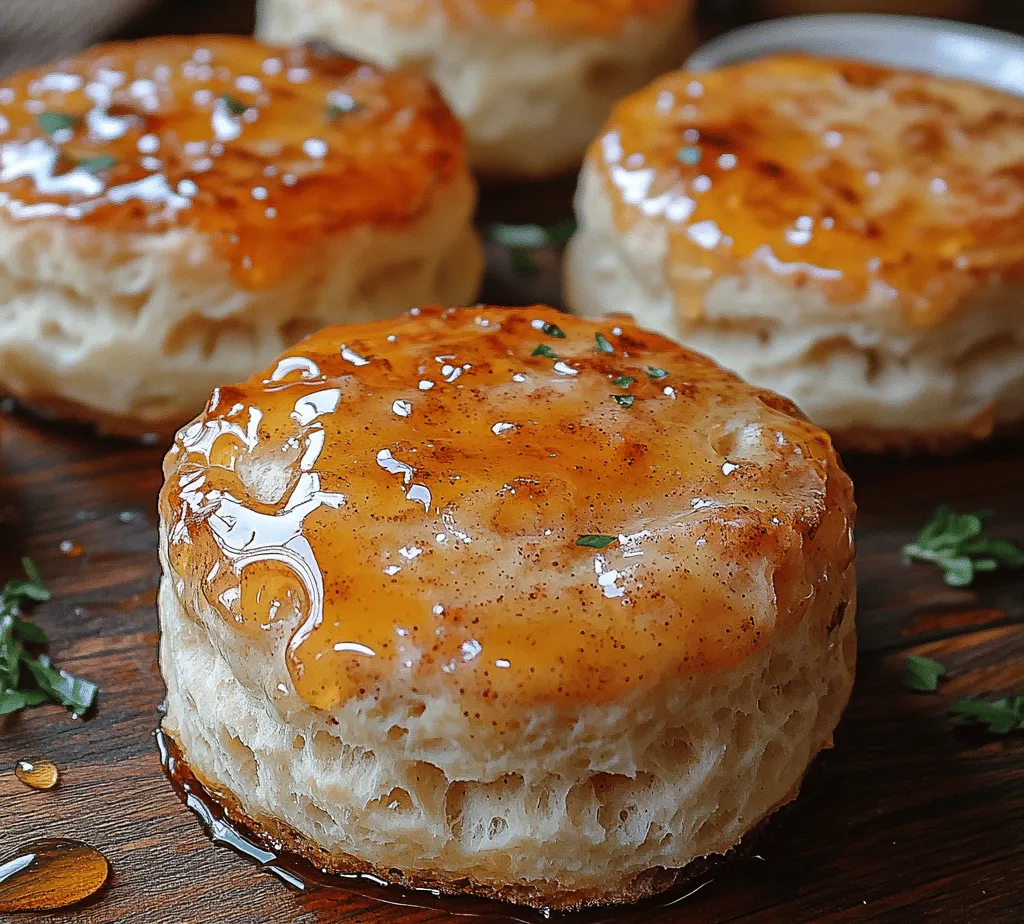
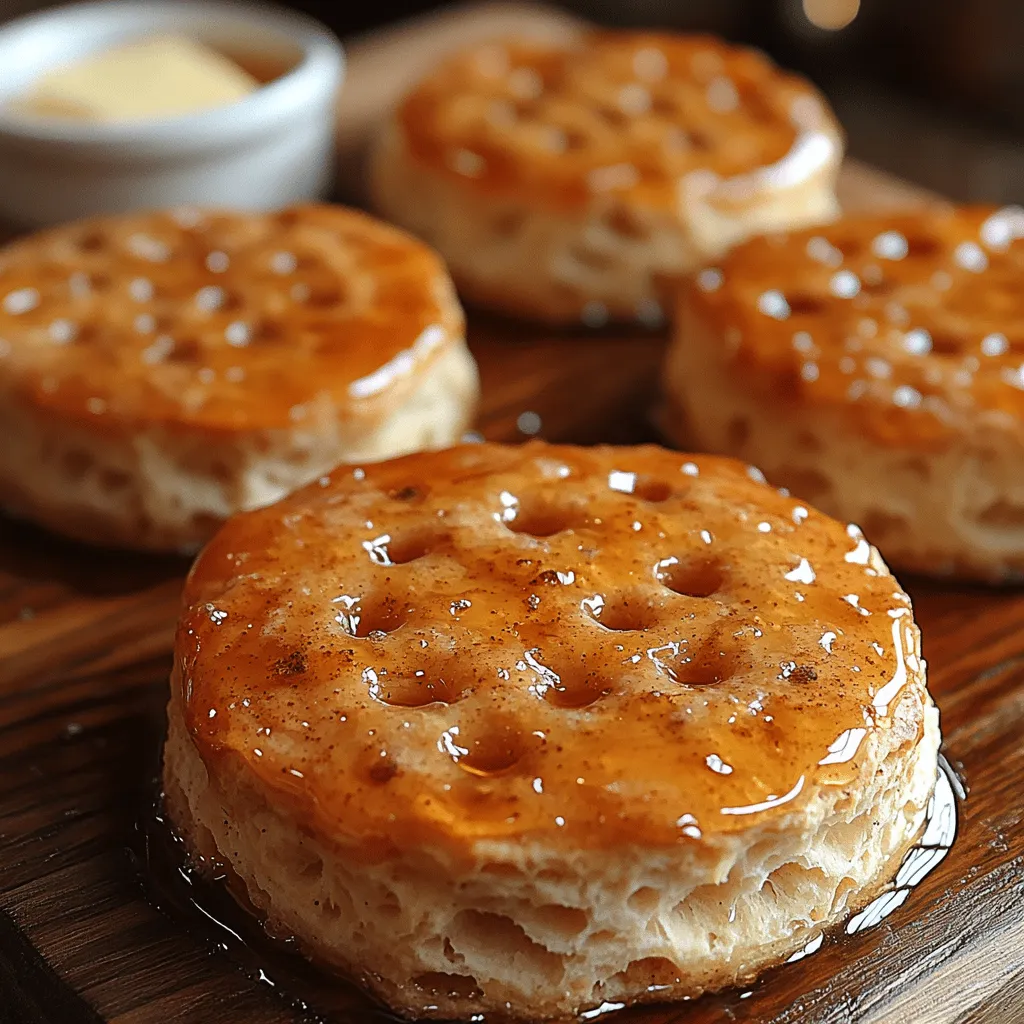
These biscuits are not just a treat; they are an experience. Imagine biting into a warm, buttery biscuit, its surface glistening with a luscious honey glaze that perfectly balances the richness of the butter. The combination of flavors offers a unique twist that is both indulgent and satisfying. The beauty of Sticky Honey Butter Biscuits lies in their simplicity, yet they bring an unexpected sophistication to the table.
To create these delectable biscuits, the quality of your ingredients plays a crucial role. Using fresh, high-quality components ensures maximum flavor and the best texture. From the flour to the butter, each ingredient contributes to the overall success of the recipe. In this article, we’ll delve into the essential ingredients, their significance, and how to craft these irresistible Sticky Honey Butter Biscuits from scratch.
Understanding the Ingredients
To create the perfect Sticky Honey Butter Biscuits, it’s essential to understand the role of each ingredient. Let’s break down the key components that make these biscuits a standout.
Flour
The backbone of any biscuit recipe, flour provides structure. All-purpose flour is commonly used due to its balance of protein content, which helps achieve that light and fluffy texture. When measuring flour, it’s critical to avoid packing it down into the measuring cup, as this can lead to dry biscuits. Instead, spoon the flour into the cup and level it off for accuracy.
Butter
Butter is the heart and soul of biscuits. Using unsalted butter is recommended since it allows you to control the saltiness of your biscuits, ensuring that the sweetness from the honey shines through. The temperature of the butter is also vital: cold butter is essential for achieving flakiness. When incorporated into the flour, it creates small pockets of fat that, when baked, produce a tender and airy biscuit.
Buttermilk
Buttermilk is another key ingredient that contributes to the biscuits’ tenderness. The acidity in buttermilk activates the baking powder, helping the biscuits rise and develop a light texture. Additionally, buttermilk adds a subtle tang that balances the sweetness of the honey, creating a delightful flavor profile. If you don’t have buttermilk on hand, you can easily make a substitute by adding a tablespoon of vinegar or lemon juice to a cup of milk and letting it sit for a few minutes.
Honey
Of course, no Sticky Honey Butter Biscuits would be complete without honey. This natural sweetener not only adds a rich flavor but also enhances the biscuits’ moistness. The honey glaze that coats the biscuits after baking provides a sticky, sweet finish that elevates the experience and makes each bite utterly irresistible.
Optional Ingredients
While the core ingredients are essential, optional flavor enhancers such as cinnamon can take your biscuits to the next level. A dash of cinnamon adds warmth and complexity, making the biscuits even more delightful. Feel free to experiment with other spices or additions like vanilla extract for a unique twist.
Step-by-Step Guide to Making Sticky Honey Butter Biscuits
Ready to dive into the kitchen and whip up some Sticky Honey Butter Biscuits? Follow this step-by-step guide to ensure your biscuits turn out perfect every time.
Prepping the Kitchen
Before you start, it’s crucial to prep your kitchen for a seamless baking experience. Ensure your workspace is clean and organized to avoid any last-minute scrambling. Gather all your ingredients and tools, including measuring cups, mixing bowls, a pastry cutter or fork, and a baking sheet.
Preheating the Oven
Begin by preheating your oven to 425°F (220°C). This high temperature is essential for achieving the proper rise and golden color of your biscuits. A hot oven ensures that the cold butter starts to melt as soon as the biscuits are placed inside, creating steam that contributes to their flaky texture.
Preparing the Baking Sheet
Line a baking sheet with parchment paper or a silicone baking mat for easy cleanup and to prevent the biscuits from sticking. This step is often overlooked, but it can save you time and frustration later, allowing you to focus on enjoying your freshly baked biscuits.
Preparing the Dry Ingredients
With your oven preheated and baking sheet ready, it’s time to prepare the dry ingredients. In a large mixing bowl, combine the all-purpose flour, baking powder, baking soda, and salt.
Proper measurement is crucial for biscuit perfection. To measure the flour correctly, use the spoon-and-level method: spoon the flour into your measuring cup and level it off with a knife. This ensures you’re not using too much flour, which could result in dense biscuits.
Once combined, whisk the dry ingredients together thoroughly. This step ensures that the leavening agents (baking powder and baking soda) are evenly distributed, which is vital for optimal biscuit rise.
Incorporating Butter
Next, it’s time to incorporate the cold unsalted butter into the dry mixture. There are two popular methods to achieve this: using a pastry cutter or your hands.
If you’re using a pastry cutter, cut the cold butter into small cubes and add it to the flour mixture. Press down on the butter with the cutter, mixing until the mixture resembles coarse crumbs, with some pea-sized pieces of butter remaining. If you prefer to use your hands, quickly rub the butter into the flour, being careful not to overwork the dough. The key is to keep the butter cold, as this will help create the flaky layers that are characteristic of great biscuits.
Mixing Wet Ingredients
Once the butter is incorporated, it’s time to mix the wet ingredients. In a separate bowl, combine the buttermilk and honey, stirring until the honey is fully dissolved. The combination of these ingredients not only adds sweetness but also contributes to the biscuits’ tenderness.
As you prepare to mix the wet and dry ingredients, it’s important to remember that overmixing can lead to tough biscuits. Gently pour the wet mixture into the dry ingredients and use a spatula or wooden spoon to stir until just combined. The dough should be slightly sticky but manageable. If it feels too dry, you can add a splash more buttermilk, but be careful not to add too much.
With the wet and dry ingredients combined, you’re on your way to baking some truly delicious Sticky Honey Butter Biscuits. Stay tuned for the next steps, where we’ll guide you through shaping, baking, and glazing these delightful treats.
—
This introduction and initial preparation will set the stage for creating the perfect Sticky Honey Butter Biscuits, ensuring that you have all the essential knowledge and steps to achieve biscuit perfection. Get ready to enjoy an unforgettable baking experience!

How to Avoid Overmixing to Maintain a Light, Airy Texture
Creating the perfect Sticky Honey Butter Biscuits hinges on the delicate balance of mixing. Overmixing can lead to tough, dense biscuits that lack the light, airy texture we all desire. To avoid this common pitfall, it’s essential to mix the dough just until combined. Once you add the wet ingredients to the dry ones, stir gently with a spatula or wooden spoon. Aim for a cohesive dough with a few floury streaks remaining; it will continue to come together as you shape it. Remember, the less you handle the dough, the better your biscuits will rise.
Shaping the Biscuits
Once your dough is ready, it’s time to shape your biscuits. This step is crucial for achieving those beautiful layers that make biscuits so delightful.
Techniques for Folding Dough to Create Layers
To create flaky layers, turn your dough onto a floured surface and gently pat it into a rectangle about 1 inch thick. Next, fold the dough in thirds, like folding a letter, and then rotate it 90 degrees. This technique develops layers as the butter creates steam during baking, resulting in fluffy biscuits. Repeat this folding process two to three times, being careful not to overwork the dough.
Tips for Cutting Biscuits Without Compressing the Dough
When it comes to cutting your biscuits, use a sharp biscuit cutter or a glass. Avoid twisting the cutter as you press down, as this can seal the edges and prevent rising. Instead, make a clean cut straight down and lift the cutter straight up. Place the cut biscuits onto a baking sheet lined with parchment paper, ensuring they sit close together for optimal rise.
Baking the Biscuits
With your biscuits cut and ready to go, it’s time to bake them to golden perfection.
Monitoring the Baking Process for Perfect Golden-Brown Results
Preheat your oven to 425°F (220°C) and place the baking sheet in the center of the oven. Keep a close eye on your biscuits as they bake. You’re looking for a beautiful golden-brown top, which typically takes around 12-15 minutes. The edges should be crisp, while the centers remain soft and fluffy.
The Significance of Spacing Biscuits on the Baking Sheet
Proper spacing of your biscuits is essential for achieving the best texture. When placed close together, the biscuits will rise higher and create softer sides. If spaced too far apart, they may spread out instead of rising, resulting in a flatter biscuit. A good rule of thumb is to place them about 1 inch apart if you prefer a crunchy edge, or touching for softer sides.
Preparing the Sticky Honey Butter
While your biscuits are baking, you can prepare the pièce de résistance: the sticky honey butter. This simple yet luxurious topping elevates your biscuits from delicious to divine.
Step-by-Step Instructions for Whipping Up the Honey Butter
To make the honey butter, start with unsalted butter at room temperature. In a medium bowl, combine ½ cup of softened butter with ¼ cup of honey. Using a hand mixer or a whisk, beat the butter and honey together until smooth and creamy. For an added depth of flavor, consider adding a pinch of sea salt or a dash of cinnamon. These optional ingredients can enhance the overall taste profile of your honey butter, making it even more irresistible.
Glazing the Biscuits
Once your biscuits are out of the oven, it’s time for the final touch.
Best Practices for Glazing Biscuits Immediately After Baking
The key to glazing your biscuits is to do it while they are still warm. Using a pastry brush, generously apply the sticky honey butter over the tops of the biscuits. The warmth will melt the butter slightly, allowing it to absorb into the biscuits for an enhanced flavor experience. Be generous; this is the moment when your biscuits truly transform!
How the Warm Biscuits Absorb the Sticky Honey Butter for Enhanced Flavor
As the honey butter seeps into the warm biscuits, it creates a delightful contrast between the crispy exterior and the tender, melt-in-your-mouth interior. The combination of sweet honey and rich butter complements the flaky layers beautifully, making every bite a heavenly experience.
Serving Suggestions
Now that your Sticky Honey Butter Biscuits are complete, it’s time to serve them up in style.
Ideas for Serving Sticky Honey Butter Biscuits for Breakfast or Brunch
These biscuits are perfect for breakfast or brunch. Serve them warm on a platter, allowing guests to help themselves. Pair them with a fresh fruit salad or a side of scrambled eggs for a well-rounded meal. For a special touch, consider offering a selection of jams and preserves alongside the honey butter for an added flavor experience.
Pairing Options with Coffee, Tea, or Breakfast Spreads
Sticky Honey Butter Biscuits pair wonderfully with a steaming cup of coffee or tea. The sweetness of the biscuits complements the bitterness of coffee, while a cup of herbal tea can enhance the overall comfort of the meal. If you’re feeling adventurous, try spreading a bit of cream cheese or ricotta cheese on a biscuit before adding the honey butter for a decadent twist.
Creative Uses for Leftover Honey Butter
If you find yourself with leftover honey butter, don’t let it go to waste! Spread it on warm toast, pancakes, or waffles for a delicious breakfast treat. You can also use it as a topping for muffins or as a sweet addition to roasted vegetables. The possibilities are endless!
Nutritional Information
Understanding the nutritional aspects of your Sticky Honey Butter Biscuits can help you enjoy them guilt-free.
Overview of the Nutritional Aspects of Sticky Honey Butter Biscuits
Each biscuit, including the sticky honey butter, contains approximately 250 calories. The caloric content may vary depending on the specific ingredients used and the size of the biscuits.
Caloric Content and Basic Nutritional Breakdown Per Serving
On average, a serving (one biscuit) has the following nutritional breakdown:
– Calories: 250
– Total Fat: 12g
– Saturated Fat: 7g
– Carbohydrates: 33g
– Fiber: 1g
– Sugars: 8g
– Protein: 3g
This comforting treat provides a satisfying indulgence while still being a relatively balanced option for breakfast or brunch when enjoyed in moderation.
Conclusion
The joy of making and enjoying Sticky Honey Butter Biscuits lies not only in their sweet, buttery flavor but also in the process of creating something homemade. These biscuits are a delightful addition to any breakfast or brunch table and can easily become a family favorite.
Experiment with the recipe by adding your favorite spices or mix-ins, and watch how this simple dish can bring loved ones together. Homemade comfort food like this is more than just a meal; it’s an experience that fosters connection and warmth. So roll up your sleeves, gather your ingredients, and enjoy the process of creating these sticky, sweet delights that are sure to impress everyone at your table.

