Introduction
There’s something undeniably comforting about homemade bread. The aroma of freshly baked goods wafting through your kitchen can evoke memories of family gatherings, holiday feasts, and warm, cozy evenings. Homemade bread is more than just food; it’s a labor of love that transforms simple ingredients into a warm embrace, making every meal feel special. Among the myriad of bread options, dinner rolls stand out for their versatility and appeal.
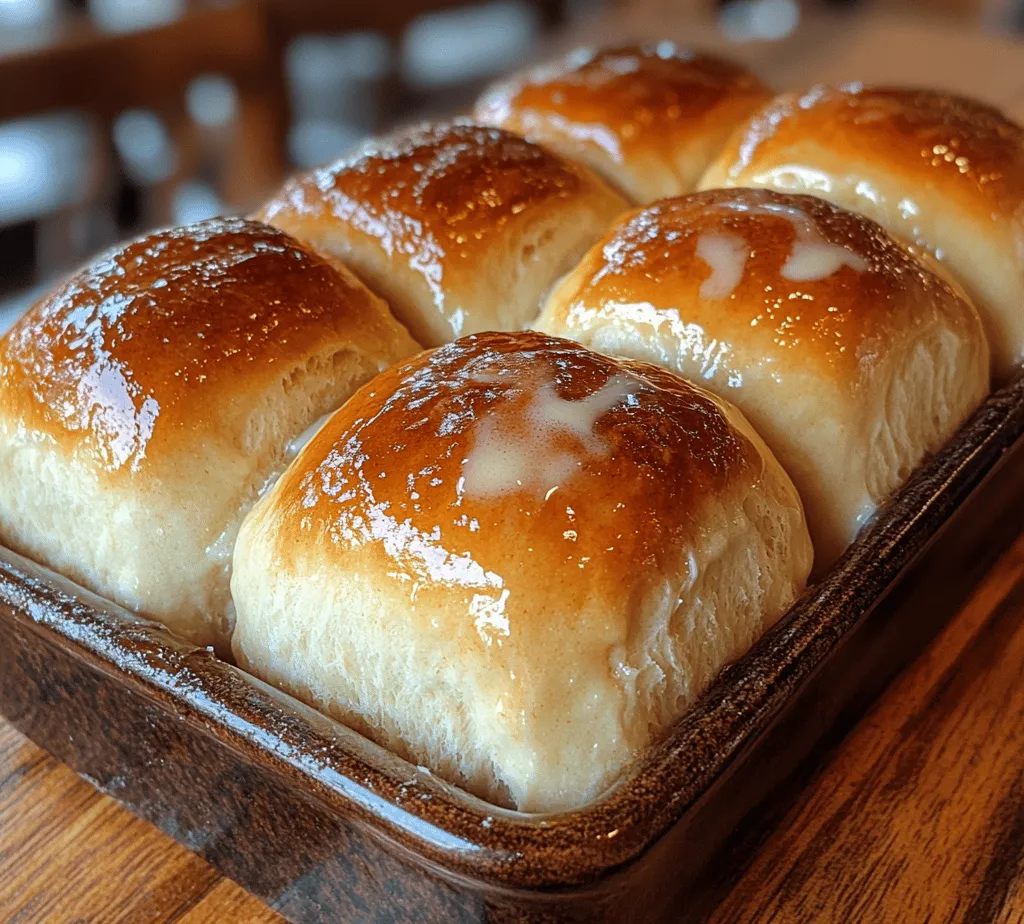
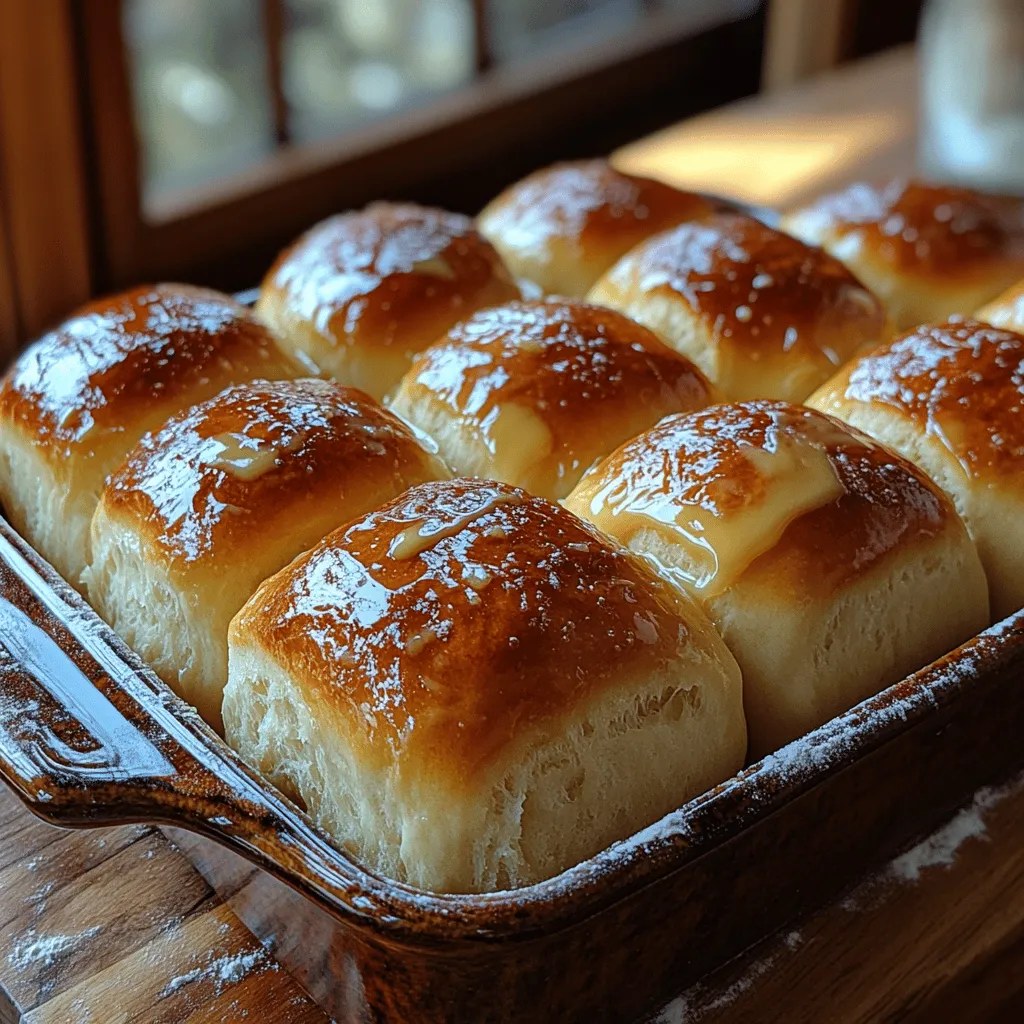
Today, we’re diving into a recipe for the softest, bakery-style dinner rolls that will elevate any meal or occasion. Imagine pulling a tray of golden, fluffy rolls from the oven, their soft exteriors beckoning with a promise of delightful texture and flavor. These rolls are perfect for slathering with butter, using as a sandwich base, or simply enjoying on their own. Their light and airy structure makes them a favorite at family dinners, festive gatherings, and even casual weeknight meals.
In this article, we will explore the rich history of dinner rolls, the key ingredients that contribute to their irresistible softness, and provide you with a detailed step-by-step guide to creating these bakery-style rolls in the comfort of your home. Whether you’re a novice baker or an experienced home cook, this recipe will guide you to achieve bakery-worthy results right in your own kitchen.
Understanding the Basics of Dinner Rolls
Dinner rolls have a long-standing place in culinary traditions around the world. These small, usually round pieces of bread are served alongside meals, enhancing the dining experience with their soft texture and comforting presence. The origin of dinner rolls can be traced back to various cultures, each adapting the basic concept to their unique culinary practices. From the fluffy Parker House rolls of New England to the rich, buttery Hawaiian rolls, the variations are numerous, but the essence remains the same: to complement and elevate everyday meals.
The role of dinner rolls in meals extends beyond mere filling; they are often a symbol of hospitality and warmth. Whether gracing the table during Thanksgiving, Christmas, or Sunday dinners, these rolls serve as a centerpiece that brings people together. Freshly baked rolls can make even the simplest meal feel extravagant, transforming a weeknight dinner into a special occasion.
One of the key reasons to opt for homemade dinner rolls over store-bought options is the unparalleled freshness and flavor that comes from baking at home. Store-bought rolls often contain preservatives and artificial ingredients designed to extend shelf life, sacrificing taste and texture in the process. When you make dinner rolls from scratch, you control the ingredients, ensuring that every bite is filled with wholesome goodness. Plus, the satisfaction of kneading dough and watching it rise is a rewarding experience that connects you to the art of baking.
Key Ingredients for Soft Dinner Rolls
To achieve the softest, bakery-style dinner rolls, it’s essential to understand the role of each ingredient in the recipe. Here’s a breakdown of the key components that contribute to the perfect roll:
All-Purpose Flour
All-purpose flour is the backbone of any bread recipe, providing the necessary structure and texture. It contains a moderate amount of protein, which is crucial for gluten development. Gluten gives bread its elasticity and chewiness, allowing it to rise and maintain its shape. For the softest dinner rolls, ensure you measure your flour correctly—too much flour can lead to dense rolls, while too little can prevent proper structure.
Sugar
Sugar plays several vital roles in bread-making. First, it enhances the flavor, giving the rolls a subtle sweetness that balances the savory elements of a meal. Second, sugar acts as food for the yeast, helping to activate it and promote fermentation during the rising process. This fermentation is crucial for developing the light and airy texture we desire in dinner rolls. A small amount of sugar goes a long way in ensuring your rolls are deliciously tender and flavorful.
Instant Yeast
When it comes to yeast, instant yeast is the star of this recipe. Unlike active dry yeast, which requires proofing in warm water before use, instant yeast can be mixed directly into the dry ingredients. This convenience makes it a favorite among home bakers. Instant yeast also works quickly, allowing your dough to rise faster, which is perfect for those who want freshly baked rolls in a hurry. If you can’t find instant yeast, you can substitute it with active dry yeast, but be sure to proof it first to activate its leavening power.
Warm Milk
Warm milk is another essential ingredient that contributes to the overall flavor and texture of the rolls. The ideal temperature for yeast activation is between 100°F to 110°F (37°C to 43°C). Warm milk not only helps to dissolve the sugar and yeast but also enriches the dough, resulting in soft, tender rolls. Make sure the milk is warm but not hot, as excessive heat can kill the yeast and prevent proper rising.
Unsalted Butter
Butter adds richness and flavor to dinner rolls, making them decadent and soft. Unsalted butter is preferred because it allows you to control the salt content in your recipe. The fat in the butter coats the flour proteins, inhibiting gluten formation and resulting in a softer texture. Incorporating melted butter into the dough ensures that these rolls are not only soft but also have a delightful buttery flavor that enhances every bite.
Eggs
Eggs play a dual role in the making of soft dinner rolls. They provide moisture and richness, contributing to the overall tenderness of the rolls. Additionally, eggs help with the structure, giving the dough stability and a beautiful golden color when baked. For an extra dose of flavor and richness, some bakers prefer to use egg yolks instead of whole eggs, but the latter works perfectly for this recipe.
Optional Honey
While honey is not a mandatory ingredient, it can elevate the flavor profile of your dinner rolls. Honey adds a hint of natural sweetness and complexity, creating a delightful contrast to the savory elements of a meal. Additionally, honey can help retain moisture, keeping the rolls soft and fresh for longer. If you decide to include honey, you can reduce the amount of sugar in the recipe to balance the sweetness.
Step-by-Step Guide to Making the Softest Dinner Rolls
Now that you understand the essential ingredients, it’s time to dive into the step-by-step process of making the softest dinner rolls. Each step is crucial to achieving the perfect texture and flavor, so let’s get started!
Step 1: Gather Your Ingredients
Before you begin, make sure you have all the necessary ingredients at hand. Here’s what you’ll need:
– 4 cups all-purpose flour, plus more for dusting
– 1/4 cup granulated sugar
– 2 1/4 teaspoons instant yeast (1 packet)
– 1 teaspoon salt
– 1 cup warm milk (about 110°F)
– 1/2 cup unsalted butter, melted and cooled slightly
– 2 large eggs
– Optional: 1/4 cup honey (to taste)
Step 2: Prepare the Dough
In a large mixing bowl, combine the flour, sugar, instant yeast, and salt. Mix these dry ingredients thoroughly to ensure even distribution. Next, create a well in the center of the dry mixture and add the warm milk, melted butter, and eggs (and honey if using). Using a wooden spoon or a sturdy spatula, stir the mixture until it begins to come together.
Step 3: Knead the Dough
Once the mixture forms a shaggy dough, transfer it to a lightly floured surface. Begin kneading the dough by folding it over itself and pushing it down with the heel of your hand. This process should take about 8-10 minutes, during which the dough will become smooth and elastic. If the dough is too sticky, sprinkle a little more flour as needed. The goal is to achieve a soft, pliable dough that bounces back when you poke it gently.
Step 4: First Rise
After kneading, shape the dough into a ball and place it in a lightly greased bowl. Cover the bowl with a clean kitchen towel or plastic wrap to prevent drafts. Allow the dough to rise in a warm, draft-free area until it doubles in size, which typically takes about 1 to 1.5 hours, depending on the ambient temperature.
Step 5: Shape the Rolls
Once the dough has risen, punch it down gently to release any air bubbles. Transfer it back to your floured surface and divide the dough into equal portions, typically yielding about 12-15 rolls. Shape each portion into a smooth ball by tucking the edges under. This creates tension on the surface, resulting in beautifully shaped rolls.
Step 6: Second Rise
Place the shaped rolls into a greased baking dish, ensuring they are close enough together to rise but not touching. Cover the dish with a towel or plastic wrap and allow the rolls to rise again until they puff up and fill the spaces between them, usually around 30-45 minutes.
As the rolls rise, you can prepare your oven by preheating it to 350°F (175°C). This ensures that the rolls will bake evenly and thoroughly.
Step 7: Bake the Rolls
Once the rolls have completed their second rise, it’s time to bake them. Remove the cover and place the baking dish in the preheated oven. Bake for 20-25 minutes or until the tops are golden brown and the rolls sound hollow when tapped.
Step 8: Brush with Butter
For a final touch of richness, melt a tablespoon of unsalted butter and brush it over the tops of the rolls immediately after they come out of the oven. This not only adds flavor but also gives the rolls a beautiful sheen.
With these steps, you’re well on your way to creating the softest dinner rolls that will impress your family and friends. Stay tuned for the next part of our recipe, where we will delve into additional tips for achieving the best results and answer some common questions about making dinner rolls from scratch. Stay excited for that warm, buttery goodness that awaits you!

Activating the Yeast
The first step in creating soft, bakery-style dinner rolls is activating the yeast. This process is crucial because it ensures that the yeast is alive and capable of producing the carbon dioxide needed for the dough to rise. To activate the yeast, mix it with warm water (about 110°F or 43°C) along with a teaspoon of sugar. Allow the mixture to sit for about 5 to 10 minutes. If the yeast is active, it will become frothy and bubbly, indicating that it’s ready to use. If there are no bubbles, your yeast may be expired or the water temperature may have been too hot or too cold, and you will need to start over.
Mixing Wet Ingredients
Once the yeast is activated, move on to mixing the wet ingredients. This typically includes warm milk, melted butter, and eggs. It’s important to ensure that the milk is warm but not hot, as excessively high temperatures can kill the yeast. Combine these ingredients in a medium bowl and whisk until smooth. The goal is to create a uniform mixture that helps to integrate the flavors of the rolls while also contributing to their tenderness. If you prefer a richer flavor, you can substitute whole milk for an even creamier texture.
Combining Dry Ingredients
Now it’s time to combine the dry ingredients. In a large mixing bowl, whisk together all-purpose flour, sugar, salt, and any other dry ingredients indicated in your recipe. Salt is crucial not just for flavor but also for controlling yeast activity, ensuring that the rolls rise at a steady pace. Make a well in the center of the dry ingredients and pour in the wet mixture along with the activated yeast. Using a wooden spoon or a spatula, gently mix until the ingredients start to come together. The dough should be slightly sticky but manageable, and you may need to adjust the flour slightly depending on humidity and other factors.
Kneading the Dough
Kneading is a fundamental step in bread-making that develops the gluten structure necessary for the rolls to rise properly and maintain their shape. Turn the dough out onto a lightly floured surface and begin kneading by folding the dough over itself and pushing down with the palm of your hand. Rotate the dough a quarter turn, and repeat the process. Knead for about 8-10 minutes until the dough is smooth and elastic. You can test the dough’s readiness by performing the “windowpane test”: stretch a small piece of dough between your fingers; if it forms a thin, translucent membrane without tearing, you’re good to go.
The First Rise
After kneading, it’s time for the first rise. Place the dough in a large bowl that has been lightly greased, cover it with a damp kitchen towel or plastic wrap, and set it in a warm, draft-free area. The ideal temperature for rising is between 75°F to 85°F (24°C to 29°C). Allow the dough to rise for about 1 to 1.5 hours or until it has doubled in size. This process allows the yeast to ferment, creating air pockets that will make your rolls fluffy.
Shaping the Rolls
Once the dough has risen, it’s time to shape the rolls. Gently punch down the dough to release the excess air, then turn it out onto a lightly floured surface. Divide the dough into equal pieces, generally about 2 ounces each for standard dinner rolls. To shape each piece, stretch it slightly into a round shape, then tuck the edges underneath to create a smooth top. Place the shaped rolls on a greased baking sheet, leaving enough space between them to allow for expansion during the second rise.
The Second Rise
Cover the shaped rolls with a clean kitchen towel or plastic wrap and let them rise again in a warm place for another 30-45 minutes. This second rise is essential for achieving the light, airy texture that we desire in dinner rolls. Be patient during this step; the rolls should puff up nicely. Proper coverage is key here, as it prevents the surface of the rolls from drying out.
Baking the Dinner Rolls
Preheating the Oven
Before the second rise is complete, preheat your oven to 375°F (190°C). Timing is crucial in baking; a preheated oven helps the rolls to rise quickly as soon as they are placed inside, contributing to a better texture and crust.
Baking Tips
When the rolls have puffed up beautifully, it’s time to bake them. Place the rolls in the preheated oven and bake for 15-20 minutes, or until they turn golden brown. Keep an eye on them towards the end of the baking time to prevent over-browning. You can test for doneness by tapping the bottom of a roll; it should sound hollow.
Brushing with Butter
Once out of the oven, brush the tops of the hot rolls with melted butter. This step not only adds flavor but also gives the rolls a beautiful, shiny finish. For an added touch, consider sprinkling a bit of sea salt or herbs on top of the butter for extra flavor.
Serving Suggestions for Dinner Rolls
These soft dinner rolls are incredibly versatile and can complement a wide range of meals. Here are some ideas on how to serve them:
– Accompaniments: Serve the dinner rolls warm with butter, honey, or your favorite spreads. They also pair wonderfully with soups, salads, and main dishes like roasted meats or pasta.
– Creative Uses: Think beyond the traditional roll. Slice them in half to create sliders filled with pulled pork, chicken salad, or a veggie burger. You can also use them to make sandwiches, adding layers of flavor with deli meats, cheeses, and fresh vegetables.
– Leftovers and Storage: If you have any leftover rolls, store them in an airtight container at room temperature for up to 2 days. For longer storage, freeze them in a single layer before transferring to a freezer bag. When ready to enjoy, simply thaw at room temperature or warm them in the oven.
Conclusion
Making homemade dinner rolls is a rewarding experience that fills your kitchen with the delightful aroma of freshly baked bread. The satisfaction of pulling golden, soft rolls from the oven is unmatched, and they can elevate any meal from ordinary to extraordinary.
We encourage you to try this recipe and experience the joy of baking your own soft, fluffy dinner rolls. Whether for a family gathering, a holiday feast, or just a cozy dinner at home, these rolls are sure to become a beloved addition to your culinary repertoire. Freshly baked bread has a comforting quality that transcends cultures and traditions, making it a cherished staple in kitchens around the world. Embrace the art of bread-making, and enjoy every delicious bite of your homemade dinner rolls!

