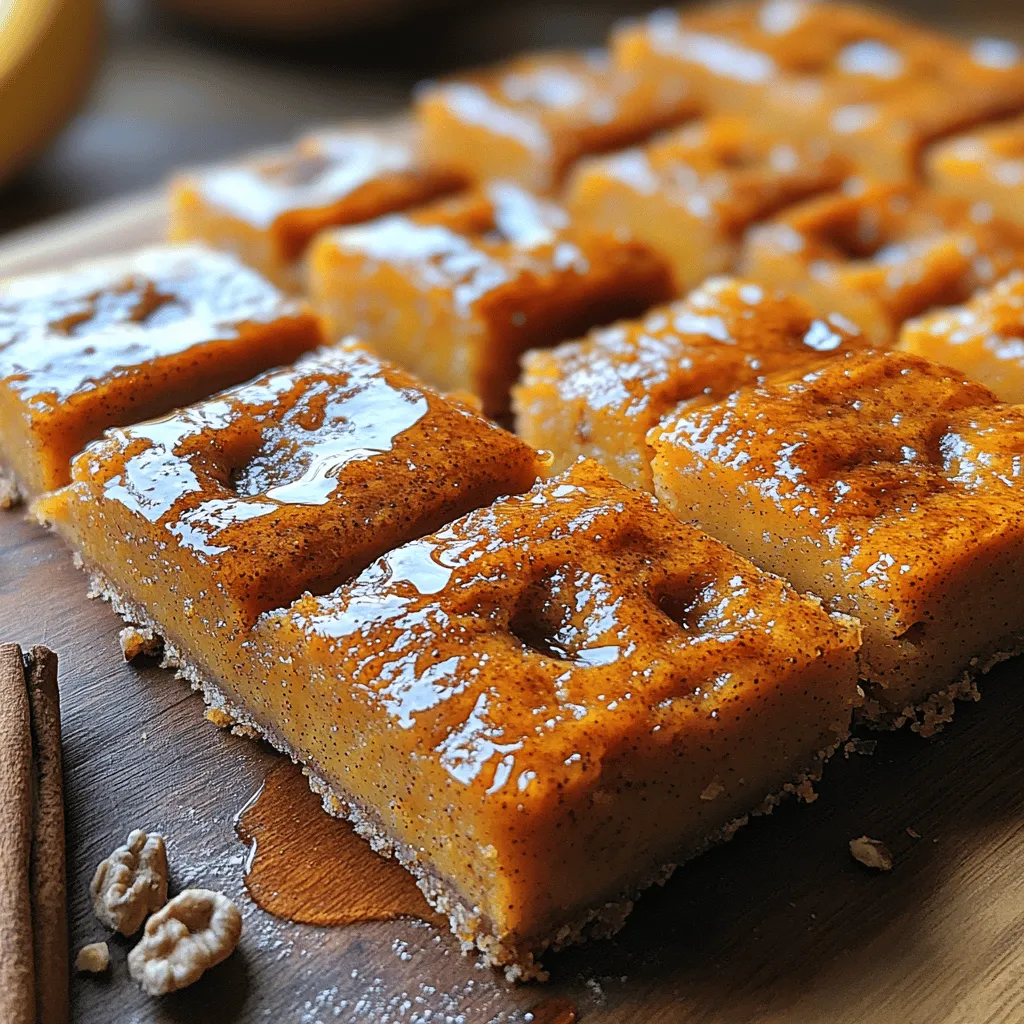
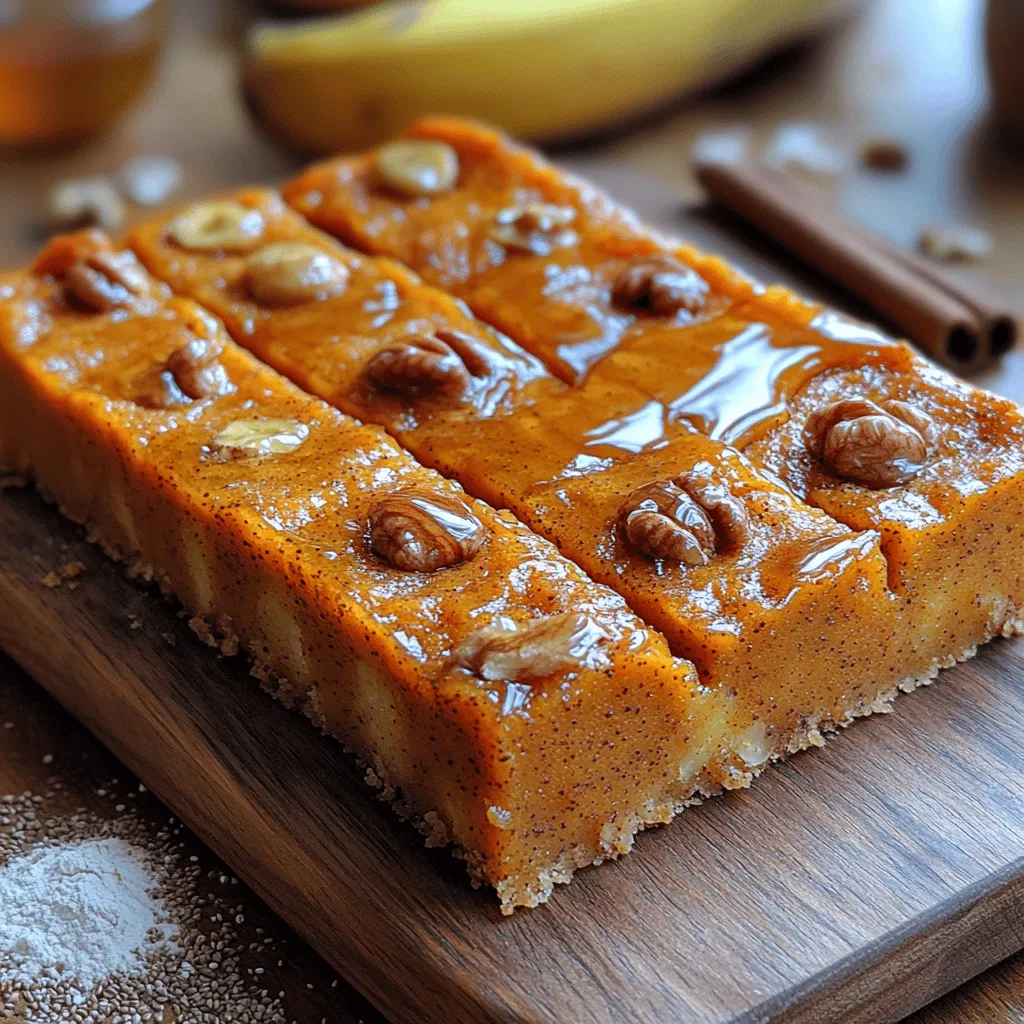
Introduction: Embracing Wholesome Treats with Pumpkin Banana Bars
In today’s health-conscious world, the quest for delicious yet nutritious snacks can often feel overwhelming. Fortunately, the recipe for Wholesome Pumpkin Banana Bars presents an ideal solution that seamlessly combines taste with health benefits. These bars harness the natural sweetness of ripe bananas and pumpkin, creating a delightful treat that caters to various dietary preferences. Easy to prepare, they serve as an excellent option for breakfast, a midday snack, or even a guilt-free dessert.
As the seasons change, autumn brings with it an abundance of pumpkins—a versatile ingredient packed with flavor and nutrition. Coupled with the naturally sweet and creamy texture of bananas, these bars not only satisfy cravings but also offer a wealth of health benefits. In this article, we will delve into the nutritional advantages of each key component, provide step-by-step instructions for creating these delicious bars, and suggest creative serving options. This ensures you can enjoy your wholesome treats in diverse and delightful ways.
Understanding the Key Ingredients
To fully appreciate the goodness of the Pumpkin Banana Bars, let’s explore the nutritional benefits of the main ingredients that contribute to their wholesome nature.
– Mashed Ripe Bananas: Bananas are a staple in many healthy recipes due to their natural sweetness and numerous health benefits. They are high in potassium, which is essential for heart health and muscle function. The fiber content in bananas aids digestion, while their natural sugars provide a quick energy boost—making them an ideal choice for a pre- or post-workout snack.
– Pumpkin Puree: This vibrant orange ingredient is more than just a seasonal favorite; it is a powerhouse of vitamins and antioxidants. Pumpkin is rich in vitamin A, which supports vision and immune function, and provides a good source of fiber, aiding in digestion. Additionally, the antioxidants in pumpkin help combat oxidative stress, making it a nutritious addition to any recipe.
– Honey or Maple Syrup: These natural sweeteners not only enhance the flavor of the bars but also offer health benefits compared to refined sugars. Honey is known for its antibacterial properties and can soothe sore throats, while maple syrup contains minerals like manganese and zinc. Both options can add a touch of sweetness without the guilt associated with high-fructose corn syrup.
– Applesauce: Often used as a healthier substitute for sugar and fats in baking, applesauce adds moisture and natural sweetness to the bars. It is low in calories and contains dietary fiber, making it a smart choice for those looking to reduce sugar intake while still enjoying a flavorful treat.
– Coconut Oil: This ingredient is celebrated for its healthy fats, which can boost metabolism and provide sustained energy. Using coconut oil in baking not only adds moisture but also imparts a subtle flavor that complements the other ingredients beautifully.
– Whole Wheat Flour: By opting for whole wheat flour instead of all-purpose flour, you increase the nutritional value of your bars. Whole wheat flour retains the bran and germ, providing more fiber, vitamins, and minerals. This choice helps keep you feeling full longer and supports overall digestive health.
– Spices: The addition of spices such as cinnamon and nutmeg not only elevates the flavor profile of the bars but also adds health benefits. Cinnamon is known for its anti-inflammatory properties and can help regulate blood sugar levels, while nutmeg adds a warm, aromatic quality that enhances the overall experience.
Preparation: Getting Ready for Baking
Before diving into the creation of your Wholesome Pumpkin Banana Bars, it’s essential to gather your ingredients and tools for a smooth baking experience. Preparing your kitchen and organizing your ingredients will streamline the process and set you up for success.
– Essential Kitchen Tools for Easy Baking: To get started, ensure you have the following tools on hand:
– A mixing bowl for combining ingredients
– A whisk or electric mixer for blending wet ingredients
– Measuring cups and spoons for accuracy
– A spatula for scraping the bowl and spreading the batter
– A baking pan (preferably 9×13 inches) for the bars
– Parchment paper (optional) for easy removal of the bars after baking
– Organizing Ingredients for Efficient Preparation: Gather all your ingredients before you begin. This includes your ripe bananas, pumpkin puree, honey or maple syrup, applesauce, coconut oil, whole wheat flour, and your chosen spices. Having everything measured and ready to go will make the baking process enjoyable and efficient.
Step-by-Step Instructions for Making Pumpkin Banana Bars
Once you have everything prepared, it’s time to mix the wet ingredients and set the foundation for your Pumpkin Banana Bars. The first step is crucial for achieving a smooth batter that melds flavors beautifully.
1. Mixing the Wet Ingredients: In a large mixing bowl, start by mashing the ripe bananas until smooth. You can use a fork or a potato masher for this task. Once your bananas are well-mashed, add the pumpkin puree, honey or maple syrup, applesauce, and melted coconut oil.
2. Blending the Ingredients: Using a whisk or an electric mixer, blend the mixture until it’s fully combined and creamy. This step ensures that the natural sweetness of the bananas and the earthy flavor of the pumpkin are evenly distributed throughout the batter. The mixture should be smooth with no lumps, allowing for a consistent texture in the final product.
As you continue with the recipe, you will incorporate the dry ingredients and spices, but for now, focusing on the wet components lays the essential groundwork for these delicious and wholesome bars.
Stay tuned as we explore the next steps, which will guide you through the process of combining the dry ingredients and baking these delightful Pumpkin Banana Bars to perfection.

Combining the Dry Ingredients
When it comes to baking, the way you mix your dry ingredients can significantly impact the final product. Properly combining dry components ensures that leavening agents, spices, and flours are evenly distributed throughout your mixture. This step is crucial for creating uniform flavor and texture in your Wholesome Pumpkin Banana Bars.
Start by whisking together the flour, baking soda, baking powder, salt, and spices such as cinnamon and nutmeg in a large bowl. This not only helps to break up any lumps but also incorporates air into the flour, promoting a lighter texture in the finished bars. If you’re using whole wheat flour for added nutrition, be aware that it can absorb more moisture than all-purpose flour, so you may need to adjust the liquid ingredients slightly.
Importance of Properly Mixing Dry Components
Mixing these ingredients thoroughly ensures that your leavening agents activate correctly when combined with wet ingredients. If they remain concentrated in one area, you might end up with unevenly risen bars or spots that taste overly salty or spicy. For the best results, take a moment to sift the dry ingredients together, especially if you’re using whole grains or adding in extras like oats or nuts. This will guarantee that every bite of your pumpkin banana bars is balanced in flavor and texture.
Integrating Wet and Dry Mixtures
With your dry ingredients prepped, it’s time to integrate the wet and dry mixtures seamlessly. The key to achieving the perfect batter consistency lies in the order of mixing and the methods you use. Begin by whisking together your wet ingredients—mashed bananas, pumpkin puree, eggs, and melted coconut oil (or your choice of oil)—in a separate bowl until smooth.
Tips for Achieving the Perfect Batter Consistency
1. Gradual Mixing: Slowly add the dry mixture to the wet ingredients, stirring gently until just combined. Overmixing can lead to tough bars due to gluten development, so aim for a batter that is slightly lumpy but cohesive.
2. Texture Check: The ideal batter for your pumpkin banana bars should be thick but pourable, similar to pancake batter. If it feels too dry, a tablespoon of milk or water can be added to loosen the mixture up without compromising the integrity of the bars.
3. Add-Ins: This is also the perfect time to fold in any mix-ins you desire, such as chocolate chips, nuts, or dried fruits. They can elevate the flavor and texture of your bars, making them even more delightful.
Pouring and Baking
Once your batter is ready, it’s time to transfer it to the baking pan. For optimal results, preparing your baking pan correctly is essential. Use an 8×8 or 9×9 inch square baking pan for thick bars, or a larger pan if you prefer thinner bars.
How to Prepare Your Baking Pan for Optimal Results
1. Greasing: Grease your pan with coconut oil, butter, or non-stick spray to prevent the bars from sticking. You can also line the bottom and sides with parchment paper for extra insurance, ensuring easy removal after baking.
2. Smoothing the Batter: Pour the batter into the prepared pan and use a spatula to spread it evenly. This ensures that the bars cook uniformly.
Recommended Baking Techniques for Even Cooking
Preheat your oven to 350°F (175°C) and place your baking pan in the center of the oven. Bake for 25 to 30 minutes, keeping an eye on your bars as they cook. To check for doneness, insert a toothpick into the center; it should come out clean or with a few moist crumbs attached, but no wet batter.
If you notice the edges browning too quickly while the center remains undercooked, you can cover the pan loosely with aluminum foil during the last 10 minutes of baking. This technique helps to achieve even cooking without over-browning the edges.
Cooling and Serving the Bars
After baking, it’s crucial to let your Wholesome Pumpkin Banana Bars cool properly to achieve the best texture and flavor. Cooling allows the bars to set, making them easier to cut and enhancing their overall taste.
Cooling Techniques for Optimal Texture
1. Cooling in the Pan: Allow the bars to cool in the baking pan for about 10-15 minutes. This will help them firm up a bit, making it easier to lift them out later.
2. Transfer to a Wire Rack: After the initial cooling time, gently lift the bars out of the pan using the parchment paper, if used, and place them on a wire rack to cool completely. This step prevents steam from accumulating underneath, which can lead to soggy bars.
Creative Serving Suggestions and Pairings
Once cooled, your pumpkin banana bars are ready to be enjoyed! They can be served plain for a wholesome snack, or you can elevate them with some exciting toppings:
– Nut Butters: Spread a layer of almond or peanut butter on top for added protein and flavor.
– Yogurt: Serve with a dollop of Greek yogurt for a creamy contrast that complements the spices beautifully.
– Cream Cheese Frosting: For a more indulgent treat, consider a light cream cheese frosting or a drizzle of maple syrup.
These bars also make a fantastic addition to your breakfast routine. Serve them with a side of fresh fruit or a cup of coffee for an energizing start to your day. They are perfect for an afternoon snack or a post-workout treat, keeping you satisfied without the guilt.
Storing and Preserving Your Pumpkin Banana Bars
To keep your Wholesome Pumpkin Banana Bars tasting fresh for longer, you’ll want to store them properly.
Best Practices for Freshness
1. Room Temperature Storage: Store the bars in an airtight container at room temperature for up to three days. This is ideal if you plan to consume them quickly.
2. Refrigeration: If you’d like to extend their freshness, you can refrigerate the bars for up to a week. Just be sure to keep them sealed to prevent them from drying out.
Freezing Options for Long-Term Storage
For long-term storage, freezing is a great option. Here’s how to do it effectively:
1. Wrap Individually: Cut the bars into squares and wrap each piece tightly in plastic wrap. This prevents freezer burn and keeps them moist.
2. Store in a Freezer Bag: Place the wrapped bars into a freezer-safe bag or container, labeling it with the date. They can be frozen for up to three months.
When you’re ready to enjoy a bar, simply remove it from the freezer and let it thaw at room temperature or pop it in the microwave for a few seconds for a warm treat.
Conclusion: Savor the Flavor of Wholesome Pumpkin Banana Bars
Wholesome Pumpkin Banana Bars are more than just a tasty treat; they are a blend of nutrition and flavor that can fit into your daily routine. Their versatility allows for enjoyment at any time of day, while the wholesome ingredients contribute to a balanced diet. With this recipe, you can feel good about indulging in a delicious snack that nourishes both body and soul.
Embrace the joy of baking with these bars and share them with family and friends to spread the wholesome goodness. Whether you enjoy them plain, topped, or as part of a meal, these bars are bound to become a favorite in your household. So gather your ingredients, preheat your oven, and savor the delightful flavors of pumpkin and banana in every bite. Happy baking!

