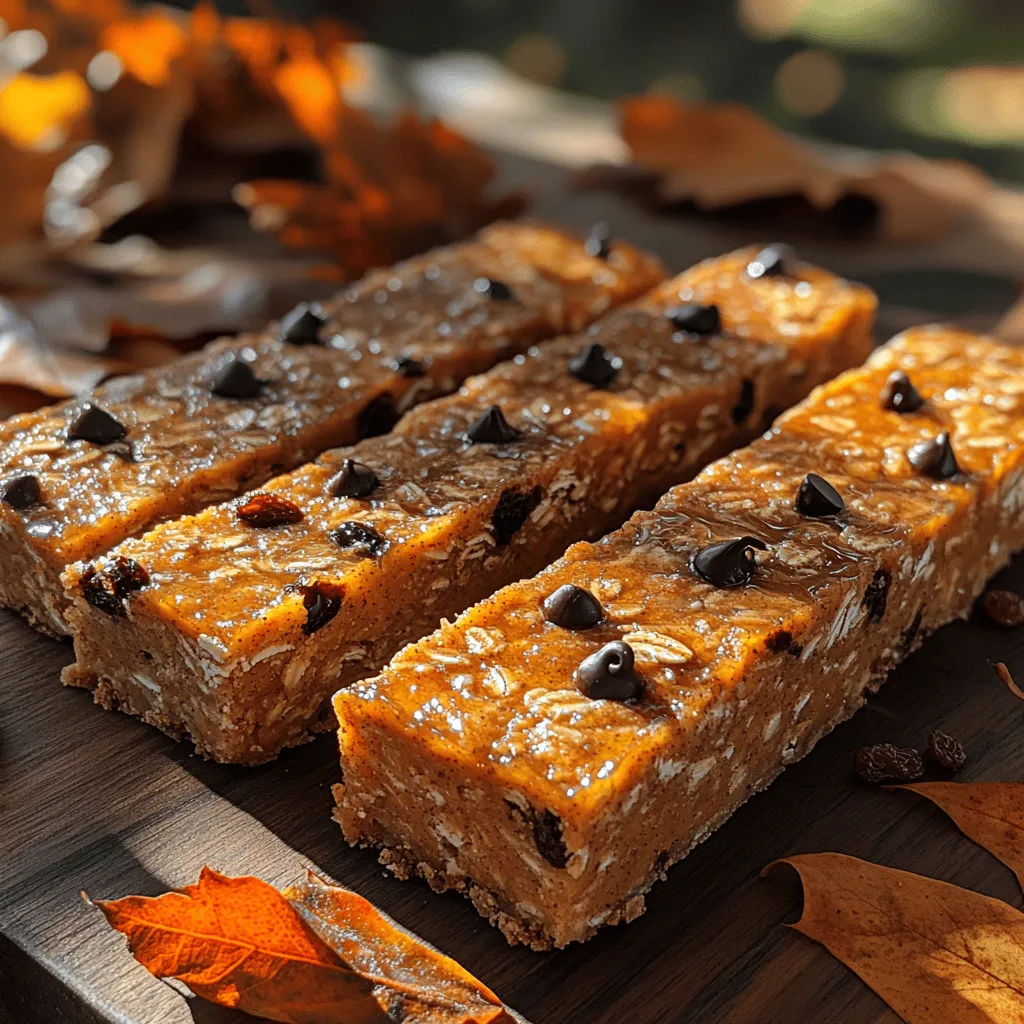
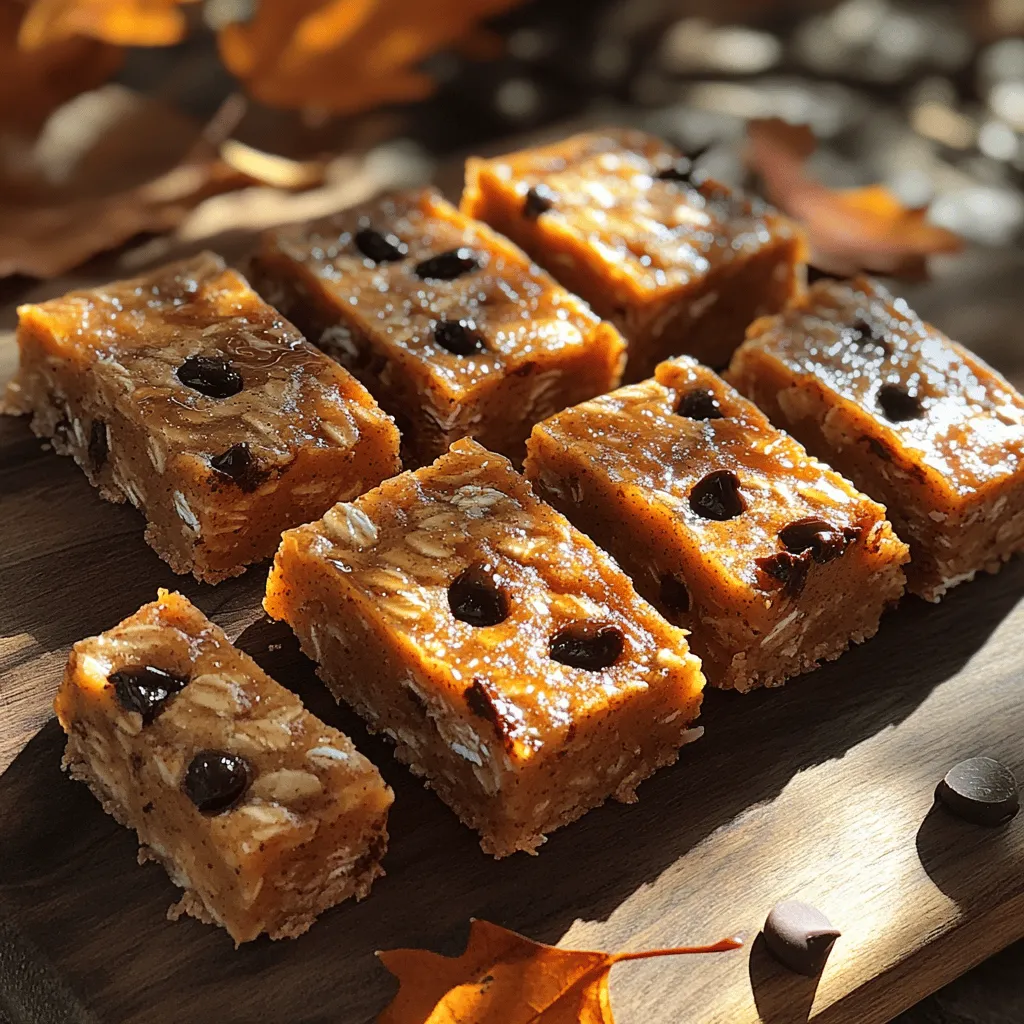
Wholesome Pumpkin Oatmeal Bars: A Delicious and Nutritious Snack
As the wellness movement continues to surge, healthy snacks have carved out a significant niche in our daily diets. Gone are the days when snacking was synonymous with empty calories and unhealthy options. Today, consumers are increasingly seeking out wholesome alternatives that not only satisfy cravings but also contribute positively to their overall health. Among these beloved snacks, pumpkin has emerged as a seasonal favorite, celebrated not just for its delightful flavor but also for its impressive nutritional profile.
Pumpkin is a nutritional powerhouse, rich in vitamins A and C, fiber, and antioxidants. Its inherent sweetness makes it a versatile ingredient, allowing it to shine in both savory and sweet dishes. With the arrival of fall, pumpkin-flavored treats flood the market, but many of these options are laden with sugar and unhealthy fats. Enter the Wholesome Pumpkin Oatmeal Bars—a deliciously healthy snack that perfectly marries the seasonal charm of pumpkin with the nourishing qualities of oats and nut butter.
This article will guide you through the intricacies of making your own Wholesome Pumpkin Oatmeal Bars at home. Not only will you learn the step-by-step recipe, but you will also discover the health benefits of each ingredient and some fun variations to customize your bars to your liking. Whether you’re looking for a quick breakfast option, a post-workout snack, or a treat for the kids, these oatmeal bars are bound to become a staple in your kitchen.
Understanding the Ingredients
To create the perfect Wholesome Pumpkin Oatmeal Bars, it’s essential to understand the role of each ingredient. Let’s break down the key components that make this recipe both nutritious and delicious.
Rolled Oats
At the heart of this recipe are rolled oats, which serve as the primary base for the bars. Whole grains, like oats, are known for their numerous health benefits. They are an excellent source of dietary fiber, which aids digestion and helps to maintain steady blood sugar levels. Additionally, oats contain beta-glucans, a type of soluble fiber that has been shown to reduce cholesterol levels and support heart health. By incorporating rolled oats into your snacks, you not only enhance their texture but also boost their nutritional value.
Canned Pumpkin Puree
Next up is canned pumpkin puree, a convenient and richly flavored ingredient that elevates these bars. Unlike pumpkin pie filling, which often contains added sugars and spices, pure canned pumpkin is simply that—pumpkin. This makes it a healthier choice, providing all the great taste without the excess calories. Pumpkin is low in calories yet high in nutrients, including vitamin A, which supports eye health, and potassium, which is essential for heart function. Its natural moisture content also contributes to the moist, chewy texture of the oatmeal bars.
Almond Butter
For healthy fats and added protein, almond butter is the nut butter of choice in this recipe. Compared to other nut butters, almond butter typically has a higher content of essential nutrients like vitamin E, magnesium, and calcium. It’s also lower in sugar compared to peanut butter, making it an excellent option for those mindful of their sugar intake. The creamy consistency of almond butter not only binds the ingredients together but also adds a rich flavor that complements the pumpkin beautifully.
Honey vs. Maple Syrup
When it comes to sweeteners, this recipe offers the flexibility of using either honey or maple syrup. Both are natural alternatives to refined sugars, but they bring distinct flavors to the table. Honey adds a floral sweetness, while maple syrup offers a warm, caramel-like flavor. From a nutritional standpoint, honey has antibacterial properties and is known for its quick energy boost, while maple syrup is rich in antioxidants and contains essential minerals. Depending on your preference and dietary needs, you can choose the sweetener that suits you best.
Almond Milk
For those seeking a dairy-free option, almond milk is the perfect liquid to incorporate into this recipe. It’s low in calories and contains healthy fats, making it a great alternative to cow’s milk. Almond milk is also rich in vitamin E, which supports skin health and has antioxidant properties. When selecting almond milk, be sure to choose unsweetened varieties to keep your bars as healthy as possible.
Optional Ingredients
To elevate the flavor and nutritional value of your Pumpkin Oatmeal Bars, consider adding optional ingredients such as raisins, nuts, or dark chocolate chips.
– Raisins and Nuts: Both raisins and various nuts can enhance the taste and texture of your bars. Raisins add a natural sweetness and chewiness, while nuts provide a satisfying crunch and additional healthy fats, protein, and fiber.
– Dark Chocolate Chips: If you’re a chocolate lover, dark chocolate chips are a delightful addition that can satisfy your sweet tooth. Rich in antioxidants, dark chocolate has been linked to various health benefits, including improved heart health. Just be sure to use them in moderation, as they can add extra sugar and calories.
Step-by-Step Guide to Making Pumpkin Oatmeal Bars
Now that we have laid the groundwork by understanding the ingredients, it’s time to dive into the step-by-step process of making these delicious Wholesome Pumpkin Oatmeal Bars.
Preheating the Oven
The first step in any baking endeavor is to preheat your oven. This is crucial as it ensures that the bars cook evenly and achieve the right texture. Set your oven to 350°F (175°C) and allow it to warm up while you prepare the batter. Proper temperature control is key to successful baking, and starting with a preheated oven will help your bars rise and set perfectly.
Mixing the Wet Ingredients
In a large mixing bowl, start by combining the wet ingredients: pumpkin puree, almond butter, and your chosen sweetener (honey or maple syrup). Using a whisk or an electric mixer, blend these ingredients until you achieve a smooth and creamy consistency. This step is important as it helps to evenly distribute the flavors and ensures that the almond butter fully incorporates into the pumpkin. If you prefer a bit of spice, consider adding vanilla extract or warming spices like cinnamon or nutmeg at this stage for an extra flavor boost.
Combining Dry Ingredients
In a separate bowl, mix together the rolled oats, baking powder, and any additional spices you’ve chosen. This is a crucial step to ensure that the leavening agent is evenly distributed throughout the mixture, which will contribute to the rise of your bars. Using a whisk, combine the dry ingredients thoroughly before adding them to the wet mixture. This will help prevent clumping and promote a uniform texture in the final product.
Folding in Optional Ingredients
Once your wet and dry ingredients are well combined, it’s time to fold in any optional ingredients like raisins, nuts, or dark chocolate chips. The folding technique is key here; use a spatula to gently combine the ingredients without overmixing. This helps maintain the structure of the bars and prevents them from becoming dense. If you’re adding chocolate chips, consider reserving a few to sprinkle on top before baking for a beautiful presentation.
Pouring and Spreading the Mixture
Finally, pour the combined mixture into a prepared baking dish lined with parchment paper or greased with a bit of oil. Using a spatula, spread the mixture evenly across the dish to ensure that the bars bake uniformly. Make sure to press down gently to compact the mixture, which will help the bars hold their shape once baked.
With these initial steps complete, you’re well on your way to creating a batch of Wholesome Pumpkin Oatmeal Bars that not only taste fantastic but also nourish your body. Stay tuned for the next part of the article, where we will explore the baking process, cooling, and storing options, as well as creative variations you can try to make this recipe your own!

Baking Process: Understanding the Signs of Doneness
Once you’ve mixed your ingredients and poured the batter into the prepared baking dish, it’s time to bake! Understanding when your pumpkin oatmeal bars are done is crucial for achieving the perfect texture—soft yet firm enough to hold together.
Signs of Doneness
1. Visual Cues: The edges of the bars should begin to pull away slightly from the sides of the dish, and the top should be a golden brown color. If the surface is still shiny or wet, the bars need more time.
2. Toothpick Test: A classic method for checking doneness is the toothpick test. Insert a toothpick into the center of the bars. If it comes out clean or with just a few moist crumbs attached, your bars are ready. If it’s gooey with batter, give them an additional 5-10 minutes in the oven.
3. Touch Test: Lightly pressing the center of the bars with your finger can also indicate doneness. If it springs back slightly, they are likely done. If it leaves an indentation, they need more baking time.
Once you’re satisfied with the doneness, remove the bars from the oven and let them cool in the pan for about 10-15 minutes before transferring them to a wire rack for complete cooling.
Cooling and Cutting: Importance of Allowing Bars to Rest
Allowing your pumpkin oatmeal bars to cool completely before cutting is critical for achieving the right texture. When warm, the bars may appear soft and fragile. Cooling solidifies the structure, making them easier to slice without crumbling.
Steps for Cooling and Cutting
1. Cooling in the Pan: After removing the bars from the oven, let them cool in the baking dish for about 10-15 minutes. This initial cooling allows the bars to set slightly.
2. Transferring to a Wire Rack: Carefully lift the bars out of the pan using the parchment paper overhang. Place them on a wire rack to cool completely. This prevents moisture accumulation at the bottom and keeps the bars from becoming soggy.
3. Slicing the Bars: Once completely cooled (about 30-60 minutes), use a sharp knife to cut the bars into squares or rectangles, depending on your preferred serving size. For cleaner cuts, wipe your knife with a damp cloth between slices.
Nutritional Benefits of Pumpkin Oatmeal Bars
Making your own pumpkin oatmeal bars not only allows for customization but also offers a treasure trove of nutritional benefits.
Overview of the Health Benefits of Oats
Oats are a powerhouse of nutrition, providing several health benefits:
– Heart Health: Oats are rich in beta-glucans, a type of soluble fiber known to help lower cholesterol levels and improve heart health.
– High Fiber Content: The fiber in oats promotes digestive health by helping to maintain regular bowel movements. It also contributes to a feeling of fullness, making oats a great choice for weight management.
– Satiety: The combination of fiber and protein found in oats can help keep you full longer, making these bars a satisfying snack or breakfast option.
Benefits of Pumpkin
Pumpkin is not just a seasonal favorite; it’s also packed with nutrients:
– Vitamins A and C: Pumpkin is an excellent source of vitamin A, which supports eye health, and vitamin C, which boosts the immune system.
– Low in Calories: With its high water content, pumpkin is low in calories, making it a smart addition to snacks without adding excessive calories.
Role of Healthy Fats from Almond Butter
Almond butter not only adds creaminess to your bars but also provides healthy fats:
– Nutrient-Dense: Almonds are rich in vitamin E, magnesium, and healthy monounsaturated fats, which are beneficial for heart health.
– Balanced Diet: Including healthy fats in your diet can help you feel satisfied and energized throughout the day.
Comparison of Traditional Snack Bars vs. Homemade Versions
Homemade pumpkin oatmeal bars are a better choice compared to store-bought snack bars for several reasons:
– Healthier Ingredients: You have control over the ingredients, ensuring they are wholesome and free of artificial additives and preservatives.
– Customization: You can adjust sweetness, flavors, and textures to suit your preferences and dietary needs.
Serving and Enjoying Your Pumpkin Oatmeal Bars
These wholesome bars are versatile and can be enjoyed in various ways.
Suggested Serving Sizes
– Breakfast: One bar can make a satisfying breakfast, especially when paired with a piece of fruit or a serving of yogurt.
– Snacks: They are perfect for a mid-afternoon snack to keep your energy levels up.
Pairing Suggestions
Enhance your experience by pairing these bars with complementary foods:
– Beverages: Enjoy your pumpkin oatmeal bars with a warm cup of tea, coffee, or a glass of milk (dairy or plant-based) to enhance the flavors.
– Other Foods: Consider serving them with a dollop of Greek yogurt or a spread of nut butter for added nutrition and flavor.
Ideal Occasions for Serving
These bars are incredibly versatile and suitable for various occasions:
– School Lunches: They make for a nutritious and filling lunchbox treat for kids.
– Picnics: A great snack to bring on outdoor adventures, they are portable and can withstand travel.
– Holiday Gatherings: With their festive flavor, they are perfect for holiday parties and gatherings, offering a healthier dessert alternative.
Storage and Shelf Life
To maintain the freshness and quality of your pumpkin oatmeal bars, proper storage is essential.
Best Practices for Storing Homemade Oatmeal Bars
– Room Temperature: If you plan to eat the bars within a week, store them in an airtight container at room temperature.
– Refrigeration: For longer shelf life, keep the bars in the refrigerator, where they can last up to two weeks.
Tips for Freezing and Thawing to Maintain Freshness
– Freezing: Wrap individual bars tightly in plastic wrap or aluminum foil, then place them in a freezer-safe bag. They can be frozen for up to three months.
– Thawing: To thaw, simply transfer the bars to the refrigerator the night before you plan to eat them or let them sit at room temperature for a couple of hours.
How to Tell if the Bars are No Longer Good to Eat
Check for the following signs to ensure your bars are still safe to eat:
– Smell: If they have an off or sour odor, it’s best to discard them.
– Appearance: Look for any mold or significant changes in texture.
– Taste: If unsure, a small taste can help determine freshness; if it tastes off, throw it away.
Variations and Customizations
The beauty of homemade pumpkin oatmeal bars lies in their adaptability. You can easily customize them to suit your taste preferences or dietary needs.
Different Nut and Seed Butters
– Nut Butter Swaps: Almond butter can be replaced with peanut butter, cashew butter, or sunflower seed butter for a nut-free option. Each will impart a unique flavor.
Flavor Variations
– Spices and Extracts: Experiment with different spices such as cinnamon, nutmeg, or ginger. Adding a splash of vanilla or a hint of maple extract can elevate the flavors.
Dietary Adaptations
– Gluten-Free: Use certified gluten-free oats to make these bars suitable for those with gluten sensitivities.
– Vegan: Replace honey with maple syrup or agave nectar for a fully plant-based treat.
Conclusion
Making Wholesome Pumpkin Oatmeal Bars at home not only ensures you control the ingredients but also allows for a nutritious and delicious snack that the whole family can enjoy. With their numerous health benefits, ease of customization, and appealing flavors, these bars are a fantastic addition to your snack rotation.
Don’t hesitate to experiment with different variations to find your favorite version. Incorporating wholesome snacks like these pumpkin oatmeal bars into your diet can promote overall health and well-being, proving that delicious can also be nutritious. So grab your ingredients, get baking, and enjoy the delightful experience of homemade pumpkin goodness!

